Growing a cherry tree is far more straightforward than you might imagine. The secret isn't some complicated horticultural trick; it's about making a few smart choices right at the beginning—before your spade even hits the soil. Getting the variety and location right from the get-go sets you up for a future of bountiful, delicious fruit.
Your Journey to Homegrown Cherries
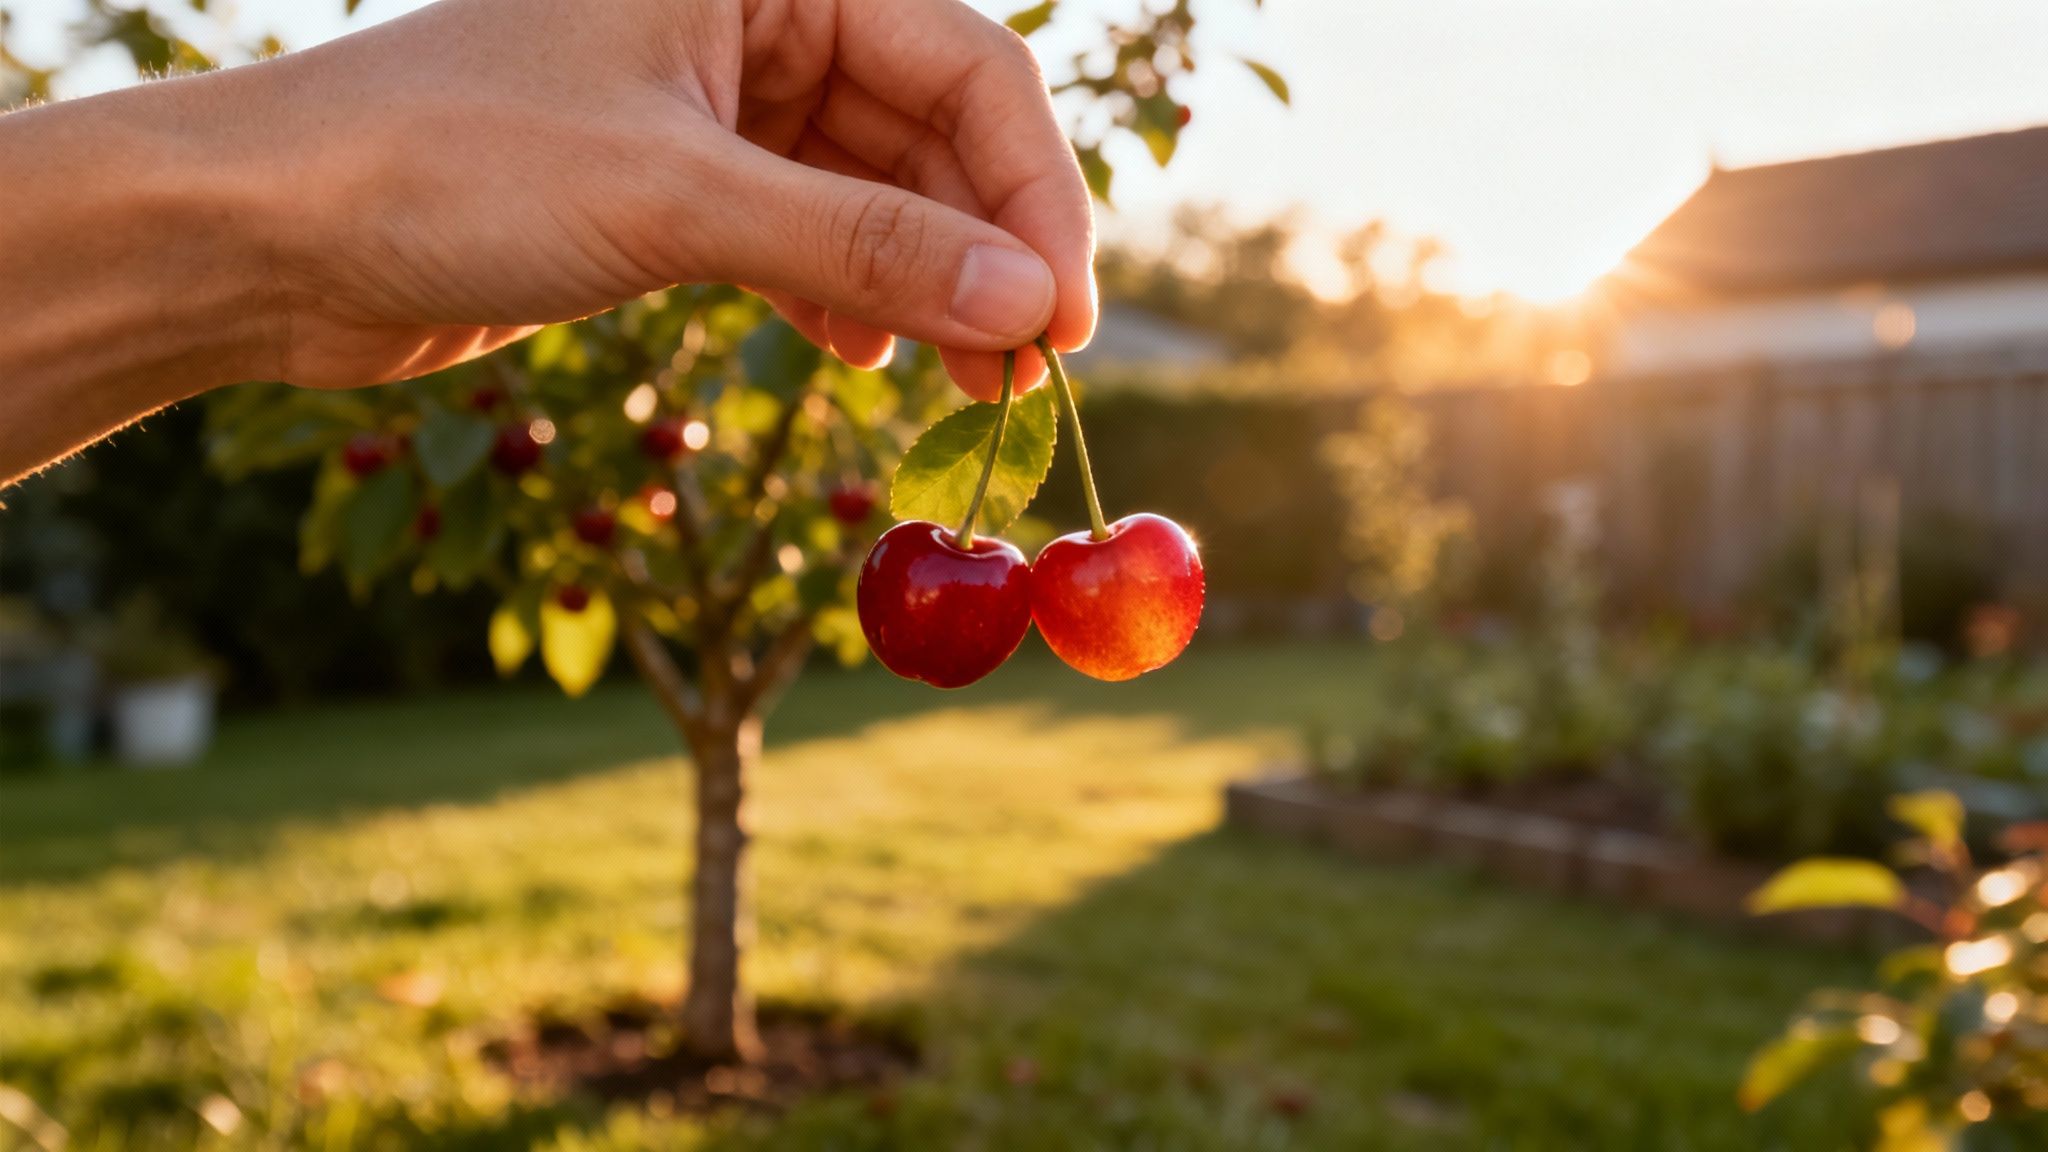
Picture this: stepping out into your own garden on a warm summer afternoon to pick sweet, juicy cherries straight from the tree. This guide is designed to turn that lovely image into your reality. We're going to skip the vague, one-size-fits-all advice and get down to the practical steps that lead to the genuine satisfaction of nurturing a tree and harvesting your own food. It's no wonder that growing your own produce is a huge part of the latest garden trends, as seen in the 7 garden trends for 2025, and a cherry tree is a brilliant place to start.
It’s a common misconception that the UK climate is too challenging for cherries, but that’s simply not true anymore. In fact, our changing weather patterns are making Britain an increasingly ideal place for them to thrive.
Why Now Is the Perfect Time
The recent boom in UK cherry production isn't a fluke; it's a direct result of more favourable growing seasons. The upcoming harvest is actually predicted to be one of the largest in living memory.
Thanks to the warmest spring on record, British cherry farmers are anticipating yields close to 8,000 tonnes. To put that in perspective, that’s four times the national output from just seven years ago. The commercial growers are having a field day, and there's no reason you can't join in on a smaller scale.
This guide will walk you through the entire process, giving you the confidence to get started. Here's what we'll cover:
- Selecting the Right Tree: We’ll explore the differences between sweet and sour varieties and explain how rootstocks control the final size of your tree—a crucial detail for any garden.
- Planting for Success: You’ll learn how to pick the perfect sun-drenched spot and prepare the ground to give your tree the best possible start in life.
- Essential Ongoing Care: From watering and feeding to the inevitable battle with the birds over your crop, we’ve got the essential maintenance covered.
- Harvesting Your Fruit: And then, the best part. We’ll get to the most rewarding moment of all—picking and savouring that first amazing harvest.
Growing a fruit tree is a long-term relationship. The care you put in during the first few years pays you back with abundant harvests for decades to come, creating a rewarding focal point for your garden.
Choosing the Right Cherry Tree for Your Garden
This is it. The single most important decision you'll make is picking the right tree from the start. A bit of forethought now means you’ll be rewarded with years of beautiful blossoms and delicious, homegrown fruit. It’s all about matching the tree to your space, your climate, and what you actually want to do with the cherries.

Before you even think about grabbing a spade, let's walk through the key differences. Getting this part right ensures the tree you plant is one you’ll still love in a decade's time.
Sweet Cherries Versus Sour Cherries
First things first: what are you dreaming of? Eating cherries straight from the branch, or baking the perfect pie? Your answer points you to one of two camps.
Sweet cherries (Prunus avium) are your classic snacking fruit. Think juicy, rich, and perfect for eating fresh. They're what you pop into your mouth on a warm summer day or toss into a fruit salad. Varieties like 'Stella' and 'Lapins' are hugely popular in UK gardens for good reason—they deliver that incredible, sweet flavour.
On the flip side, sour cherries (Prunus cerasus) are the undisputed stars of the kitchen. Their tart, tangy flavour is exactly what you need for cooking. It holds up beautifully, making them the top choice for pies, crumbles, jams, and sauces. The 'Morello' variety is a time-tested favourite here in the UK; it’s reliable, hardy, and tastes fantastic once cooked.
Your choice between sweet and sour really just comes down to purpose. If you dream of fresh fruit, pick a sweet variety. If you're a keen baker, a sour cherry tree will be your best friend in the kitchen.
Understanding Pollination Needs
Right, you’ve decided on sweet or sour. The next hurdle is pollination. It sounds a bit technical, but it’s actually straightforward. Some cherry trees are happy to go it alone, while others need a friend to produce fruit.
- Self-fertile varieties: These are the simplest choice for most gardens, especially if you’re short on space. A self-fertile tree like the ever-popular 'Stella' or 'Sunburst' can pollinate itself. You plant one tree, and you get fruit. Easy.
- Self-sterile varieties: Many older, traditional cherry varieties need a partner. This just means they require pollen from a different, compatible cherry tree that flowers at the same time. If you choose one of these, you’ll need to plant a suitable pollinator within about 15 metres.
Always, always check the plant label before you buy. It will tell you in plain English if the tree is self-fertile or needs a buddy. If you only have room for one tree, a self-fertile variety is the safest bet.
The Secret of Rootstocks
Here’s a tip that experienced gardeners swear by: pay attention to the rootstock. The cherry variety gives you the fruit you want, but the rootstock it's grafted onto dictates the tree's final size. Overlooking this is the most common mistake I see people make.
The right rootstock lets you grow a cherry tree in a pot, train one flat against a fence, or let it become a magnificent centrepiece in a large lawn. It puts you in control.
For instance, a tree on a 'Gisela 5' rootstock will stay at a manageable 2.5-3 metres tall, perfect for smaller gardens. If you have a bit more room, a tree on a 'Colt' rootstock will grow to a medium-sized 4-5 metres. Understanding this from the get-go means you can pick a tree that fits the space you actually have, not the space you wish you had.
Comparing Sweet vs Sour Cherry Varieties for UK Gardens
To help you decide, here’s a quick rundown of some popular and reliable varieties that do well in the UK. Whether you’re after a sweet treat or a baker’s delight, there’s a perfect tree out there for your garden.
Ultimately, the best variety is the one that excites you the most. A self-fertile sweet cherry like 'Stella' is a brilliant all-rounder for beginners, while a 'Morello' is a must-have for any serious home baker.
Matching Your Tree to the UK Climate
It’s also worth remembering that cherry trees are closely tuned to our local weather. Data shows that flowering and ripening times for sweet cherries in the UK can shift by up to three weeks from year to year, all depending on the spring temperatures. Our cherries also tend to flower earlier than those on the continent, which makes choosing a sheltered spot crucial for protecting those delicate blossoms from late frosts.
Of course, long before the fruit arrives, you get that glorious spring display. Cherry blossoms are one of the highlights of the garden year. You can see how they fit into the bigger picture by reading our guide to the best springtime flowering trees.
Planting Your Cherry Tree for a Strong Start
A healthy, productive tree starts on planting day. The effort you put in now is probably the biggest single factor in your tree's long-term health and how much fruit it will eventually give you. This is where you lay the foundation for decades of beautiful blossoms and delicious cherries.

Let's get into the practical steps, from picking the right spot and prepping the soil to getting the tree perfectly settled into its new home. Getting these details right from the very beginning prevents a world of problems down the line.
Choosing the Perfect Planting Spot
Before you even think about digging, take a good look around your garden. Cherry trees are real sun-worshippers and need a spot that gets at least six to eight hours of direct sunlight every day during the growing season. Anything less, and you'll get fewer flowers, which means a disappointing harvest.
They also appreciate a bit of shelter. Finding a location that’s protected from strong, prevailing winds can save branches and blossoms from being damaged. Also, steer clear of low-lying frost pockets where cold air settles. A late spring frost can easily wipe out your entire crop of flowers before they even have a chance to set fruit.
Getting the Soil Right
If there’s one thing cherries hate, it’s having "wet feet." They are incredibly susceptible to root rot in waterlogged conditions, so good soil drainage is completely non-negotiable.
A simple way to check your drainage is to dig a hole about a foot deep and fill it with water. If it takes more than a few hours to drain away completely, you’ve got some work to do.
For heavy clay soil, which is common across much of the UK, the answer is to add plenty of organic matter. Dig in generous amounts of well-rotted compost or manure. This physically breaks up the dense clay, improves its structure, and allows water to move through it freely. It's a simple fix that can turn a challenging spot into an ideal home for your tree.
Timing Your Planting Perfectly
When you plant is just as important as where you plant. The best time depends on whether you've bought a bare-root or a container-grown tree.
- Bare-root trees are best planted while they’re dormant, anytime from November to March. Autumn is often the sweet spot, as it gives the roots a chance to get established over winter before the demands of spring growth kick in.
- Container-grown trees give you more flexibility. You can plant them at any time of year, as long as the ground isn't frozen solid or completely waterlogged. Still, planting in autumn or spring is better to avoid the stress of summer heat and potential drought.
For a detailed month-by-month look at garden tasks, our comprehensive UK planting calendar can help you plan everything out.
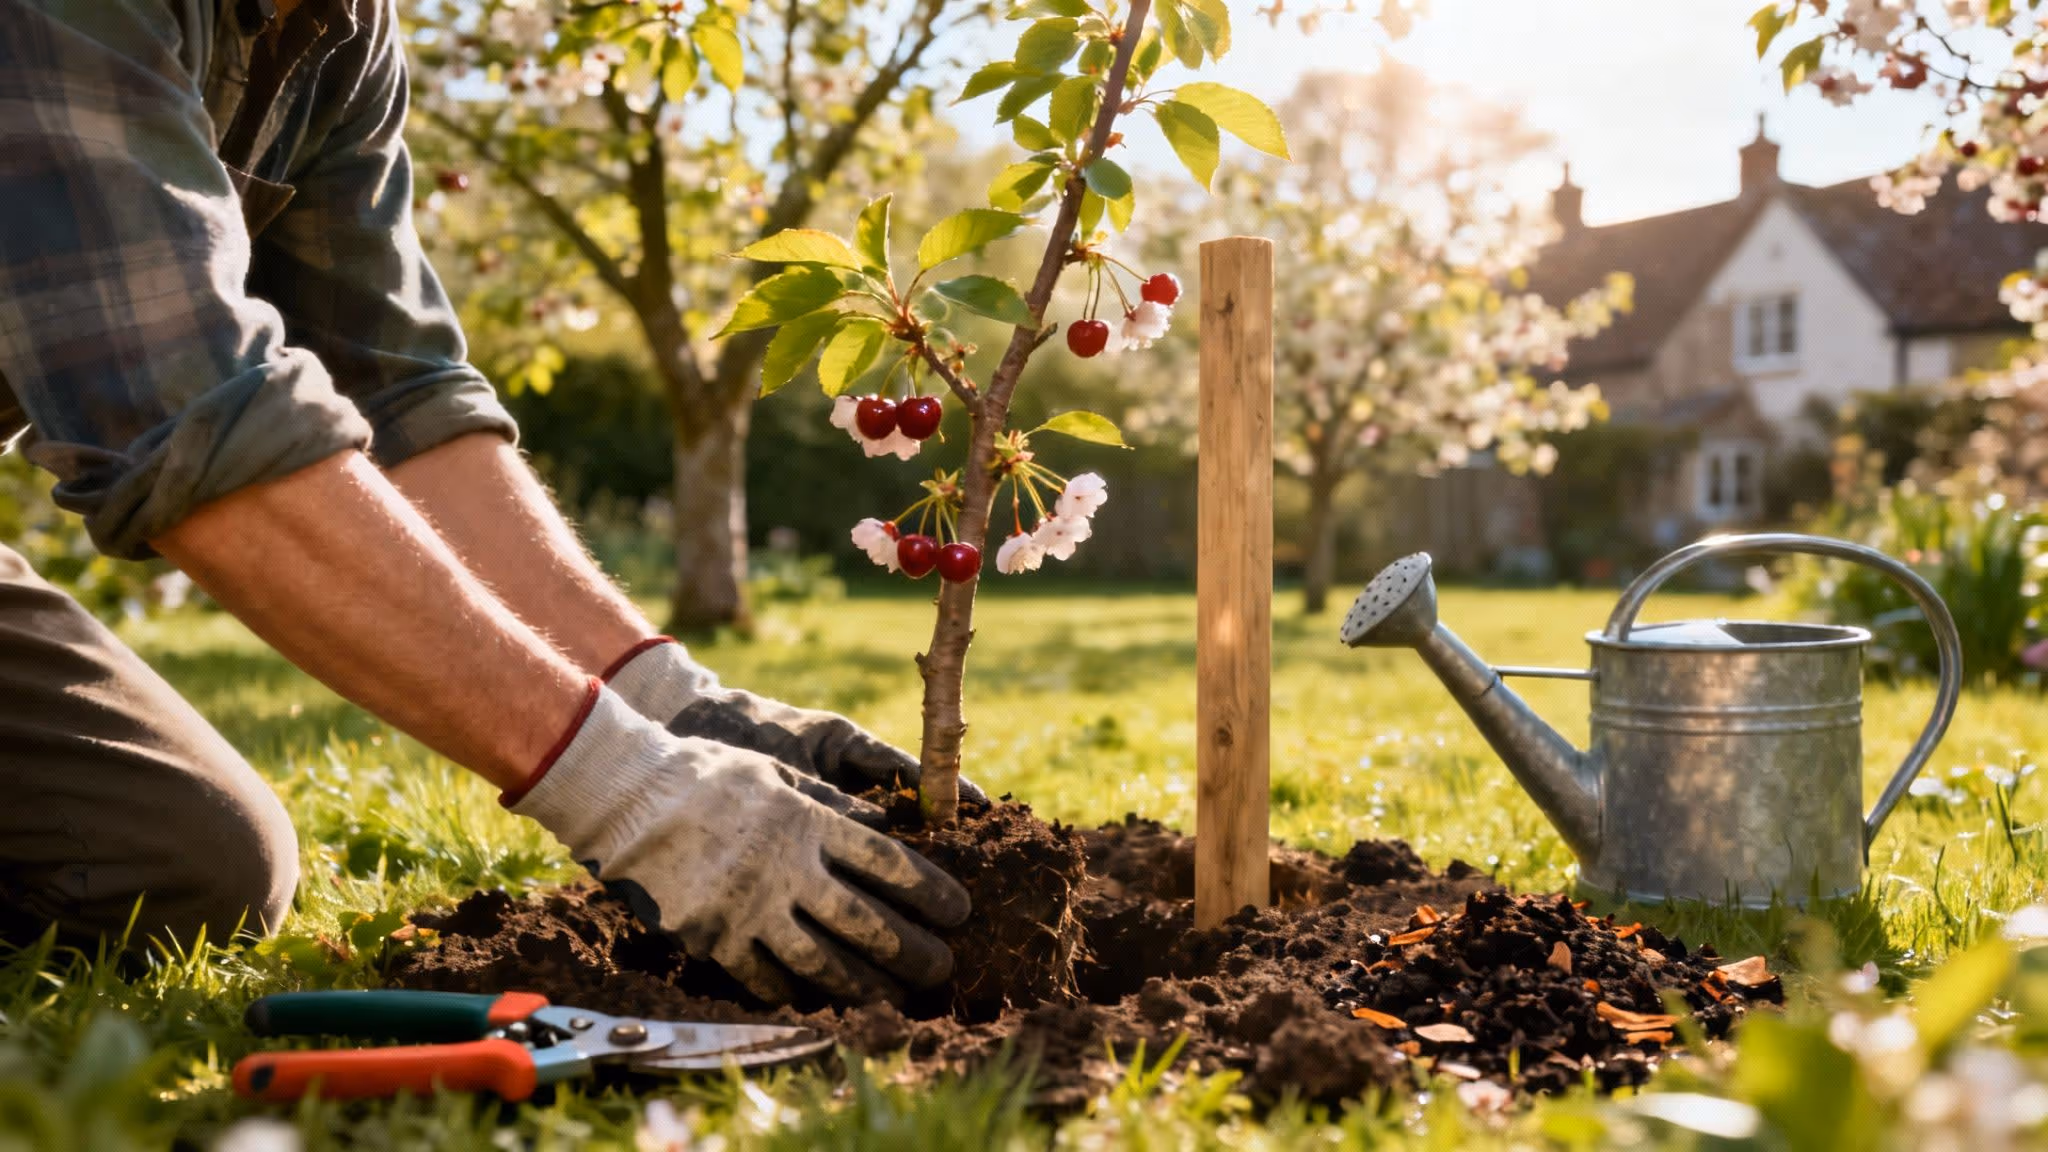
The Planting Process, Step by Step
With your site picked and the timing right, it’s time for the main event. Following these steps will give your young tree the best possible start.
1. Dig the Right Hole
Your hole should be about twice as wide as the tree's root ball, but no deeper. This encourages the roots to spread outwards into the surrounding soil. It’s also a good idea to loosen the soil on the sides of the hole with a garden fork to make it easier for the new roots to penetrate.
2. Set the Depth Correctly
This part is crucial. Place the tree in the hole and lay a cane across the top to check the depth. The original soil mark on the stem should be level with the surrounding ground. Most importantly, make sure the graft union—that noticeable bulge near the base of the trunk—is at least 10cm (4 inches) above the final soil level. If you bury it, the top part can root itself, which completely negates the size-controlling effect of the rootstock.
3. Backfill and Water In
Refill the hole with the soil you dug out, gently firming it down with your boot to get rid of any large air pockets around the roots. Once the hole is filled, give the tree a really generous watering—at least one full watering can. This helps settle the soil properly and gives the roots the moisture they need to get started.
Expert Tip: Always plant a cherry tree at the same depth it was growing in its nursery pot. Planting too deep is one of the most common reasons young fruit trees fail to thrive.
Providing Essential Early Support
A newly planted tree can easily be rocked by the wind, which damages the delicate new roots and stops it from establishing properly. Giving it some support for the first couple of years is a smart move.
Drive a sturdy stake into the ground before you place the tree in the hole to avoid spearing the root ball. Position the stake on the side of the prevailing wind, so the tree is blown away from it, not bashed against it. Use a proper tree tie to secure the trunk, making a figure-of-eight pattern to prevent any rubbing. Now your tree is perfectly planted and ready to grow.
Essential Care for a Thriving Cherry Tree
Now that your cherry tree is settled in its new home, the real work begins. Don't worry, it’s not about back-breaking labour, but about establishing a simple, sensible routine. This ongoing care is what will transform that young sapling into a strong, productive tree, rewarding you with those baskets of juicy cherries you’ve been dreaming of.
From watering during a dry spell to keeping hungry birds from nicking your harvest, these are the little things that make a huge difference.
Smart Watering and Feeding
Getting the watering right is crucial, especially for young trees in their first couple of years. Your goal is to keep the soil consistently moist, but never, ever waterlogged.
Instead of watering on a rigid schedule, get into the habit of checking the soil first. Just push your finger about two inches down into the soil near the tree’s base. If it feels dry, it’s time for a good, deep soak. During a hot, dry summer – particularly when the fruit is swelling – you might find yourself needing to water deeply once a week.
A deep, infrequent drenching is far better than a light, daily sprinkle. It encourages the roots to grow down deep into the soil, which ultimately makes the tree more resilient and less dependent on you.
When it comes to feeding, cherry trees are fairly light eaters. A single application of a balanced, general-purpose fertiliser in late winter or early spring is usually plenty. This gives the tree a gentle boost just as it’s waking up for the growing season.
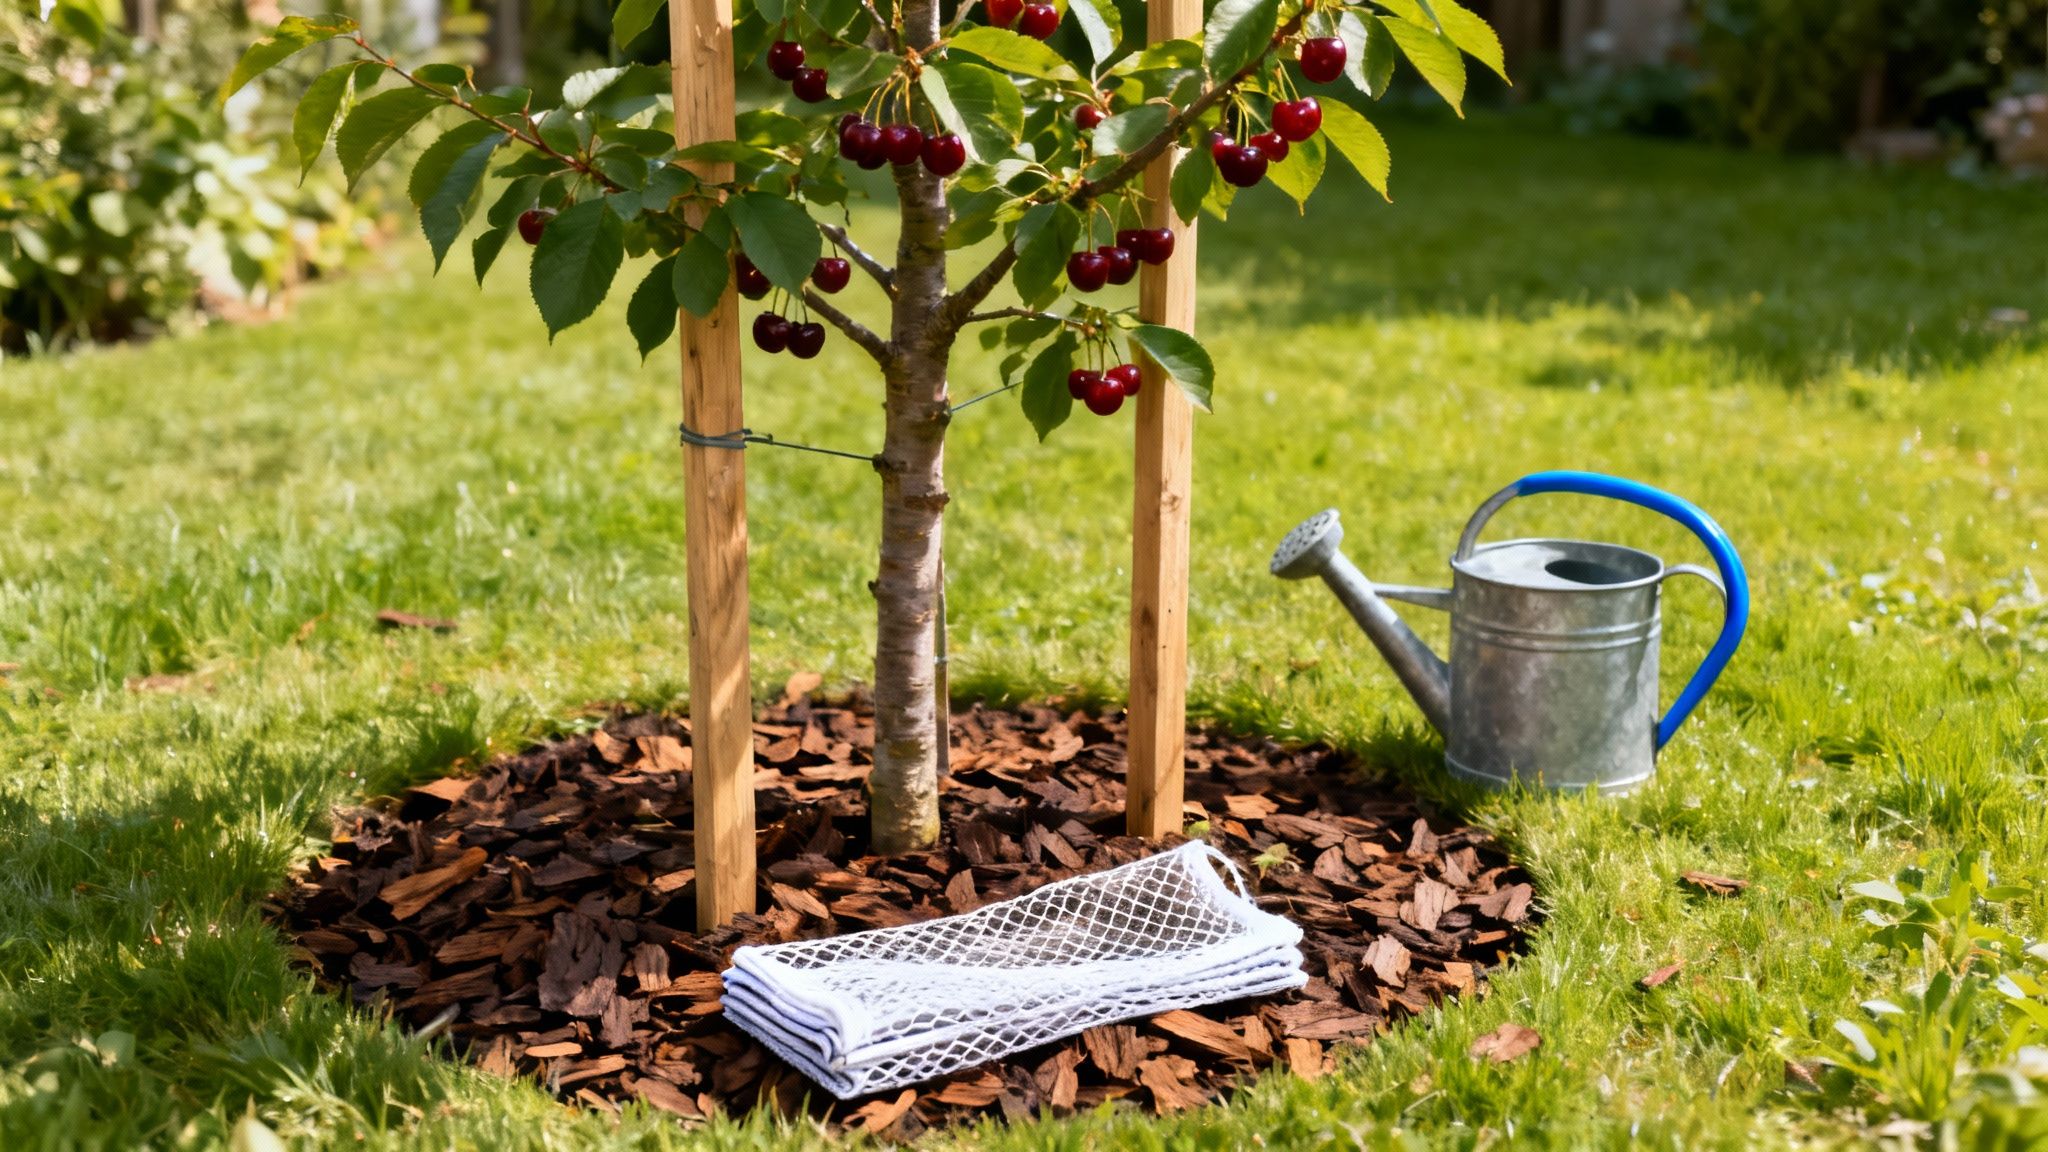
The Power of Mulching
If you do one thing for your cherry tree's health, make it mulching. Applying a 5-7cm (2-3 inch) layer of organic matter like well-rotted compost, bark chips, or leaf mould around the base of the tree is a game-changer.
- Keeps moisture in: Mulch acts like a lid on the soil, slowing down evaporation. This means you won't have to water nearly as often.
- Stops weeds: It blocks sunlight, preventing weeds from sprouting and stealing water and nutrients from your tree.
- Improves the soil: As the organic mulch breaks down, it gradually enriches the soil, improving its structure and fertility over time.
Just one golden rule when applying mulch: always leave a small gap around the trunk itself. Piling mulch right up against the bark can trap moisture and could lead to rot.
Protecting Your Tree from Common Threats
Part of nurturing your tree is playing defence against a few predictable challenges. Here in the UK, the two biggest culprits are late frosts and birds.
A sudden, sharp frost in late spring can be devastating. It can easily damage the delicate blossoms, wiping out your entire potential harvest for the year. If a frost is forecast while your tree is in bloom, get out there and cover it overnight with horticultural fleece or even old bedsheets. The same principles for protecting plants in winter can be a lifesaver for spring frosts, too.
And just as your cherries ripen to that perfect, irresistible red, you'll notice you’re not the only one who's been watching them. Birds, especially blackbirds, can strip a tree bare in a morning. The only truly effective solution is a physical barrier. A couple of weeks before the fruit is ready, drape the entire tree with fine-gauge bird netting. Make sure you secure it around the base of the trunk so crafty birds can't sneak in from underneath.
Getting to Grips with Pruning Cherry Trees
https://www.youtube.com/embed/ZMbZyX8lxXs
Pruning can seem a bit daunting, I know. But for cherry trees, it's the key to a healthy life and a bumper crop of fruit. A good prune helps with airflow, lets sunlight reach the ripening cherries, and builds a strong, reliable frame. Neglect it, and you’re not just risking a poor harvest, you're opening the door to disease.
If you remember only one thing, make it this: timing is everything with cherries. Unlike most fruit trees, you must only prune them in mid-summer. I'm talking late July or August, when the weather is warm and dry.
Why? Pruning in winter leaves them wide open to nasty fungal diseases like silver leaf and bacterial canker. These thrive in the damp and cold, creeping into the tree through fresh pruning wounds. A summer prune lets the cuts heal over quickly, drastically reducing the risk.
Pruning Young Trees to Build a Strong Framework
For the first couple of years, your goal isn't fruit. It's all about building a solid, open framework that will support heavy crops for decades to come. Think of it as creating the tree's skeleton.
You're aiming for an open, goblet-like shape. To achieve this, pick out three or four strong, well-spaced branches to be your main leaders. You'll want to remove any that are weak, crossing over each other, or growing back in towards the centre of the tree. This simple step opens up the structure, letting that vital sunlight and air get right in.
- Year One: After you’ve planted your tree, find those main framework branches. Shorten each one by about a third, making sure to cut just above an outward-facing bud. This tells the tree, "grow out, not in."
- Year Two: The following summer, you’ll do a similar thing. Shorten the new growth on those main branches again. Also, have a look for any particularly vigorous shoots that are making a beeline for the centre of the tree and snip them out.
It can feel a bit brutal cutting back a young tree, but you’re just channelling its energy into creating a robust and productive structure for the future.
How to Prune Mature, Fruit-Bearing Trees
Once your tree has its shape and is producing fruit, your job changes. You're no longer building the structure, but simply maintaining it. The idea is to keep the tree a manageable size, encourage plenty of fruit, and keep that open centre clear.
Every summer, stand back and have a good look at your tree. The pruning now will be much lighter. You’re looking to remove any branches that are:
- Dead, Damaged, or Diseased: These are the first to go. Cut them back to healthy, clean wood. This is non-negotiable for the tree's health.
- Crossing or Rubbing: Branches that rub against each other create wounds that are an invitation for disease. Choose the weaker of the two and remove it.
- Growing Inwards: Any shoots pointing back towards the trunk need to go. This keeps the air flowing and the light getting in.
- Too Vigorous: You’ll often see long, vertical shoots (sometimes called watersprouts) rocketing upwards. Cut these back to keep the tree's shape balanced.
I always think of pruning as a conversation with the tree. You’re not just hacking away; you're guiding its growth, promoting its health, and setting it up for a fantastic harvest. A little trim each year is always better than a massive, shocking cut every few years.
Pruning Different Shapes and Styles
Of course, not all cherry trees are the same shape. A classic, free-standing bush tree is pruned very differently to a fan-trained tree growing flat against a wall.
For a fan-trained tree, the aim is to keep a flat, two-dimensional framework of evenly spaced branches. Every summer, you’ll need to tie in new shoots that are growing in the right direction to extend the fan. Any shoots growing straight out from the wall or directly back into it should be pinched back or removed. It's a bit more hands-on, but it's a brilliant way to grow a productive cherry tree in a tight spot.
If you'd like to explore this further, our guide on the best time to prune fruit trees has more detailed tips for various tree shapes.
Got Questions About Your Cherry Tree?
Growing a cherry tree is a real joy, but it's natural to have a few questions pop up, especially in the early years. Let's walk through some of the queries I hear most often from fellow gardeners here in the UK.
How Long Before I Get My First Cherries?
Ah, the big question! It’s all about patience, and the answer lies in something called the rootstock – the root system your tree is grafted onto.
If you've chosen a tree on a dwarfing rootstock like 'Gisela 5', which is brilliant for smaller gardens, you're in for a treat. These are bred for quicker results, and you could be picking your first small harvest in as little as two to three years.
For trees on more vigorous rootstocks, like 'Colt', the plant puts its energy into growing a strong, sturdy frame first. Think of it as building a solid foundation. With these, you’re looking at a wait of around four to five years for a proper crop. The best thing you can do during this time is give it plenty of TLC to help it get established.
Why Are My Cherry Tree's Leaves Turning Yellow?
Yellowing leaves are a common worry, but don't panic. More often than not, it’s a simple issue with water. Here in the UK, the culprit is usually too much water from our damp climate or heavy soil, not too little. Roots sitting in boggy ground can't take up nutrients properly, and the leaves show their distress by turning yellow.
Before you even think about adding fertiliser, get your hands dirty. Check the soil around the base of the tree. If it’s soggy, you’ve found your problem. If the soil and drainage seem fine, then it might be a lack of nutrients, often nitrogen. A good balanced feed in the spring should sort it out.
Do I Really Need Two Trees to Get Fruit?
This is a classic one, and the good news is, often you don't. It all comes down to which variety you’re growing.
Many fantastic modern cherry trees are 'self-fertile', meaning they can pollinate themselves. You plant one tree, you get a bumper crop. Simple as that. Some great self-fertile choices include:
- 'Stella'
- 'Sunburst'
- 'Lapins'
- The ever-reliable sour cherry, 'Morello'
However, lots of older, traditional sweet cherry varieties are 'self-sterile'. They need a different, compatible cherry tree flowering nearby to provide pollen. Your plant label will always tell you what you’ve got. If you only have room for one tree, make your life easier and stick with a self-fertile variety.
Choosing a self-fertile variety is the single easiest way to guarantee a harvest in a smaller garden. It removes all the guesswork around pollination partners and flowering times.
How Can I Stop Birds from Eating All My Cherries?
You're not the only one with an eye on that ripening fruit. Birds are incredibly good at spotting a free meal and can strip a tree bare just as you're getting ready to pick.
I've seen people try everything from shiny CDs to plastic owls, but clever birds soon realise they're no threat. From my experience, the only foolproof method is a physical barrier: fine-mesh netting.
You need to drape it over the tree a week or two before the cherries are ripe. The most important part? Secure it tightly around the trunk. If you leave any gaps at the bottom, the birds will just hop in from underneath. It's a bit of a faff, I'll admit, but it’s the one thing that guarantees you're the one enjoying the fruits of your labour, not the blackbirds.


