
Growing watercress at home really comes down to one thing: mimicking its natural home in cool, flowing streams. You need to give it constant moisture, nutrient-rich soil, and a bit of shade from the harshest sun.
The two best ways to do this are either growing it in a simple pot that sits in a tray of fresh water, or for the more ambitious, setting up a small, flowing water system. Get the setup right, and you’ll have a steady supply of this peppery green almost all year.
Your Quick Guide to Growing Watercress at Home
Watercress is one of the oldest leafy greens people have ever eaten, and it’s no wonder why. It’s absolutely packed with goodness, with a single serving containing an incredible 142% of your daily vitamin K.
It might have a reputation for growing wild in streams, but don't let that intimidate you. Cultivating it on your own patio or even a windowsill is much easier than you’d think. This guide will walk you through it, helping you create a thriving patch of peppery greens with just a few simple tricks.
For a quick overview of what's involved, this table breaks down the essentials for the two most common home-growing methods.
Watercress Growing At a Glance
As you can see, the container method is a fantastic starting point, while a flowing system is for those ready to take their watercress game to the next level.
The Essentials for Success
Whether you're new to gardening or have plenty of experience, getting watercress right depends on a few core principles. It's not like most garden herbs; its semi-aquatic nature means it plays by a different set of rules.
- Consistent Moisture: This is the big one. The roots can never be allowed to dry out. That’s why the pot-in-a-saucer method works so well—the water is always there, but you must remember to change it daily to keep it fresh.
- Partial Shade: Watercress definitely likes the sun, but scorching midday heat will cause it to "bolt" (flower too early). When this happens, the leaves turn bitter. Find a spot that gets lovely morning sun but is shaded in the afternoon.
- Nutrient-Rich Medium: A high-quality potting mix blended with a bit of compost gives it the fuel it needs for that lush, vigorous growth we're all after.
The real secret to how to grow watercress is consistency. A quick daily check of the water level and making sure it's shielded from the intense afternoon sun will make all the difference. It's what separates a struggling plant from one that's ready to harvest.
Mastering these basics is the perfect launchpad. If you're keen to bring more green indoors, you might also enjoy our guide on how to grow herbs indoors for more tips and ideas.
Creating the Perfect Watercress Environment
The secret to a thriving patch of watercress is all about mimicking what it loves in the wild: a cool, consistently moist, and nutrient-rich home. You don't need to replicate a fast-flowing stream in your garden, but you do need to make sure its roots never, ever dry out.
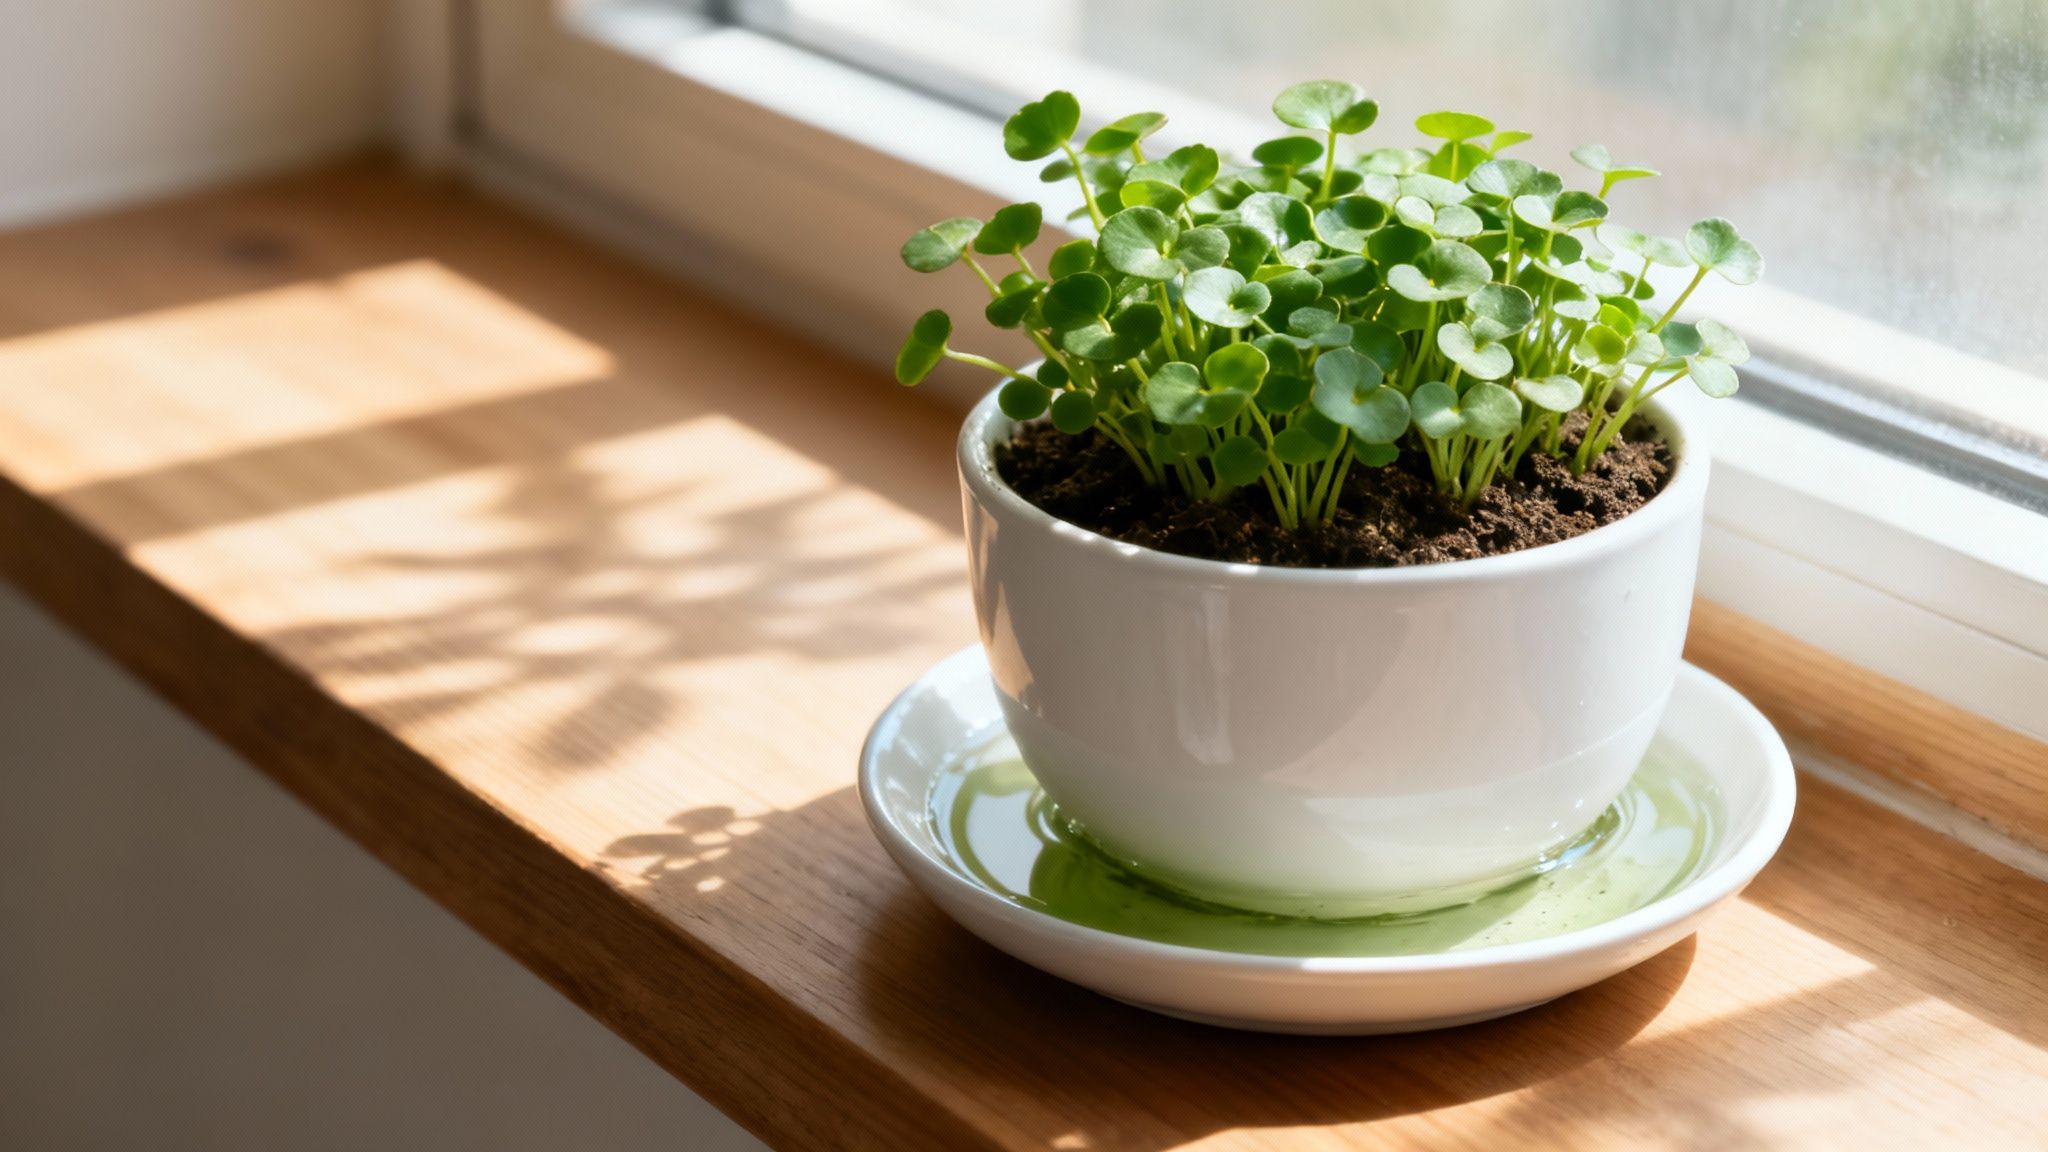
Choosing the right container is your first, and most important, decision. Thankfully, you don't need any fancy kit. A simple plant pot with good drainage holes will do the job perfectly, as long as you sit it in a very deep saucer or tray.
This simple pot-and-saucer setup creates a personal reservoir. The soil wicks up moisture as needed, keeping the roots perfectly hydrated without becoming a swamp.
Choosing Your Container and Location
When it comes to picking a container, your main thought should be moisture management. Self-watering planters are a fantastic, low-fuss option because their built-in reservoirs take a lot of the daily guesswork out of watering.
Here are a few popular choices and why they're so effective:
- Standard Pot & Deep Saucer: This is the easiest way to get started. The pot holds your soil and plant, while the saucer acts as a mini-pond that you just need to keep topped up.
- Self-Watering Planter: These are designed for thirsty plants like watercress. They pull water up from a hidden tank, delivering a steady supply right to the roots.
- Large Trough or Window Box: If you’re dreaming of a bigger harvest, a long trough gives you more growing space. Just make sure it has drainage holes and sits inside a larger, watertight tray to hold the water.
Where you place your pot is just as critical. Watercress is a bit like Goldilocks—it needs its light to be just right. Find a spot that gets gentle morning sun for about 4-6 hours but is shaded from the harsh, scorching heat of the afternoon. Too much direct sun stresses the plant and causes it to flower prematurely, a process called 'bolting', which makes the leaves unpleasantly bitter.
If there's one thing new growers should know, it's that watercress is surprisingly adaptable. It’s not about having a pristine chalk stream, but about giving the plant a cool root zone with a constant source of fresh, clean water.
Crafting the Ideal Growing Medium
Watercress is a hungry plant. It needs a rich, moisture-retentive growing medium to really flourish. A standard, off-the-shelf potting mix on its own often won't hold enough water or provide the sustained nutrients for lush, peppery growth.
To get the blend just right, I mix a high-quality, peat-free potting compost with an equal amount of either perlite or vermiculite. This combination creates a beautiful, spongy texture that holds onto moisture while still allowing vital oxygen to get to the roots, which is key to preventing rot.
This approach is a small-scale version of the mineral-rich beds found in nature. For instance, the famous UK watercress farms in Hampshire thrive because of the unique conditions created by chalk springs. The Watercress Company, one of the leading growers, manages its beds so sustainably that they become biodiversity hotspots—an estimated 1.7 billion insects live across just 16 hectares of their pesticide-free beds.
If you happen to have a pond or a small garden stream, you can certainly take inspiration from these larger systems. Our guide on how to garden with a water feature has some brilliant ideas you could adapt for a more ambitious watercress project.
Getting Your Watercress Started: Seeds or Cuttings?
Now that you've got the perfect spot sorted, it's time for the exciting bit—planting. You've got two main routes to go down here: starting from scratch with seeds or getting a big head start with cuttings. Honestly, there's no right or wrong answer; it just depends on how patient you are!
Starting from seed is a classic for a reason, and it's incredibly satisfying. On the other hand, using cuttings is a brilliant shortcut to get you to your first harvest much faster. Both methods work a treat, even if you're just dipping your toes into the world of growing in pots.
Sowing From Seed
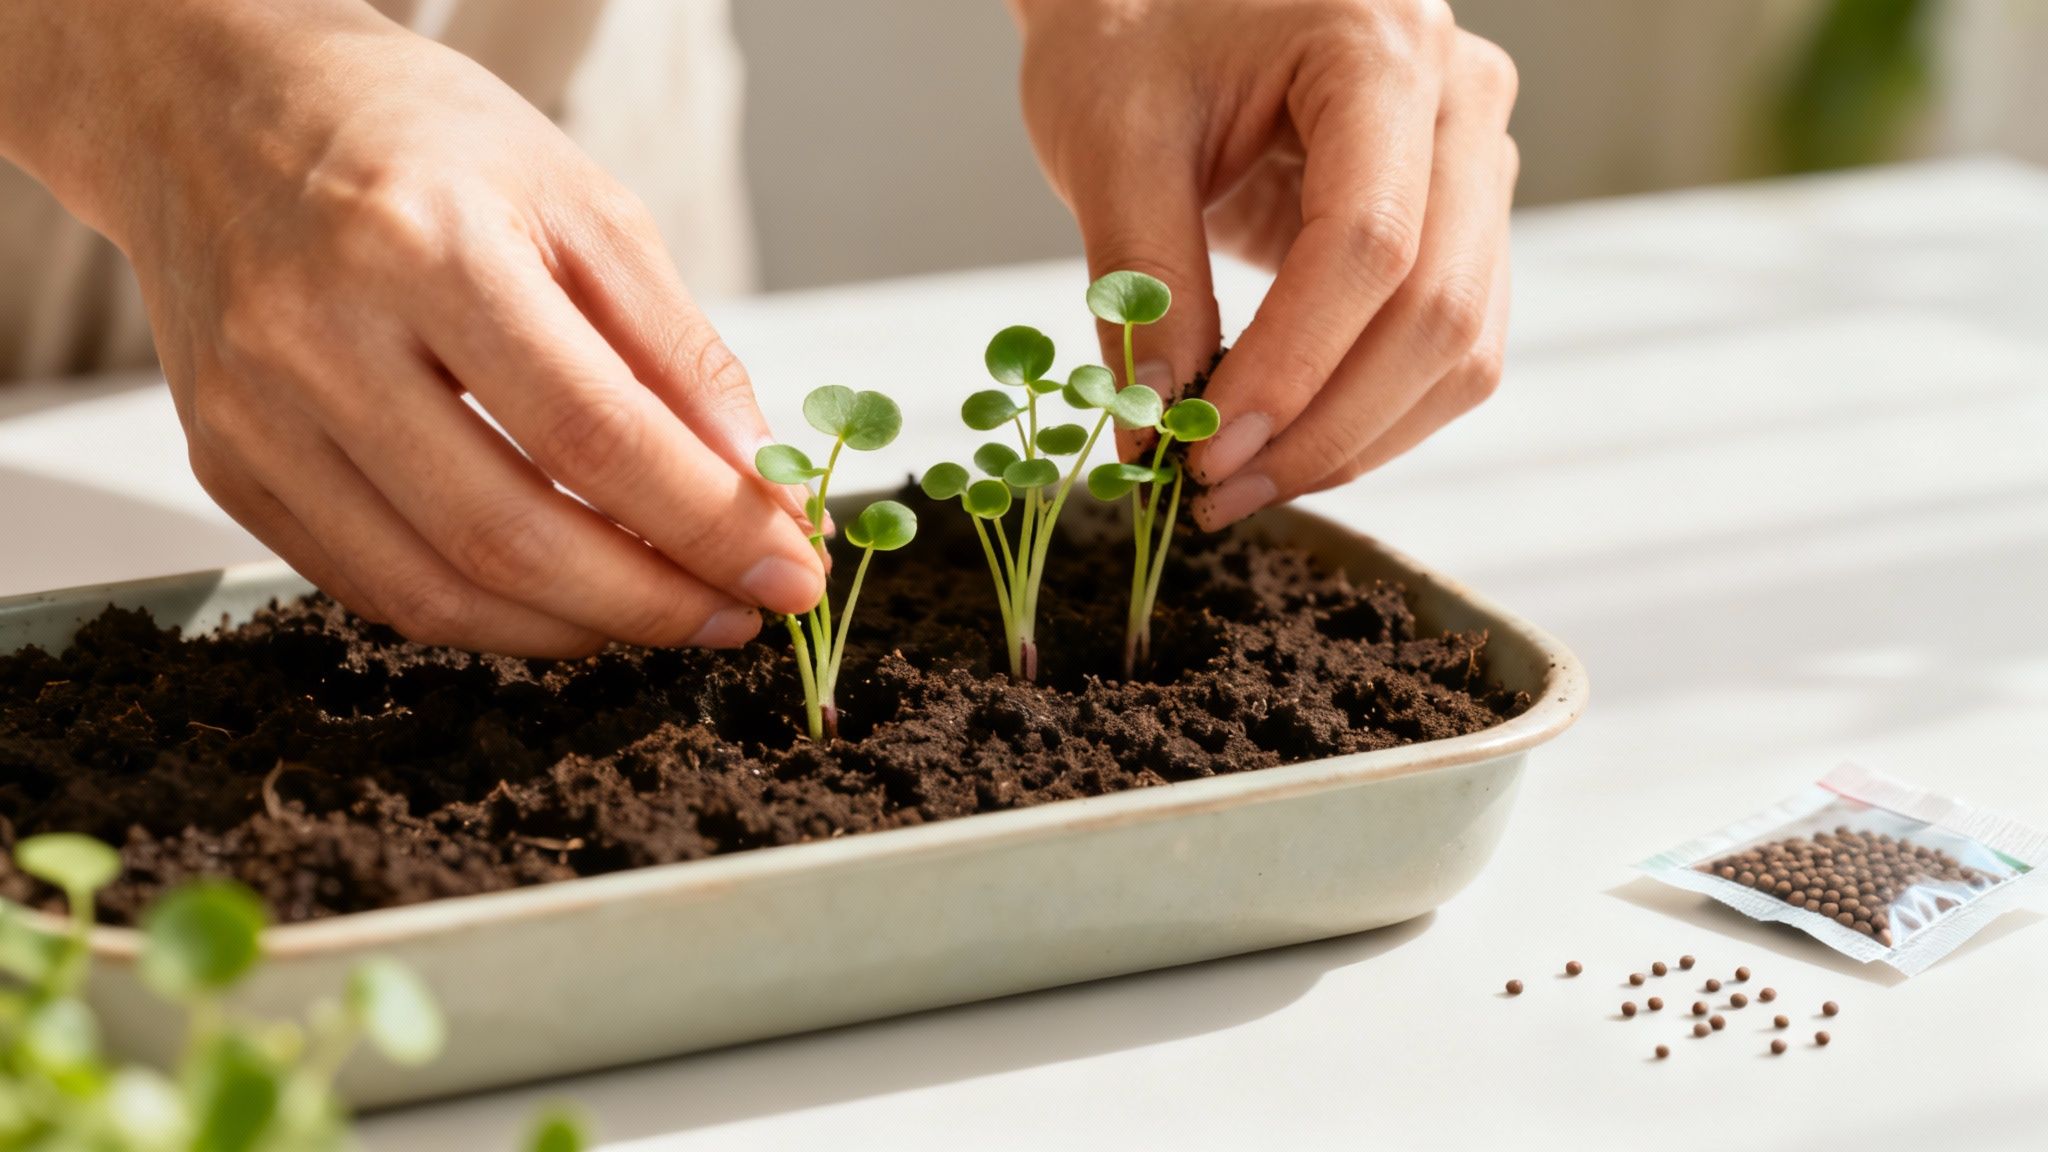
This is the traditional, cost-effective way to kick things off. Watercress seeds are absolutely tiny, so you’ll need a delicate touch, but they're surprisingly eager to grow. You can expect to see them spring to life in just a few days.
First, give your soil mix a good drink until it's properly damp all the way through, but not a soggy mess. Then, sprinkle the seeds as evenly as you can across the surface. Don't stress about getting the spacing perfect right now; we can always thin out the weaker seedlings later on.
Lightly press the seeds into the soil to ensure they make good contact. You can also cover them with the finest dusting of soil, but no more than 1/8 inch (about 3mm). If you bury them any deeper, the little sprouts will exhaust themselves trying to reach the light.
The real secret to getting seeds to sprout is keeping the soil surface consistently moist. I find a gentle mist from a spray bottle once or twice a day does the trick perfectly, preventing the seeds from drying out without washing them away. Pop the pot into its water tray, and you should be rewarded with green shoots in just 5 to 10 days.
A Quicker Start With Cuttings
If you want a peppery salad next week rather than next month, this is the method for you. Propagating from cuttings is basically cloning a mature plant, so it's incredibly reliable. All you need is a fresh bunch of watercress from the supermarket.
When you're picking a bunch, look for one with sturdy, green stems and plenty of healthy-looking leaves. Steer clear of anything that’s already looking a bit sad, yellow, or wilted.
- Prep Your Stems: Start by carefully snipping the leaves off the bottom few inches of each stem.
- Pop Them in Water: Place the stems into a jar of water, making sure all the bare parts are submerged.
- Find a Sunny Spot: A bright windowsill is ideal, but try to avoid scorching, direct sun which can stress them out.
- Watch for Roots: This is the magic part. Change the water every day to keep it fresh. Before you know it—usually in about a week—you'll see delicate white roots starting to sprout.
Once the new roots are about an inch long, they're ready for their new home. Be gentle as you plant them; those new roots are fragile. Simply poke them into your prepared damp soil, planting them to roughly the same depth they were sitting at in the water.
It's fascinating to think that this plant has been a specialist crop here in the UK for centuries. Unlike major crops like wheat or potatoes, watercress doesn't even show up in the main national agricultural statistics. This really underlines its niche status as a high-value green, a tradition that goes all the way back to the 19th century when the new railways would rush it from farms in Hampshire to the bustling markets of London.
Mastering Water and Nutrient Needs

If there's one golden rule when learning how to grow watercress, it's this: water is everything. The clue is right there in the name. Mastering its hydration needs is the secret to a lush, peppery harvest. The aim is to keep the soil constantly damp and cool, mimicking the fresh, flowing springs it loves in the wild, but without letting it become a stagnant, waterlogged bog.
Stagnation is the number one enemy of healthy watercress. It suffocates the roots by starving them of oxygen, which quickly leads to rot and disease. There's a reason commercial UK watercress growers operate under such strict guidelines.
Professional growers must adhere to rigorous food safety and environmental standards. These demand that water in production beds flows constantly to prevent contamination. The rules also mandate regular water testing and specific quality controls, which just goes to show how sensitive the crop is to pollution. For the home grower, the lesson is clear: fresh water is paramount.
The Art of Consistent Hydration
For watercress grown in containers, the simplest and most effective technique is what I call the 'saucer method'. Just place your pot inside a deep tray or saucer and keep it topped up with fresh water every single day. The soil will wick up exactly what it needs, ensuring the roots never go thirsty.
The most important part of this routine is the daily refreshment. Don't just top up yesterday's water. You need to empty the saucer completely and refill it. This simple act stops the water from becoming stagnant, introduces fresh oxygen, and flushes away any potential build-up of salts from fertilisers.
Think of it like this: you're not just giving your plant a drink, you're recreating a tiny, clean stream at its base. Consistency is far more important than quantity; a daily refresh is the secret to vibrant, healthy growth.
Feeding for Flavour and Growth
Watercress is a hungry plant that grows quickly. That constant supply of water means nutrients are washed through the soil relatively fast, so you'll need to provide a regular feed to keep it producing those delicious, nutrient-packed leaves.
A balanced, water-soluble liquid fertiliser is your best friend here. I'd recommend looking for one formulated for leafy greens or vegetables, as it will have the right balance of nitrogen to encourage plenty of foliage.
Here’s a simple feeding schedule that works well:
- Frequency: Feed your watercress every two weeks during its main growing season in spring and autumn.
- Application: Always dilute the liquid fertiliser to half the strength recommended on the bottle. A full-strength dose is often too intense and can scorch the delicate roots.
- Technique: Apply the diluted feed directly onto the soil, rather than just pouring it into the water saucer. This gets the nutrients straight to the root zone where they're needed most.
This gentle but regular feeding approach encourages vigorous growth without sacrificing that signature spicy flavour. If you fancy a more organic approach, you can find some brilliant recipes for homemade plant food that your watercress will absolutely thrive on. Get this balance of water and nutrients right, and your home-grown patch will truly flourish.
Harvesting and Maintaining Your Watercress
This is the moment all your hard work pays off. The brilliant thing about growing your own watercress is that it's not a one-and-done harvest. Get the technique right, and you'll have a steady stream of those fresh, peppery leaves for months.
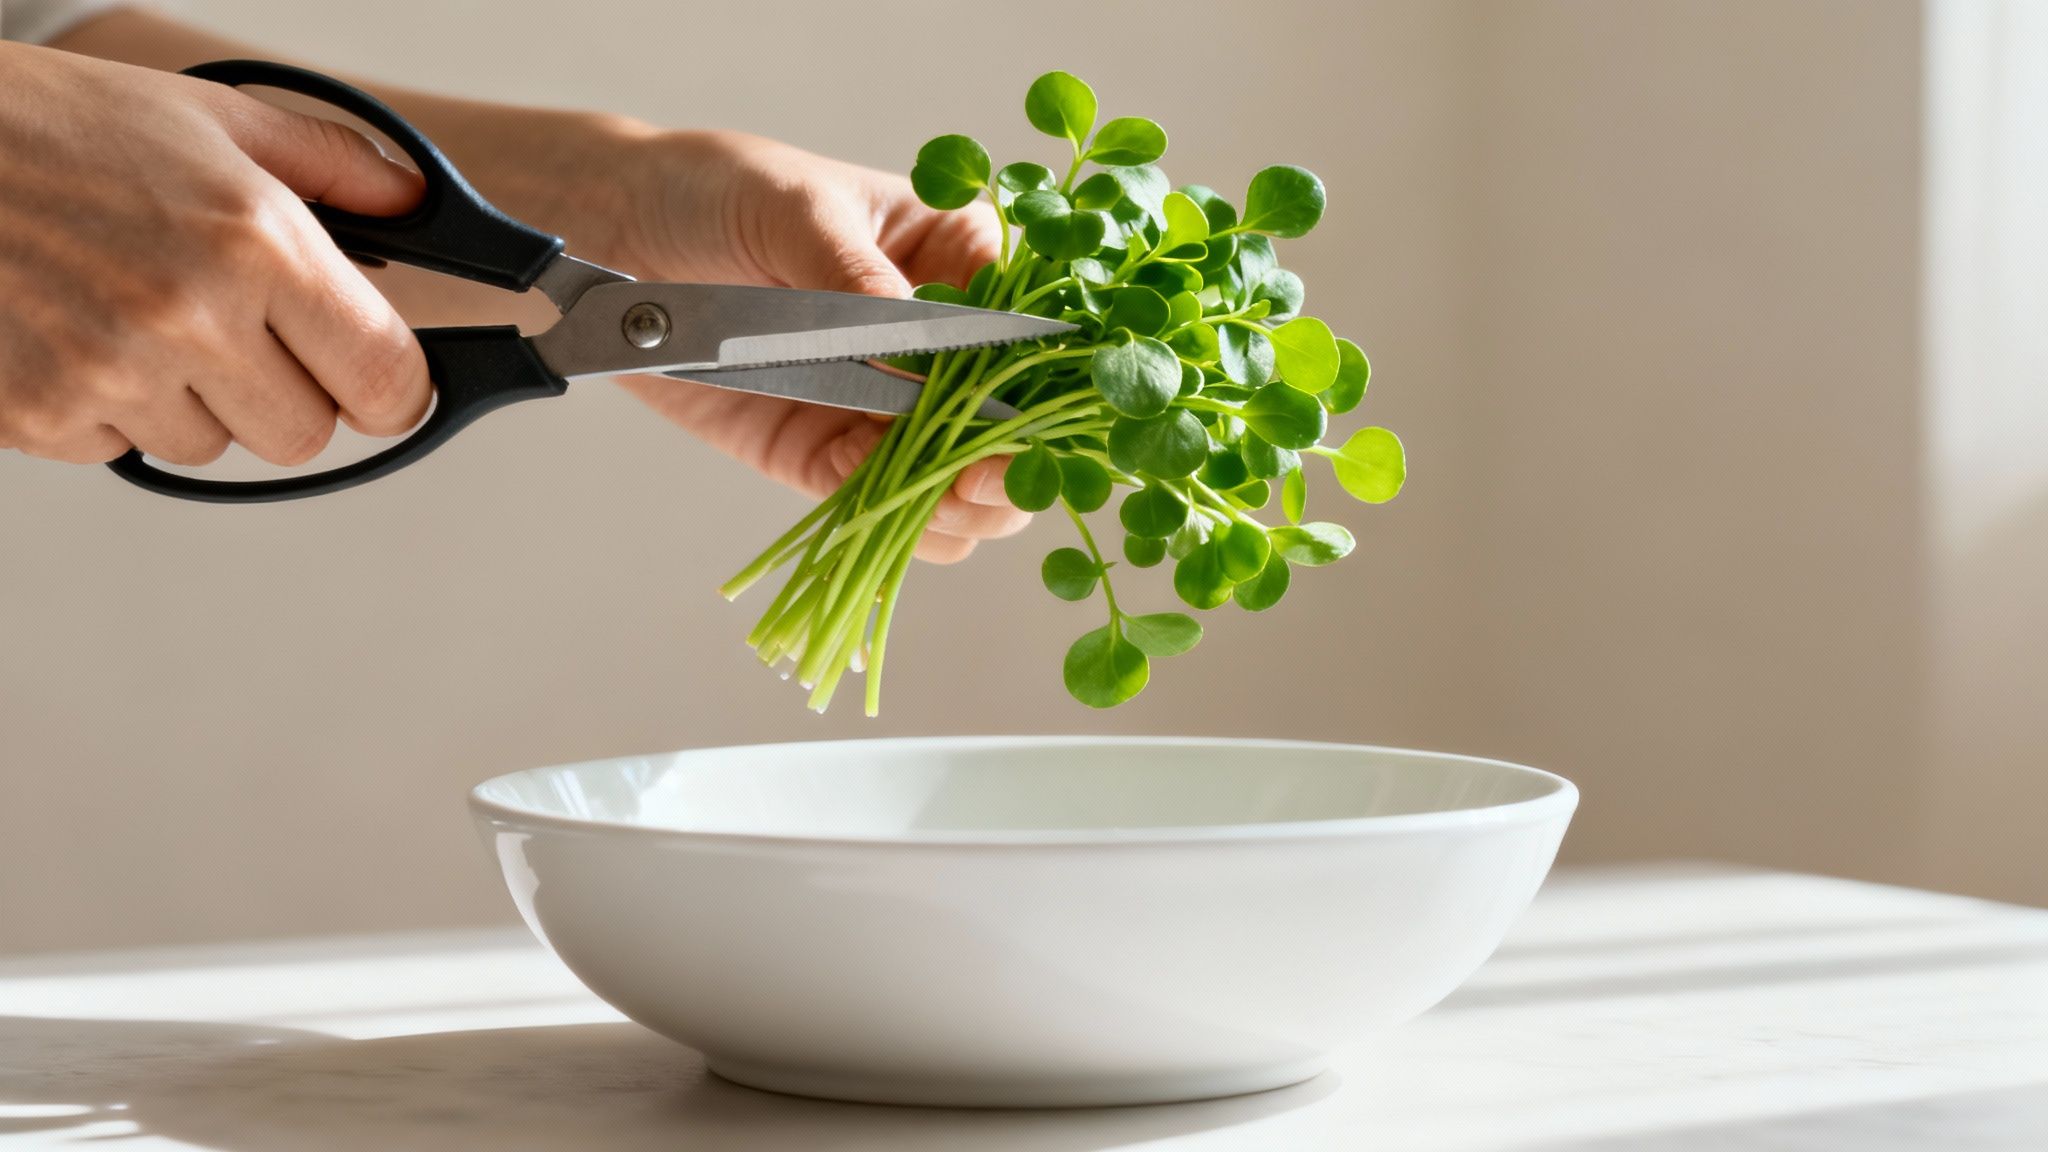
It all comes down to the 'cut-and-come-again' method. This simple approach is exactly what it sounds like: you trim what you need, and the plant is spurred on to produce even more tender new shoots. It's a fantastic, sustainable way to keep your kitchen well-stocked from just a single pot or patch.
The Best Way to Harvest
When your watercress plants are standing about 4-6 inches (10-15 cm) tall, it's time for their first haircut. Don't be timid here! In fact, regular harvesting is the very thing that keeps the plant productive. It also stops it from flowering, which is something you want to avoid as it can make the leaves taste bitter.
Grab a clean, sharp pair of scissors. Snip the stems about 1-2 inches from the base, making sure to leave a few leaves behind on each stem. This is the crucial part, as it encourages the plant to branch out from where you cut, sending up fresh new growth in no time.
During its favourite seasons, spring and autumn, you can easily harvest from the same plant every one to two weeks. This consistent trimming really is the secret to a long and generous harvest.
Keeping Your Watercress Healthy
Looking after a healthy patch is mostly about keeping an eye on the little things. Beyond the daily water refresh, a bit of proactive care will keep your plants thriving and head off any common issues before they take hold.
Aphids, for instance, are a classic garden pest you might run into. They absolutely love the lush, new growth on watercress.
To handle them without nasty chemicals:
- A strong spray of water is often enough to just blast them off the leaves.
- Welcome beneficial insects like ladybirds into your garden; they’re nature’s best pest controllers.
- Use a neem oil solution if you have a stubborn infestation. A diluted spray is a great organic deterrent.
Keep an eye out for yellowing leaves, too. This is usually a tell-tale sign of a nutrient deficiency. If you spot this even with your regular feeding schedule, it’s a clear signal your plant is hungry and needs a bit more fuel to support all that growth.
A mistake I see people make is getting a bit too enthusiastic with the scissors. As a rule of thumb, never take more than one-third of the plant in a single cutting. Leaving plenty of foliage allows it to recover quickly and bounce back for your next harvest.
Managing Your Patch Through the Seasons
Watercress is happiest in the cooler months of spring and autumn. When the summer heat kicks in, the plant's instinct is to 'bolt' – that is, to send up flower stalks. While regular harvesting helps put this off, you might also want to give your patch a bit of shade during the hottest part of the day to keep it happy.
Once winter rolls around, growth will naturally slow right down. If you live in a milder part of the UK, you can often keep harvesting well into the colder months, especially with a bit of protection. For more in-depth advice on this, our guide on protecting plants in winter has some fantastic, practical tips.
Common Watercress Growing Questions
Every gardener runs into a few head-scratchers, and watercress is no exception. Even with the best intentions, questions pop up. Let's tackle some of the most common queries I hear, so you can get ahead of any issues and keep your harvest on track.
Can I Just Grow It in a Bucket of Water?
It seems logical, right? Watercress loves water, so a bucket full of it should be perfect. Unfortunately, this is a classic mistake. Watercress needs oxygenated, moving water to really flourish; stagnant water is its enemy.
A simple bucket of still water will quickly lead to root rot and becomes a breeding ground for mosquitos. Instead, plant your watercress in a pot with a good soil mix and place that pot inside a larger, water-filled tray. The trick is to change the water in the tray every single day. This mimics the fresh, flowing conditions it loves without the risk of suffocation and disease.
Why Are My Watercress Leaves Turning Yellow?
Yellow leaves are a tell-tale sign that your plant is unhappy. It's usually signalling one of two problems: either it's thirsty or it's hungry. If you let the soil dry out, even for a short while, the plant gets stressed, and the leaves will start to turn.
More often than not, though, yellowing is a cry for nutrients, particularly nitrogen. Watercress grows incredibly fast, and that means it has a serious appetite.
To get those leaves back to a vibrant green, first double-check your watering. Is the soil consistently moist? Is the water in the tray fresh? Next, get it on a regular feeding schedule. A balanced liquid fertiliser every two weeks during the growing season will give it the boost it needs.
How Do I Stop My Watercress From Flowering?
As the weather warms up, watercress gets an instinct to 'bolt'—meaning it sends up flower stalks. Once it flowers, all its energy goes into producing seeds, and the leaves become smaller and much more bitter.
Your best line of defence is to harvest, harvest, and harvest some more. By regularly snipping the stems with the 'cut-and-come-again' method, you're constantly signalling to the plant that it needs to produce more tasty leaves, not flowers.
It also helps to give it a bit of shade during the hottest part of the afternoon. Keeping the plant cool can delay bolting. Think of harvesting as more than just taking your crop; it's essential maintenance to keep your watercress productive all season long.


