Growing herbs indoors doesn't have to be complicated. Get just three things right—at least six hours of sunlight a day, pots with decent drainage, and watering only when the soil feels dry to the touch—and you’ll have fresh flavours on your windowsill all year round.
Your Thriving Indoor Herb Garden Starts Here
Picture this: you're making pasta and need some fresh basil, so you just snip a few leaves from a pot in your kitchen. Fancy a mojito? Fresh mint is right there. This guide is all about making that a reality, even with our famously unpredictable UK weather.
We'll sidestep the common mistakes and show you that a lush, productive indoor herb garden is well within your reach, whether you’re in a city flat with a single windowsill or a house with more space to play with.
This is about bringing a bit of green and a lot of flavour into your home, simply and successfully. And you're in good company; growing your own indoors has become a huge passion across the UK.
The Rise of Indoor Gardening
There's a real movement towards connecting more with our food and greening up our living spaces. It's not just a feeling, either. Between 2017 and 2019, sales of indoor plants, herbs included, shot up by 14%.
That interest has only grown, with garden centres reporting a massive 29.4% jump in houseplant sales in 2021 compared to the year before. You can read more about this surge in popularity over on DIY Garden.
Growing your own herbs isn't just about having fresh ingredients on hand. It's a small act of self-sufficiency that brings a surprising amount of joy. There's nothing quite like harvesting something you've nurtured yourself—it completely changes how you cook and connect with nature.
To get you started on the right foot, here's a quick rundown of what you need to think about.
Quick Start Guide for Your Indoor Herbs
This table breaks down the essentials for getting your indoor herb garden going in a typical UK home.
This is just a starting point, of course. Let's dive into the details to help you build confidence and get your herb garden flourishing.
What This Guide Will Cover
We're here to walk you through everything, step-by-step. We'll cover all the essentials to get you growing herbs indoors like a pro:
- Choosing the Right Herbs: We’ll look at which varieties are best suited for indoor life here in the UK.
- Perfecting Your Setup: From the best pots and soil to finding the perfect spot in your home.
- Light and Water Wisdom: How to master the two most crucial elements for keeping your plants happy.
- Long-Term Care: We'll get into harvesting, feeding, and looking after your herbs for a continuous supply.
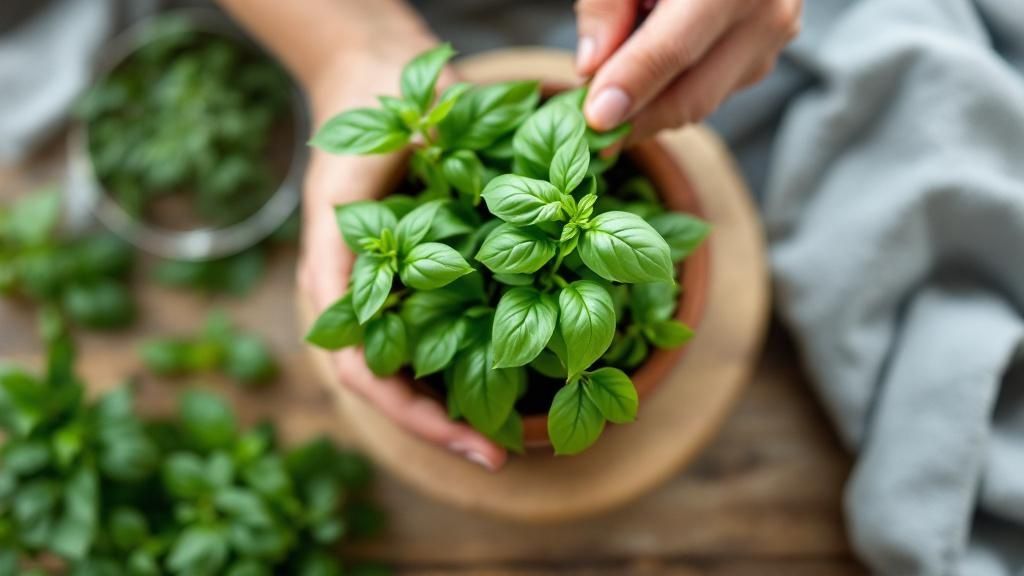
Choosing the Best Herbs for Your Indoor Space
The first, and most important, step to a thriving indoor herb garden is picking the right plants. Not every herb is suited to life on a British windowsill, where sunlight can be a bit of a luxury, especially in autumn and winter. The real secret is to be honest about the light you have and choose your herbs accordingly.
Think of it this way: Mediterranean herbs like basil, thyme, and rosemary grew up in sun-drenched spots. They really need at least six hours of direct, bright light every day to be happy. If you've got a south-facing window that the sun loves to visit, these are brilliant choices that will pay you back with incredible flavour.
But don't worry if your home is a little shadier. Plenty of popular herbs are much more forgiving and will do just fine on east or west-facing windowsills, or even in a bright north-facing spot.
Herbs for Lower Light Conditions
Not all of us are blessed with sun-drenched kitchens, but that absolutely shouldn't put you off. Several herbs don't just tolerate lower light, they actually do rather well in it. These tend to be the leafy green types that aren't trying to produce flowers or fruit.
- Mint: Famously easy-going, mint (whether it's spearmint or peppermint) is incredibly adaptable. It's perfectly happy with just a few hours of morning sun. A quick tip: always grow mint in its own pot, as its roots love to spread and will quickly take over.
- Parsley: Both flat-leaf and curly varieties are fantastic choices for shadier corners. They just want consistent moisture and will reward you with lush leaves without needing hours of direct sun.
- Chives: As part of the onion family, chives are genuinely one of the simplest herbs to grow inside. They need very little light to produce those lovely, delicate stalks.
- Lemon Balm: This fragrant, citrusy herb is in the mint family and has the same laid-back attitude. It's lovely for teas and handles partial shade like a champ.
These are all perfect for a little kitchen garden that doesn't see sun all day long. If you're looking for more inspiration on easy-to-care-for houseplants, this guide to indoor plants for beginners has some great ideas to get you started.
The most common mistake I see is someone trying to force a sun-worshipping herb like basil to grow in a dark corner. By picking herbs that suit your light, you’re setting yourself up for success right from the start.
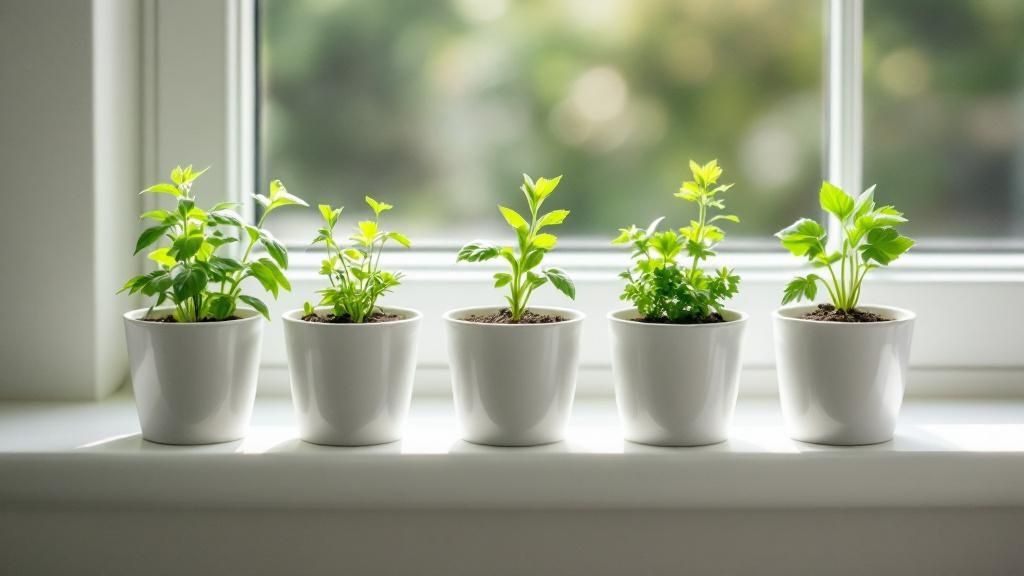
Seeds or Starter Plants?
Once you've got a shortlist of herbs, you need to decide how to begin. Are you going to buy young, established plants from a garden centre, or start from scratch with seeds? There are good reasons for both, and it really just comes down to your budget and how patient you're feeling.
Starting with young plants is your fast track to fresh herbs. You can bring a plant home and be snipping off leaves for your dinner that very same day. It's wonderfully satisfying and great for beginners, though it is the pricier way to go.
Growing from seed, on the other hand, is so much cheaper. A single packet of seeds often costs less than one plant but can give you dozens. Plus, there's something truly special about watching a tiny seed sprout and grow. It does require more patience, though—it could be several weeks or even a couple of months before you're ready to harvest.
Setting Up Your Herbs for Success
Getting the foundation right is the difference between herbs that merely survive and herbs that genuinely flourish. Once you've brought your plants home, the next job is to create the perfect environment for them, focusing on the pot, the soil, and where they'll live in your house.
This initial setup is your chance to head off many common problems before they even begin. A little attention to detail here gives your herbs the best possible start, ensuring they grow strong and keep your kitchen stocked with fresh flavour.
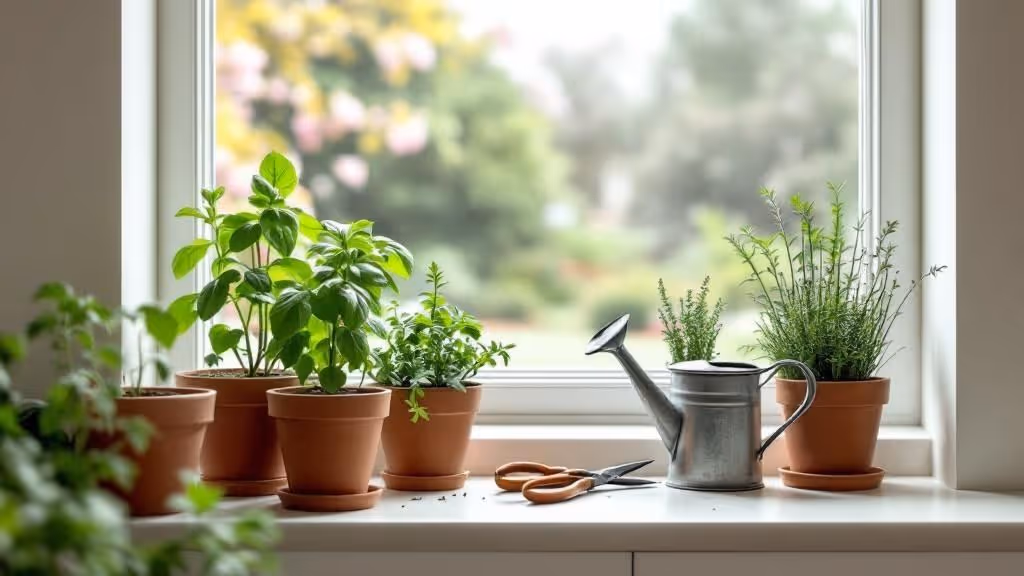
Choosing the Right Pot and Soil
The pot you choose plays a surprisingly big part in how well your indoor herbs will grow. The golden rule? Drainage. Whatever you pick, it absolutely must have holes in the bottom. Waterlogged soil is the fastest way to kill an herb, and drainage holes are your non-negotiable insurance policy against it.
Think about the material, too. Terracotta pots are porous, which means air and water can pass through the sides. This helps the soil dry out more evenly, significantly reducing the risk of root rot – a brilliant feature for drought-loving herbs like rosemary and thyme.
Plastic pots, on the other hand, hold onto moisture for much longer. This can be handy for thirstier plants like basil or mint, but it does mean you need to be extra vigilant about not overwatering.
The soil itself is just as critical. Please don't be tempted to scoop soil from the garden; it becomes dense and compacted in a pot, which will suffocate the roots. Instead, always go for a high-quality, peat-free potting mix designed specifically for containers.
Look for a mix that contains perlite—those little white specks you often see. It’s a lightweight volcanic rock that’s fantastic for improving aeration and drainage, creating the light, airy structure that herb roots absolutely love.
Giving your herbs the right container and soil is like building a strong foundation for a house. Get it right, and everything that follows becomes much easier.
Potting and Placement
When you’re ready to get your hands dirty, gently tease out the roots if they look tightly bound in their nursery pot. Pop the plant into its new home, making sure the top of the root ball sits about an inch below the rim, and then fill in the gaps with your potting mix. Press the soil down gently, but don't pack it in too tightly.
Finding the perfect spot is the final piece of the puzzle. Most herbs, especially Mediterranean ones, are complete sun-worshippers. A bright, south-facing windowsill is prime real estate, offering the six or more hours of direct sunlight they crave to thrive.
Given our sometimes-gloomy UK weather, maximising sunlight is key. Horticulturalists often suggest starting seeds for things like basil, chives, and parsley on a south-facing windowsill from January to April to give them the strongest possible start. You can find more fantastic tips from the experts over at the Royal Horticultural Society on their herb-growing pages.
Don't have a south-facing window? Don't panic. An east-facing spot offers gentle morning sun, while a west-facing one provides stronger afternoon light. Both can work well for less demanding herbs like mint and parsley. For more advice on timing your gardening jobs, our gardening calendar is a brilliant resource to have on hand.
Nailing The Light and Water For Your Indoor Herbs
Getting the light and water right is where most people trip up when they start growing herbs inside. But once you crack this, you've pretty much won the battle for a lush, thriving indoor garden. Let's break down these two crucial elements, especially thinking about the unique challenges we face here in the UK.
We just don't get that intense Mediterranean sun, so we have to be a bit cleverer with what we've got. A south-facing window is your absolute best mate, but even that might not be quite enough during those short, often gloomy winter days.
Making The Most of Natural Light
To give your herbs the best shot, you need to make every single sunbeam count. This is about more than just finding a good spot; it's about active, daily management.
- Turn, Turn, Turn: Give your pots a little quarter-turn every couple of days. This super simple habit stops your plants from getting lopsided as they lean desperately towards the light, ensuring every side gets its moment in the sun.
- Keep It Clean: I know it sounds ridiculously obvious, but a dusty window can cut down the light reaching your plants more than you'd think. A quick wipe-down can honestly make a world of difference.
- Watch for Shadows: Be mindful of anything that might be casting a shadow over your herbs, whether it's the edge of a curtain or another, larger object on the windowsill.
If you're short on sunny spots, getting creative with your layout is a game-changer. We've got some tips on our guide to terrace house garden ideas that you can easily adapt for an indoor setup.
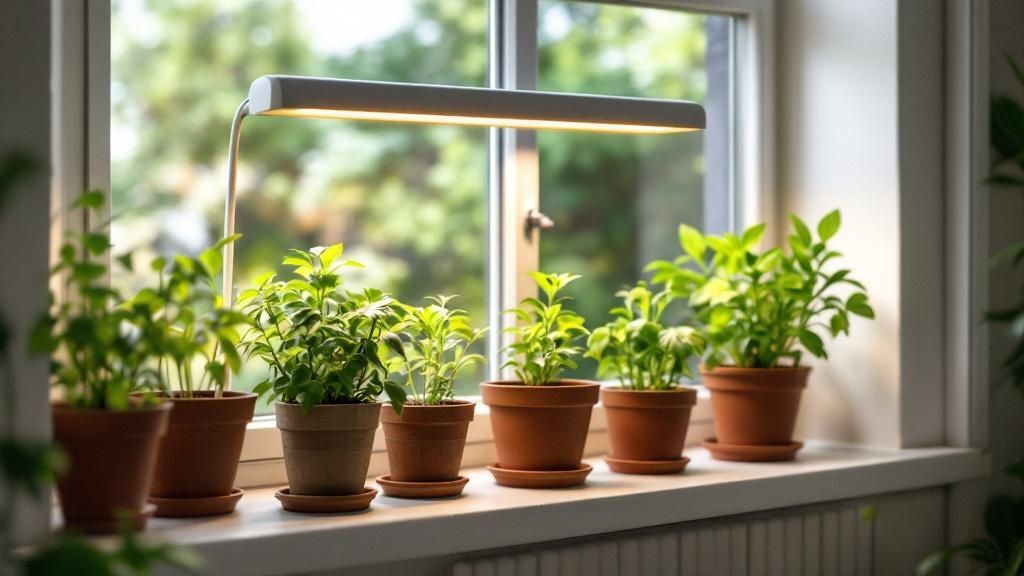
When To Bring in The Big Guns (A.K.A. Grow Lights)
Look, sometimes Mother Nature just doesn't play ball. If your home is on the darker side or you're determined to grow sun-worshippers like basil all year round, a grow light is a brilliant, and surprisingly affordable, investment.
You'll want to look for a full-spectrum LED light. These are designed to mimic natural sunlight, giving your plants exactly what they need for photosynthesis without sending your electricity bill through the roof. A simple clip-on lamp, positioned a few inches above your herbs for about 12-14 hours a day, can completely transform a sad, struggling plant.
The Art of Watering (Without Drowning)
I can't say this enough: more indoor herbs are killed by kindness than by neglect. Overwatering is, without a doubt, the number one mistake people make. It leads to root rot, a dreaded condition that very few plants ever come back from.
The golden rule is to check the soil before you even think about grabbing the watering can.
The best way to do this? The good old-fashioned ‘finger test’. Just stick your index finger about an inch down into the soil. If it feels even slightly damp, step away. If it feels dry, it’s time for a drink. When you do water, do it thoroughly until you see water running out of the drainage holes at the bottom, and then let it drain completely. Never, ever let your pot sit in a puddle of water.
Remember, different herbs have different tastes. Basil is famously thirsty and might need a top-up every few days, whereas woody Mediterranean types like rosemary and thyme actually prefer their soil to dry out completely between waterings. Getting to know the individual personalities of your herbs is the real secret to mastering your indoor garden.
Harvesting, Feeding and Long-Term Care
A thriving indoor herb garden is one you actually use. It’s the regular care, beyond just light and water, that turns a few pots on a windowsill into a constant source of fresh flavour. This means knowing exactly when and how to harvest, when to give them a little nutritional boost, and how to spot problems before they really take hold.
Getting these simple routines down will keep your plants healthy, productive, and generous for the long haul.
The Art of a Good Harvest
Harvesting isn't just about grabbing leaves for your dinner. It's a crucial part of plant care that actually encourages bushy, healthy growth. The key is to snip often, but to do it the right way.
A good rule of thumb is to never remove more than one-third of the plant at once. Taking too much can really stress it out.
For leafy herbs like basil and mint, the best technique is what gardeners call 'pinching back'. Once the plant is about six to eight inches tall, just use your fingers or a small pair of scissors to snip off the top set of leaves. Make sure you cut right above a point where two new leaves are sprouting out the sides. This clever trick tells the plant to send out two new stems from that spot, making it grow bushier instead of tall and leggy.
The approach changes slightly for other types of herbs:
- Chives and Parsley: Always take the outer leaves first, cutting them right down at the base. This lets the younger, inner leaves keep growing strong.
- Rosemary and Thyme: Just snip off the top couple of inches from a woody stem. This encourages the plant to branch out and become much fuller.
Regular, thoughtful harvesting is the single best thing you can do to promote a vigorous indoor herb garden. It stops plants from getting lanky and prevents them from flowering, which can often make the leaves taste bitter.
Feeding Your Indoor Herbs
While a good quality potting mix gives your herbs a great start, they will eventually need a top-up. Think of it as a much-needed meal to fuel their growth, especially during the busy spring and summer months.
A balanced, water-soluble liquid fertiliser is perfect for the job. Look for one that's made for edible plants or vegetables. During spring and summer, feed your herbs about once every two to four weeks, making sure to follow the dilution instructions on the package. It's really important not to overdo it—too much fertiliser can burn the roots and even spoil the flavour of the leaves.
When autumn rolls around, you can ease off, reducing feeding to once a month or stopping completely. As the light levels drop, the plants' growth naturally slows down, so they just don't need the extra energy. Knowing when to hold back is just as important as knowing when to feed. For more detailed advice on seasonal plant care, our guide on protecting plants in winter has some brilliant tips.
Dealing with Common Problems
Even with the best care, you might run into the odd pest or disease. The most common culprits indoors are tiny aphids or spider mites, which can sneak in on new plants or even through an open window.
If you spot any unwanted guests, act fast. For a minor infestation, a strong jet of water from a spray bottle can often be enough to knock them off.
If the problem is a bit more stubborn, a simple, organic solution is best for plants you're going to eat. Just mix a few drops of washing-up liquid with water in a spray bottle and apply it directly to the pests. It's a safe and effective way to keep your edible garden healthy and completely free from chemicals.
Common Questions About Indoor Herb Gardening
Even with the best of intentions, a few questions are bound to pop up when you start growing herbs indoors. Let's tackle some of the most common queries I hear, giving you clear, straightforward answers to help you troubleshoot with confidence and keep your green companions happy.
Why Are My Indoor Herbs Turning Yellow?
Seeing yellow leaves can be a bit alarming, but don't panic—it’s usually a simple fix. In almost every case, yellowing is a cry for help against overwatering, which is hands down the number one mistake with indoor herbs.
Soggy soil basically suffocates the roots, stopping them from absorbing oxygen and often leading to root rot.
Before you even think about watering, always do the "finger test." If the top inch of soil feels damp, just wait another day. It's also vital to make sure every pot has decent drainage holes. Less often, yellow leaves can point to a nutrient deficiency, especially if it's been a while since you last fed your plant.
Do I Really Need a Grow Light in the UK?
A bright, south-facing windowsill is fantastic during spring and summer. But let's be realistic—when it comes to the UK’s notoriously gloomy autumn and winter, a grow light is an absolute game-changer.
For sun-worshipping herbs like basil or rosemary, it’s often the difference between just about surviving and properly thriving. You don’t need a complicated, expensive setup either. A simple full-spectrum LED clip-on lamp, positioned a few inches above your plants for 12-14 hours a day, can make a world of difference to their health, colour, and flavour.
Even if you're working with a tiny area, there are some brilliant small space gardening ideas that can help you incorporate a bit of extra light.
How Often Should I Harvest My Herbs?
Harvesting your herbs often is one of the best things you can do for them. Seriously. It actively encourages them to grow bushier and become far more productive.
A good rule of thumb is to never harvest more than one-third of the plant at once. This gives it plenty of leaves to keep growing strong.
For leafy herbs like basil, start snipping the top sets of leaves once the plant is about 6-8 inches tall. This signals the plant to branch out from below, creating a much fuller shape. For others, like chives, you should cut the outer leaves right at the base.
This regular trim also helps prevent your herbs from flowering (a process called 'bolting'), which can make the leaves taste bitter. Consistent, thoughtful harvesting is your ticket to a continuous supply of fresh ingredients.


