
A truly spectacular garden doesn't happen by chance; it's the result of timely care and foresight. Knowing precisely what to do and when is the secret that separates a struggling plot from a thriving oasis. This is where a comprehensive gardening calendar becomes your most valuable tool, transforming reactive chores into a proactive strategy for year-round success. Forget generic advice that fails to account for the UK's unique and often unpredictable climate. We've created a detailed, 12-month guide designed to give you clarity and confidence, no matter the season.
This blueprint isn't just another checklist. It's a structured plan that focuses on the highest-impact tasks essential for a flourishing garden. We will guide you through the critical actions for each part of the year, from the foundational work of preparing your soil in the brisk air of spring to the final, protective tasks of cleaning and storing your tools in the quiet of winter. By aligning your efforts with this seasonal rhythm, you'll not only cultivate healthier, more resilient plants but also develop a deeper connection to your garden's natural cycle.
This organised approach ensures that key opportunities are never missed, whether it's the optimal window for planting autumn bulbs or the crucial moment for summer pruning to encourage a second flush of blooms. Following this expert gardening calendar will empower you to work smarter, not harder, leading to more bountiful harvests, vibrant flowers, and a garden that brings you joy throughout 2025 and beyond. Let's dig in.
1. The Spring Foundation: Mastering Soil Preparation and Testing
The success of your entire gardening year often hinges on the groundwork laid in early spring. Long before you sow a single seed, preparing your garden soil is the most critical task in any comprehensive gardening calendar. This foundational step goes far beyond simply turning over the earth; it involves a scientific assessment of your soil's health to create the perfect environment for plants to thrive. By understanding and amending your soil, you set the stage for vigorous growth, resilient plants, and abundant harvests later in the year.

This methodical approach is proven to deliver results. For centuries, historic kitchen gardens like that at Audley End House have relied on meticulous soil improvement to supply their estates. On a more local level, community allotments across the UK consistently report healthier, more productive plots after implementing annual soil preparation workshops, reinforcing the value of this crucial spring activity.
Why It's Essential
Proper soil preparation directly impacts a plant's ability to access water, oxygen, and nutrients. Compacted, nutrient-poor soil restricts root growth, leading to weak, stunted plants that are more susceptible to pests and diseases. Conversely, well-structured, fertile soil provides the ideal anchor for strong root systems, ensuring your plants have everything they need for the growing season ahead.
Key Insight: The Royal Horticultural Society (RHS) consistently emphasises that annual soil testing is a cornerstone of successful UK gardening. It transforms guesswork into a targeted, effective strategy for improvement.
How to Prepare and Test Your Soil
Follow these steps to give your garden the best possible start:
- Test Your Soil's pH: Begin by using a simple home testing kit to determine your soil's pH and nutrient levels. For the most accurate reading, test when the soil is slightly moist but not waterlogged. Take small samples from several different areas of your beds and mix them together to get a representative overview.
- Improve Structure and Fertility: Based on the test results, amend your soil. Most UK garden soils benefit from the addition of well-rotted organic matter like compost or manure. This improves drainage in heavy clay soils and helps retain moisture in sandy soils. If you're working with a smaller space, mastering home composting can provide a sustainable source of soil improver; find out more about composting for small gardens.
- Time It Right: Incorporate your chosen organic matter at least two to four weeks before planting. This allows it time to integrate properly with the existing soil.
- Check the Temperature: Don't rush to plant. Many seeds, particularly vegetables like runner beans and courgettes, require a minimum soil temperature to germinate. Use a soil thermometer to ensure the ground is consistently above 10°C (50°F) before sowing directly outdoors.
- Keep Records: Make a note of your soil test results each year. This allows you to track the impact of your amendments and make more informed decisions in your future gardening calendar.
2. Summer Watering and Irrigation Management
As summer's heat intensifies, strategic watering becomes one of the most vital tasks in your gardening calendar. Effective irrigation is about more than just preventing wilting; it’s a science of delivering the right amount of water at the right time to encourage deep, resilient root systems. Adopting smart watering practices conserves a precious resource, saves you time, and ensures your plants remain healthy and productive through the driest spells of the year.
The power of this targeted approach is globally recognised. Pioneering Israeli drip irrigation technology, developed by Simcha Blass, revolutionised agriculture by delivering water directly to plant roots, a method now used worldwide. On a smaller scale, California's famous drought-resistant gardens and the advanced water management systems at Cornwall's Eden Project showcase how efficient irrigation allows diverse and beautiful plant collections to flourish even under challenging conditions.
Why It's Essential
Improper watering, such as light daily sprinkling, encourages shallow roots that are vulnerable to heat stress and drought. This makes plants overly dependent on constant moisture and less able to fend for themselves. Strategic, deep watering, however, promotes the growth of extensive root networks that can access moisture from deeper in the soil, creating stronger, more self-sufficient plants that are better equipped to handle summer heatwaves.
Key Insight: Water conservation organisations like the Xerces Society advocate for water-wise gardening not just to save water, but because it actively builds healthier, more resilient garden ecosystems.
How to Manage Summer Watering
Follow these steps for efficient and effective irrigation during the peak growing season:
- Water Deeply, Not Daily: Instead of a brief daily sprinkle, water your garden beds thoroughly two to three times per week. This ensures moisture penetrates deep into the soil profile, encouraging roots to grow downwards.
- Time Your Watering: The best time to water is early in the morning. This minimises water loss through evaporation and allows foliage to dry before evening, reducing the risk of fungal diseases like powdery mildew.
- Apply Mulch: Spread a 2-3 inch layer of organic mulch, such as bark chippings or compost, around your plants. Mulch is critical for conserving soil moisture, suppressing weeds that compete for water, and keeping the soil cool.
- Group Plants Wisely: When planning your garden, group plants with similar water needs together. This practice, known as hydrozoning, allows you to water more efficiently and prevents over or under-watering certain plants.
- Check Before You Water: Don't just water on a schedule; check if your plants actually need it. The simplest method is to insert your finger 2-3 inches into the soil. If it feels dry at that depth, it’s time to water.
3. Fall Harvest and Preservation
The culmination of a season's hard work, the autumn harvest is a pivotal event in any gardener's calendar. It involves the systematic collection, processing, and preservation of your garden produce at its peak ripeness. This critical task not only locks in maximum flavour and nutritional value but also extends the enjoyment of your homegrown food throughout the winter months, reducing waste and deepening your connection to the food you grow.

This practice is steeped in history and proven effectiveness. For generations, traditional root cellars have been used to store winter vegetables, a method still effective today. More modern approaches, popularised by organisations like the National Center for Home Food Preservation and experts such as fermentation guru Sandor Katz, have revived and refined these skills. Evidence of its value is clear, with UK Master Gardener programmes often reporting significant food cost savings through effective home preservation.
Why It's Essential
Properly timing your harvest and choosing the right preservation methods are crucial for maximising your yield's potential. Harvesting too early or too late can compromise flavour and texture, while improper storage can lead to spoilage. Effective preservation allows you to enjoy the taste of summer sunshine in the depths of winter, providing a sustainable and rewarding outcome for your gardening efforts. It transforms a seasonal hobby into a year-round source of high-quality food.
Key Insight: The Women's Institute (WI) has long championed the skills of preserving, or "putting by." Their annual competitions and local workshops underscore that mastering preservation is not just a practical skill but a celebrated part of British horticultural heritage.
How to Harvest and Preserve
Follow these steps to make the most of your autumn bounty:
- Time Your Harvest: For many vegetables like beans and leafy greens, harvest in the cool of the early morning. This is when their sugar content is highest and they are at their most crisp and flavourful.
- Process Promptly: Aim to process or store your produce within 24 hours of picking. The quicker you can or freeze your crops, the more nutrients and quality you will retain.
- Start Simple: If you are new to preserving, begin with easy methods like freezing or making simple jams and chutneys. Techniques like pressure canning or multi-stage pickling can be explored as your confidence grows.
- Follow Safety Guidelines: Food safety is paramount. Always use tested recipes and follow official guidelines, such as those provided by the National Center for Home Food Preservation, to prevent foodborne illness.
- Label Everything: Meticulously label every jar, bag, and container with the contents and the date it was preserved. This simple step prevents confusion and ensures you use older items first.
4. Winter Garden Cleanup and Tool Maintenance
As the growing season draws to a close, a thorough winter cleanup becomes a vital entry in your gardening calendar. This is not merely about tidying up; it's a strategic process of removing potential threats, protecting vulnerable plants, and preparing your tools for the year ahead. A well-executed winter cleanup prevents the carryover of pests and diseases, ensures your valuable equipment remains in peak condition, and sets the stage for a healthy, vigorous garden come spring.
This methodical approach has deep historical roots, from the meticulous winter preparations in traditional Japanese gardens to the systematic practices in European monastery gardens. Modern sustainable gardening balances this cleanup with habitat preservation, and professional landscape maintenance companies report that proper winter care can extend tool life by as much as 50 percent, demonstrating its practical and economic value.
Why It's Essential
Leaving spent and diseased plant material in your beds over winter creates a perfect refuge for fungal spores and overwintering pests like aphids and slugs. When spring arrives, these problems emerge ready to attack new, tender growth. Furthermore, neglecting your tools leads to rust, dull blades, and mechanical failure, which makes gardening tasks more difficult and can damage plants with rough, unclean cuts.
Key Insight: Many gardeners now adopt a 'tidy but not sterile' approach. The Wildlife Trusts advocate leaving some healthy seed heads and hollow stems to provide crucial food and shelter for beneficial insects and birds throughout the winter.
How to Clean Up and Maintain Tools
Follow these steps for an effective end-of-season routine:
- Be Selective with Debris: Remove and dispose of any plant material showing signs of disease like rust, mildew, or black spot. Healthy stems, leaves, and seed heads can be chopped up and added to the compost heap or left as a natural mulch and wildlife habitat.
- Protect Tender Plants: Apply a thick layer of protective mulch, such as bark chips or straw, around the base of tender perennials, shrubs, and roses. This insulates the root systems from the harshest winter frosts.
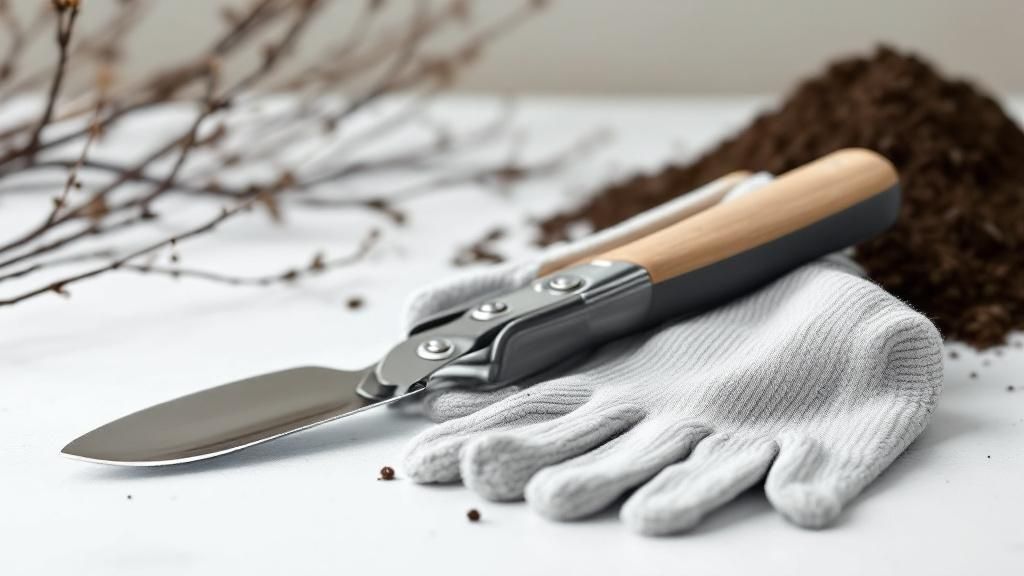
- Care for Your Tools: Scrape off all mud and debris from spades, forks, and hoes. Clean the metal parts with a wire brush and wipe them down with an oily rag to prevent rust. This simple step is a cornerstone of garden tool longevity.
- Sharpen and Service: Take the time to sharpen the blades on your secateurs, loppers, and shears. Clean cuts are healthier for your plants and make pruning less of a chore. Check any petrol-powered tools and service them as needed.
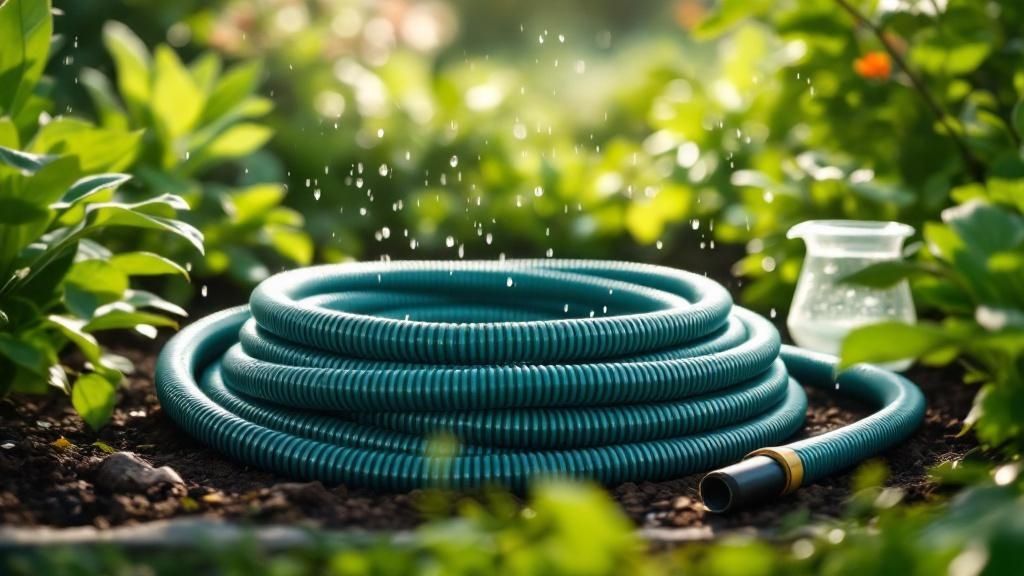
- Drain and Store Hoses: Completely drain water from all hoses, sprinklers, and irrigation systems to prevent them from splitting as the water freezes and expands. Store them in a shed or garage away from sunlight.
5. Spring Seed Starting and Propagation
Getting a head start on the growing season is a game-changer for any UK gardener, and indoor seed starting is the key to unlocking this potential. This technique, a crucial entry in any ambitious gardening calendar, involves germinating seeds in controlled indoor conditions, typically 6 to 12 weeks before the last frost. It allows you to nurture delicate seedlings into strong, healthy young plants, ready for transplanting outdoors the moment conditions are right. This gives you a significant advantage, effectively extending your harvest period and providing access to a far wider range of plant varieties than those available as starts from garden centres.
This method is proven by gardening pioneers and modern research alike. Eliot Coleman’s work on four-season farming in challenging climates demonstrated how early propagation can dramatically extend productivity. Similarly, data from university extension services frequently shows germination success rates exceeding 85% when proper indoor seed-starting methods are followed, confirming its reliability for the home gardener.
Why It's Essential
Starting seeds indoors bypasses the unpredictable nature of early spring weather. It protects vulnerable seedlings from late frosts, heavy rain, and pests, ensuring a higher survival rate. This controlled environment allows you to cultivate tender crops like tomatoes, peppers, and chillies, which require a long, warm growing season that the typical UK climate doesn't always provide. Ultimately, it gives you greater control, leading to earlier and more abundant yields.
Key Insight: Organisations like the Heritage Seed Library champion indoor propagation as a vital method for preserving rare and heirloom vegetable varieties, many of which require an early start to mature successfully in the UK.
How to Start Seeds and Propagate
Follow these steps for successful indoor germination:
- Use Sterile Seed Starting Mix: Always begin with a sterile, fine-textured seed-starting compost to prevent damping-off disease, a fungal issue fatal to new seedlings. Avoid using heavy garden soil.
- Maintain Consistent Temperature: Most seeds germinate best when the soil temperature is kept between 18-24°C (65-75°F). A heated propagator or a warm spot on a windowsill can provide the necessary warmth.
- Provide Adequate Light: As soon as seedlings emerge, they need 12-16 hours of bright light daily. A south-facing windowsill may suffice, but affordable LED grow lights will prevent seedlings from becoming weak and "leggy".
- Harden Off Before Planting: Acclimatise your young plants to outdoor conditions gradually over 7-10 days. Start by placing them outside for a few hours in a sheltered spot, increasing the duration each day. This process is essential to prevent transplant shock. If you're new to growing your own food, get more guidance on how to start a vegetable garden.
- Keep Detailed Records: Label your trays clearly and keep a log of what you sowed and when. This helps you track germination times and plan your transplanting schedule, refining your gardening calendar for future years.
6. Summer Pruning and Deadheading
While summer is often seen as a time for relaxation and enjoying the garden, it is also a critical period for active maintenance. Strategic summer pruning and deadheading are essential tasks in any mid-year gardening calendar, ensuring your plants remain healthy, productive, and visually appealing. This practice involves the selective removal of spent flowers, excessive growth, and any diseased parts to channel the plant's energy into producing more blooms and stronger growth rather than setting seed.
This ongoing summer task is the secret behind the world's most impressive displays. Famous rose gardens, like those at Mottisfont Abbey, demonstrate how masterful summer pruning encourages repeat flowering and maintains plant vigour. Similarly, the long-lasting, vibrant English perennial borders celebrated at RHS Garden Wisley rely on diligent deadheading to provide a continuous spectacle of colour throughout the season. Studies have even shown that consistent deadheading can extend a plant's bloom period by up to 40%.
Why It's Essential
Without summer pruning and deadheading, many flowering plants will complete their life cycle prematurely. Once a flower is pollinated, the plant redirects its energy from producing more blooms to creating seeds. By removing these spent flowers, you trick the plant into flowering again. Pruning also improves air circulation within the plant, which is crucial for preventing fungal diseases like powdery mildew, a common problem during humid UK summers.
Key Insight: The National Trust advises that regular deadheading is one of the most effective, low-effort ways to boost the performance and extend the flowering season of bedding plants, roses, and perennials.
How to Prune and Deadhead Effectively
Follow these steps to keep your garden looking its best all summer long:
- Be Precise with Deadheading: To encourage new growth, snip off spent flowers just above the next healthy leaf node or developing flower bud. For single-stem flowers like daffodils (earlier in the year) or alliums, remove the entire flower stalk down to the base.
- Use Clean, Sharp Tools: Always use clean, sharp secateurs or snips. This ensures a clean cut that heals quickly and, most importantly, prevents the transmission of diseases from one plant to another. Wipe blades with a disinfectant between plants if you are cutting out diseased material.
- Time It Well: The best time to prune is in the early morning or on an overcast day when plants are fully hydrated and less susceptible to stress. Avoid pruning during the intense heat of a summer afternoon.
- Practise Restraint: A good rule of thumb is to remove no more than 25% of the plant's total foliage at one time during a summer prune. This avoids sending the plant into shock.
- Think of Wildlife: Consider leaving some ornamental seed heads on plants like echinacea, rudbeckia, and teasels towards the end of summer. These provide a valuable food source for birds like goldfinches during the autumn and winter months.
7. Fall Planting of Trees, Shrubs, and Bulbs
While spring is often associated with new beginnings, autumn offers a superior window for establishing the long-term backbone of your garden. Planting trees, shrubs, and spring-flowering bulbs in the autumn is a strategic task in any well-planned gardening calendar. This approach leverages cooler air temperatures and warm, moist soil, allowing plants to develop strong root systems without the stress of summer heat. This head start ensures they are more resilient and ready for vigorous growth when spring arrives.
This method is globally recognised for its effectiveness. The world-renowned Dutch bulb industry, responsible for millions of tulips, daffodils, and hyacinths, relies entirely on autumn planting. Similarly, landscape architects and botanical gardens often schedule the planting of major specimens like Japanese maples for the autumn to ensure higher success rates. University studies have backed this up, showing significantly better survival rates for trees planted in autumn compared to spring.
Why It's Essential
Planting in autumn gives trees and shrubs a crucial establishment period. The soil is still warm enough from the summer to encourage root growth, while the cooler air reduces water loss from leaves, minimising transplant shock. When spring arrives, these plants already have an established root system, enabling them to absorb water and nutrients efficiently and better withstand the first summer heatwave. For bulbs, a period of cold is essential to trigger the flowering process for the following spring.
Key Insight: The Arbor Day Foundation reports that autumn-planted trees can have up to a 90% success rate, as the focus is entirely on root establishment rather than simultaneous leaf and flower production.
How to Plant in the Autumn
Follow these steps for successful autumn planting:
- Time It Right: Aim to plant new trees and shrubs at least six to eight weeks before the ground typically freezes in your area. This gives the roots ample time to grow and anchor themselves.
- Check Soil Temperature for Bulbs: Plant spring-flowering bulbs like tulips and daffodils when the soil temperature is consistently below 15°C (60°F). This cold period is necessary for them to bloom beautifully in the spring. If you're looking for ideas on what to plant, you can find a helpful guide about what to plant now in the UK.
- Dig the Perfect Hole: Prepare a hole that is two to three times wider than the plant's root ball but no deeper. This encourages roots to spread outwards into the surrounding soil.
- Mulch for Protection: Apply a 5-7cm (2-3 inch) layer of organic mulch, such as bark chips or compost, around the base of newly planted trees and shrubs. Be sure to leave a small gap around the stem or trunk to prevent rot.
- Water Thoroughly: Water new plantings deeply immediately after planting to settle the soil and eliminate air pockets. Continue to water regularly, especially during dry spells, until the ground freezes.
7-Stage Gardening Calendar Comparison
From Calendar to Creation: Your Thriving Garden Awaits
We've journeyed through the entire gardening year, mapping out a comprehensive plan from the first hopeful days of spring to the quiet reflection of winter. This detailed gardening calendar is designed to be more than a simple to-do list; it's a strategic framework for partnering with the seasons, ensuring you provide the right care at precisely the right time. By moving beyond reactive gardening and embracing a proactive, seasonal rhythm, you set the stage for a garden that doesn't just survive, but truly thrives.
The core principles we've explored, such as attentive soil preparation, strategic watering, and timely planting, are the foundational pillars of a successful garden. They work in concert, creating a virtuous cycle where healthy soil supports robust plants, which in turn are better equipped to handle pests, diseases, and the unpredictable British weather. Let's distil the most critical takeaways from our year-long guide.
Your Actionable Blueprint for a Flourishing Garden
The essence of effective gardening lies in understanding that each season presents a unique opportunity. Your primary takeaway should be this: timing is everything. Planting a seed or pruning a shrub a few weeks too early or too late can make a significant difference in its success.
Here are the pivotal concepts to integrate into your gardening practice:
- Embrace Proactive Soil Health: Don't wait until planting day to think about your soil. The work you do in early spring, amending with compost and conducting soil tests, pays dividends all year long. Healthy soil is the single most important investment you can make in your garden.
- Water with Intelligence, Not Just Instinct: Move away from the 'splash-and-dash' approach. Deep, infrequent watering that encourages strong root growth is far superior to a daily light sprinkle. Mastering irrigation, especially during the peak summer months, is a game-changer for plant resilience.
- View Autumn as a Beginning, Not an End: While it marks the end of the summer harvest, autumn is a crucial planting window for the future. The trees, shrubs, and bulbs you plant in the cooler, damp soil will establish strong root systems over winter, giving them a powerful head start for the following spring.
- Make Winter a Productive Pause: A tidy winter garden isn't just about aesthetics; it's about disease prevention and preparation. Clearing debris removes overwintering sites for pests, and maintaining your tools ensures you're ready to hit the ground running when the first signs of spring appear.
From Guide to Garden: Making It Your Own
This gardening calendar provides the 'what' and 'when', but your unique garden provides the 'how' and 'why'. No two gardens are identical. A sheltered, south-facing courtyard in Cornwall will have a different microclimate to an exposed, north-facing plot in the Scottish Highlands.
Key Insight: The most valuable tool you possess is observation. Use this calendar as your foundational guide, but always pay close attention to your specific conditions. Notice where the sun lingers, which areas are prone to waterlogging, and how your specific plants respond.
Your next steps are clear. Take this monthly framework and begin to adapt it. Purchase a dedicated gardening journal or use a digital app to record your own observations. Note down your specific planting dates, when you first spot pests, and which varieties perform exceptionally well. Over time, you will build a personalised gardening calendar that is perfectly attuned to your patch of earth.
This journey transforms gardening from a series of chores into a rewarding, creative process. It connects you to the natural world in a profound way, offering a tangible sense of accomplishment with every new shoot, bloom, and harvest. With this strategic calendar as your guide and a willingness to learn from your own green space, the vibrant, productive, and beautiful garden you envision is not just a possibility; it's an inevitability. Now, it's time to get your hands dirty and bring that vision to life.


