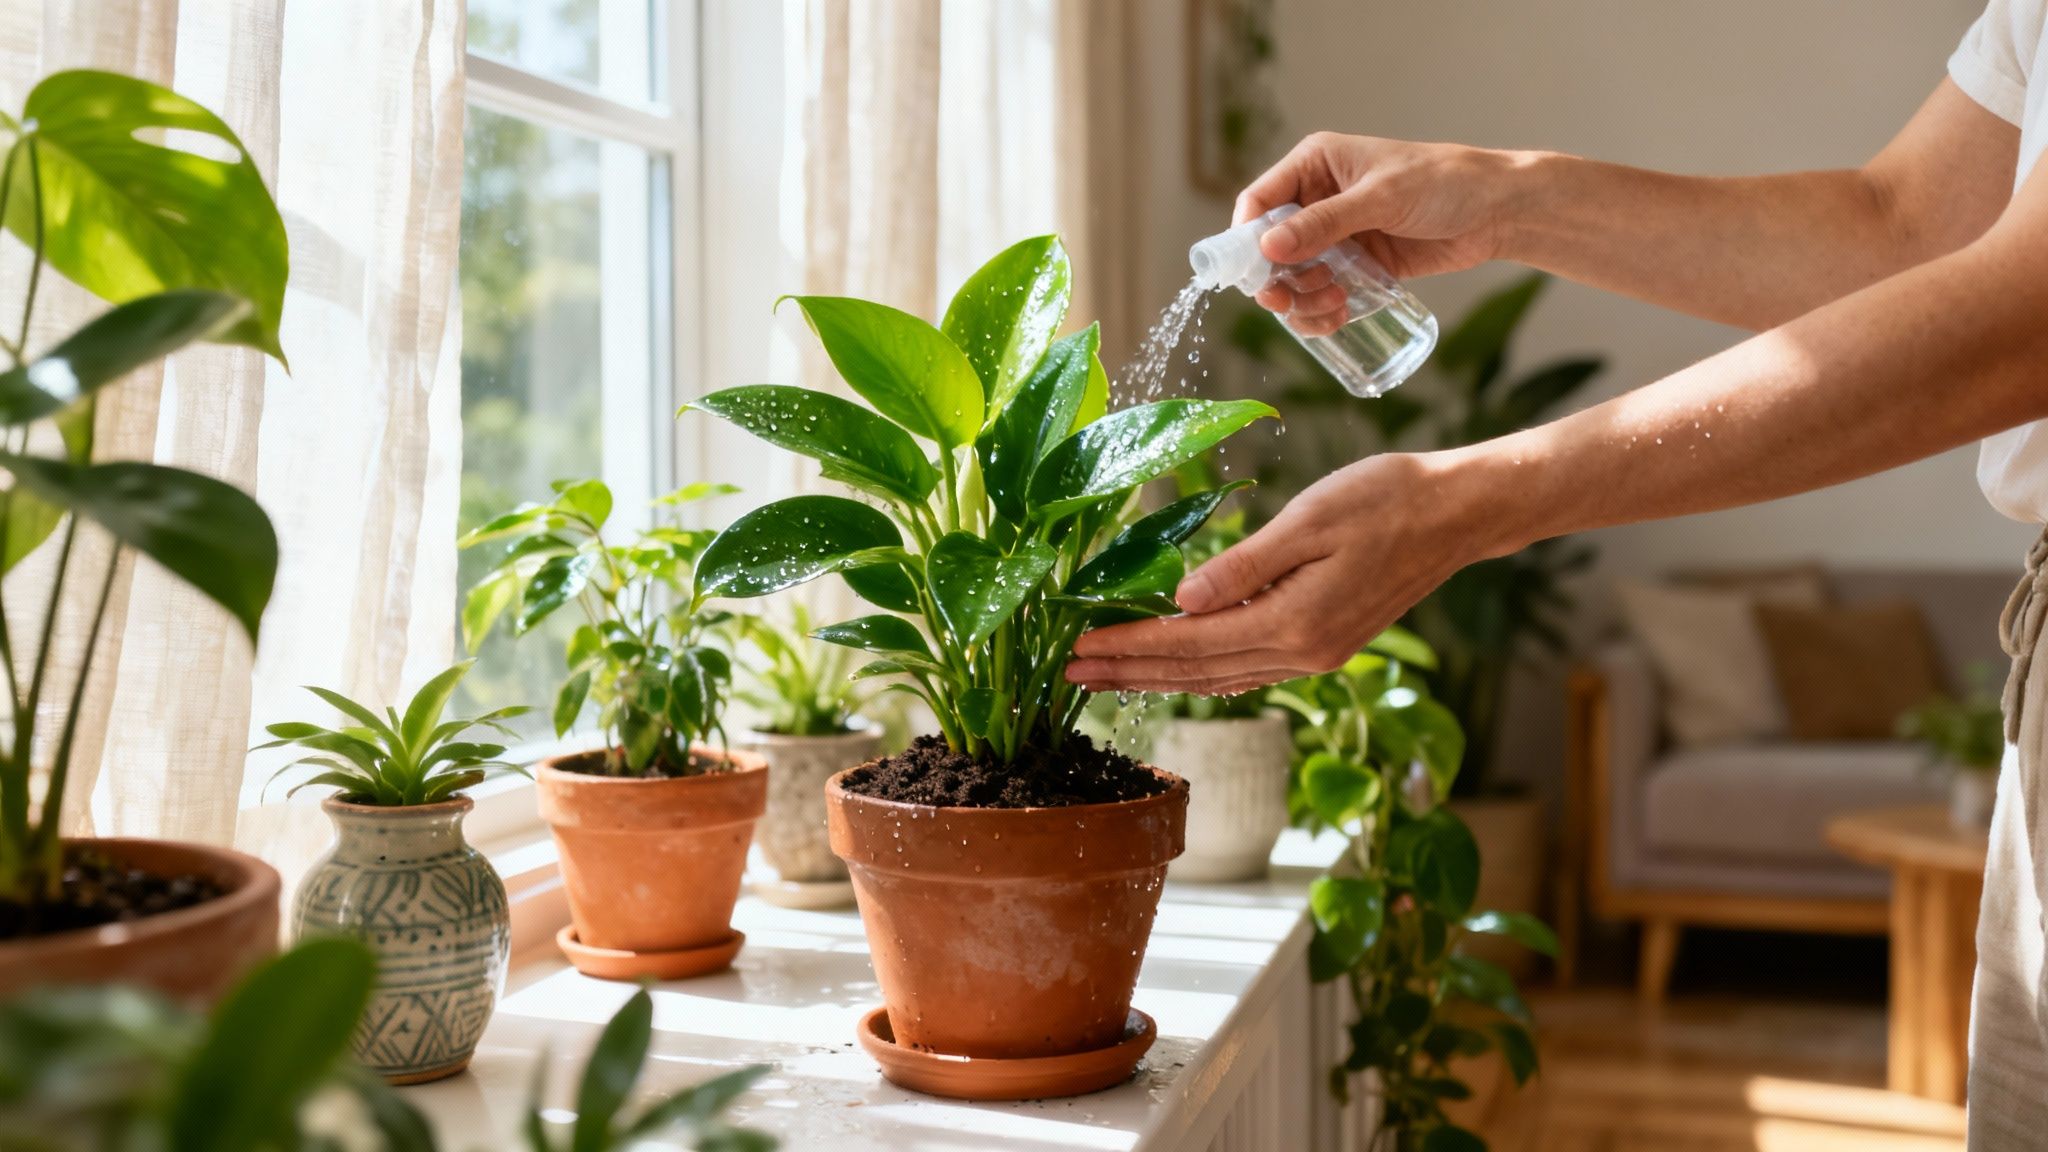
Pruning your Japanese maple is a subtle art. You need a gentle hand and an understanding that less is almost always more. We're not trying to force the tree into some unnatural shape; the goal is to gently guide and enhance its natural elegance and health. The best time to do this is during its dormant season, typically between November and January here in the UK.
Why Pruning Your Japanese Maple Is So Important
Think of pruning as less of a haircut and more of a conversation with your tree. It's about much more than just keeping it tidy – you're looking after its long-term health, structure, and overall vitality. For those of us gardening in the UK, knowing why you're making each cut is vital, especially with our climate.
Our damp, often mild winters can be a breeding ground for fungal diseases. Good pruning is your best defence.
Enhancing Health and Preventing Disease
When you carefully thin out a few congested branches, you're letting air flow freely through the canopy. This means the leaves dry out much faster after a downpour, which drastically cuts down the risk of common problems like powdery mildew or fungal leaf spots. It's a simple, preventative step that makes for a much happier, more resilient tree.
A well-pruned tree is also a stronger one. Over time, branches can start growing in awkward directions, rubbing against each other. This friction causes small wounds in the bark – basically an open door for pests and diseases to get in.
Thoughtful pruning isn't about making big, dramatic changes. It’s about making small, precise cuts that guide the tree towards a healthier future. It’s a partnership, ensuring its graceful form can be enjoyed for decades to come.
Building a Strong, Lasting Structure
The real beauty of pruning a Japanese maple is in celebrating its natural, elegant form. It’s not about imposing a rigid shape, but about making tiny adjustments now to prevent big problems later. The main benefits are:
- Removing Weak Growth: This helps the tree put its energy into developing strong, healthy branches.
- Preventing Structural Flaws: You can correct crossing or badly angled branches before they grow large enough to snap in strong winds.
- Encouraging Natural Form: It allows the unique, sculptural character of your particular Acer variety to really stand out.
This careful approach helps your Japanese maple build a strong framework that can handle whatever the British weather throws at it. It turns a seasonal chore into a genuine act of care. Once you understand what your Acer needs, you can make every cut with confidence, setting it up for a lifetime of beauty in your garden.
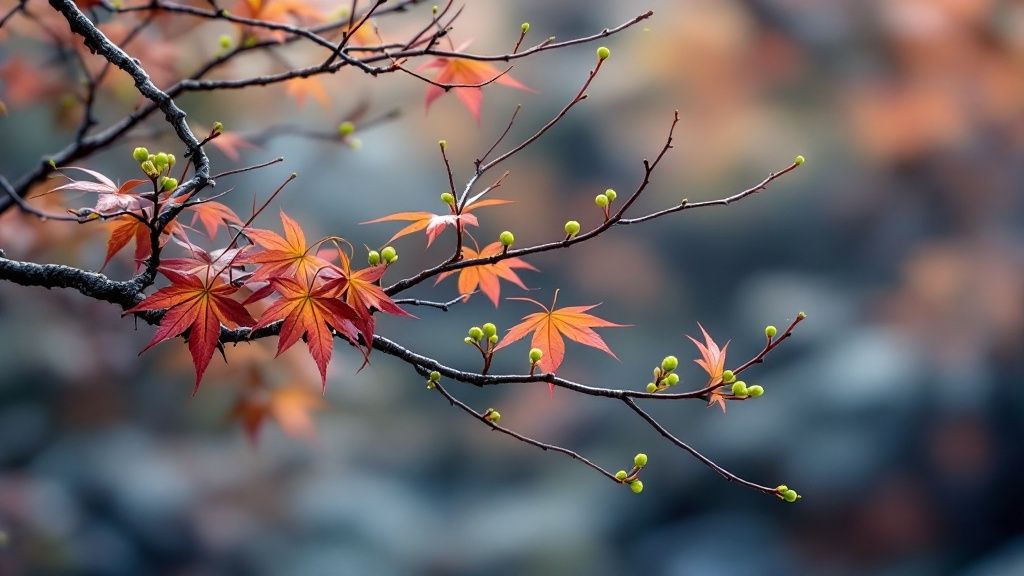
When to Prune Japanese Maples in the UK

When it comes to pruning a Japanese maple, timing isn't just important—it's everything. Get it right, and you'll have a graceful, healthy tree. Get it wrong, and you risk stressing it out, or worse, encouraging weak growth. In the UK, with our famously fickle weather, the key is to work with the tree's natural rhythm, not against it.
The golden rule you'll always hear is to prune when the tree is dormant. This is when it's resting for the winter, and the sap has retreated down to the roots. Cutting into branches during this period minimises shock and avoids the dreaded 'bleeding' of sap that happens when the tree is actively growing.
Think of the dormant season as your main window for making the big structural decisions that will define the tree's shape for years to come.
The Ideal Winter Pruning Window
For most of us in the UK, the prime time for any serious pruning falls between late November and the end of January. In these cold, quiet months, the tree is properly dormant, and the risk of sap loss is at its absolute lowest.
This is your opportunity to get in and do the heavy lifting:
- Take out any large branches that are dead, damaged, or diseased.
- Sort out any structural problems, like branches that are crossing over and rubbing against each other.
- Carefully thin out congested areas to let more light and air into the canopy.
One word of caution, though: try to pick a mild, dry day. Avoid pruning during a hard frost or a serious cold snap. Frozen wood is brittle and can easily split or crack, leaving a messy wound that the tree will struggle to heal properly.
A classic mistake is getting too eager and pruning in early autumn right after the leaves have fallen. The tree might look like it's asleep, but it often hasn't fully shut down. Be patient and wait for the proper cold to arrive.
Why a Late Spring Trim Can Be a Good Idea
While winter is for major surgery, there's a growing case for doing some light, cosmetic work in late spring. This might sound wrong, but the logic is all about how quickly a tree can heal itself.
Botanical research has shown that wounds actually seal over much faster in warmer weather. When temperatures are around 15 °C—pretty typical for May in the UK—a Japanese maple can heal a small cut in about three weeks. That's a lot quicker than in the cold, damp conditions of winter, which can leave the cuts vulnerable to infection.
So, what's the takeaway? Late spring is perfect for the delicate finishing touches.
Use this time for:
- Snipping off tiny twigs that spoil the tree's silhouette.
- Removing any new shoots growing in awkward directions.
- Fine-tuning the shape once the leaves are out, as you can see exactly how it looks.
What to Do If You've Missed the Boat
We've all been there. Life gets in the way, and suddenly it's February or March, and you realise you never got around to pruning. If this happens, the best thing you can do is hold off.
If you prune just as the sap is starting to rise for spring, the tree will almost certainly bleed from the cuts. While it’s not usually a fatal mistake, it drains a huge amount of energy just when the tree needs it most to produce new leaves.
If you’ve missed the main winter window, just wait. Deal with anything that's clearly dead or dangerous, but save all the other structural work for the following winter. A good UK gardening calendar can be a brilliant tool to help you stay on top of seasonal jobs like this.
UK Pruning Calendar for Japanese Maples
This calendar should help you feel confident about picking up the secateurs at the right moment, ensuring your Japanese maple stays both beautiful and healthy.
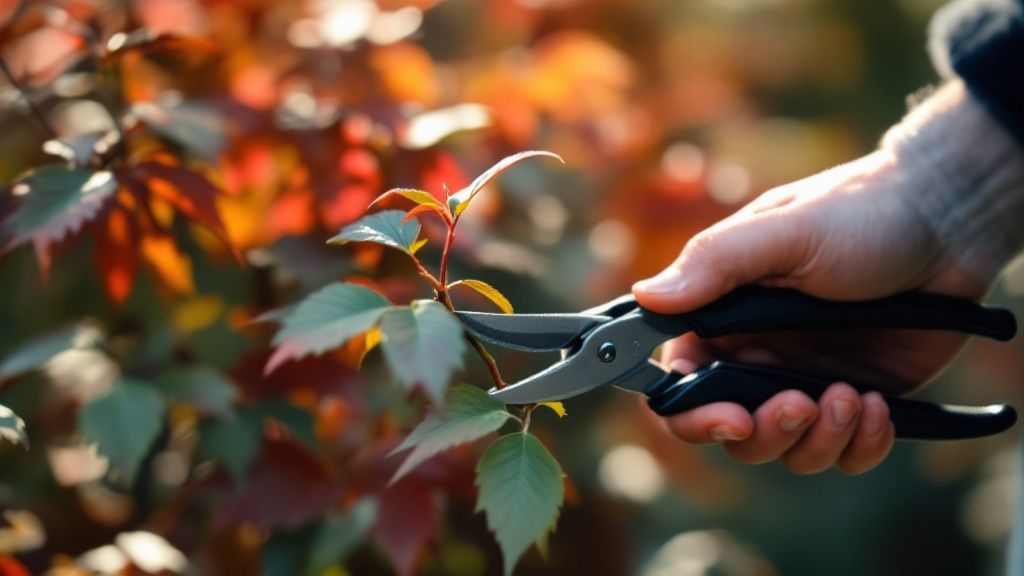
The Right Tools for Clean, Healthy Cuts
If you want to prune your Japanese maple properly, you’ve got to start with the right kit. Using a blunt or unsuitable tool is one of the quickest ways to cause damage. It doesn't just make your life harder; it crushes the plant’s delicate tissues, leaving messy wounds that are slow to heal and practically invite disease in.
The aim is to make clean, almost surgical cuts that the tree can seal over quickly. Think of it like a chef choosing the right knife – you don't need a massive arsenal, just a few key pieces chosen for their sharpness and precision. A small investment here will pay dividends for the health and beauty of your Acer.
Your Essential Pruning Toolkit
For the majority of the work, a good pair of bypass secateurs will be your best friend. They work just like scissors, with one blade gliding past the other to make a clean slice. They're perfect for any small branches up to about half an inch thick. Avoid anvil secateurs at all costs – they crush one side of the stem, which is the last thing you want.
When you come across branches that are a bit too much for your secateurs, it's time to bring out the bypass loppers. These are basically long-handled secateurs, giving you that extra bit of leverage to tackle branches up to about an inch and a half thick. The long handles also give you a bit more reach, letting you get further into the canopy without wobbling on a ladder.
For anything bigger, you'll need a pruning saw. A small, curved saw is ideal because it helps you get into tight spots without accidentally nicking nearby branches. Find one with a sharp, fine-toothed blade designed for a smooth pull-stroke – it makes for a much cleaner cut.
The Step Everyone Forgets: Sterilisation
Before you even think about making that first cut, get into the habit of sterilising your tools. It’s absolutely non-negotiable, especially in our damp UK gardens where fungal and bacterial diseases can spread like wildfire.
A quick wipe of the blades with some rubbing alcohol or a household disinfectant is all it takes. Doing this between plants prevents you from accidentally carrying pathogens from one to another.
Think of it this way: you wouldn't want a surgeon operating without washing their hands. Skipping this step introduces a huge, unnecessary risk to your tree’s health.
Taking thirty seconds to wipe down your blades is a cornerstone of responsible gardening. It protects not just your Japanese maple, but every other plant in your garden, too.
If you're curating a space with a mix of species, maintaining the health of the entire collection is key. You can find some brilliant inspiration for creating a healthy, vibrant space in our guide to garden border plant ideas. By keeping your tools clean, you’re not just pruning one tree; you’re safeguarding your entire garden ecosystem.
How to Make the Right Pruning Cuts
With your timing sorted and tools sharp and clean, it's time to actually approach the tree. This is where theory meets practice, but remember the golden rule: less is always more. The whole point is to gently enhance your maple's natural, elegant form, not to chop it into an artificial shape.
Every single cut needs a purpose. Before you even think about closing those secateurs, ask yourself why you're removing that particular branch. A deliberate, thoughtful approach beats impulsive snipping every time and ensures each cut benefits the tree's health and beauty.
Start With The Three Ds
Your first pass should be a simple bit of housekeeping. I'm talking about looking for any branches that are dead, damaged, or showing signs of disease. Gardeners call this tackling the 'three Ds', and it’s the cornerstone of good pruning.
- Dead Wood: This stuff is usually easy to spot. It’ll be brittle, often a different colour to the healthy wood, and won't have any buds. If you bend it, it’ll snap.
- Damaged Wood: Keep an eye out for branches that are cracked or broken, maybe from wind or heavy snow. These are just open invitations for pests and disease to move in.
- Diseased Wood: Things like cankers, odd-looking growths, or discoloured patches of bark are all red flags. It's vital to cut these back into healthy, clean wood. Make sure you sterilise your tools after every single cut here to avoid spreading the problem around.
Getting this wood out of the way first not only cleans up the tree's appearance but, more importantly, removes potential sources of infection. It also gives you a much clearer view of the tree's true structure before you start making bigger decisions. After a good clean, proper tool storage is key; our guide on garden tool storage ideas has some handy tips to keep them in top shape.
Deal With Crossing and Rubbing Branches
Once the obvious problems are gone, it’s time to look for structural issues. The most common problem you'll find is branches that cross over and rub against each other. Over time, that friction wears away the protective bark, creating wounds that can lead to weakness and decay.
Take a step back and walk a slow circle around your tree. Look at its silhouette from every angle. You're trying to spot any branches that are growing back towards the centre or are getting in the way of a stronger, better-placed branch.
When you find two that are crossing, you have to pick a winner. I almost always remove the weaker, smaller, or more awkwardly positioned of the two. This one simple cut can make a huge difference to the tree's structure and head off future problems.
Making a Proper Thinning Cut
The signature move for pruning a Japanese maple is the thinning cut. This means taking an entire branch off, right back to where it started on a larger branch or the main trunk. This is how you preserve that natural, airy form we all love.
The trick is to cut just outside the branch collar – that slightly swollen-looking ring of tissue where the branch joins the trunk. Don't cut flush with the trunk, but don't leave a long stub either.
The branch collar is packed with special cells that heal over the wound. Cutting into it hobbles the tree's natural defence system, while leaving a stub is an open invitation for rot. A clean cut just outside this collar is the single most important thing for quick healing.
This technique opens up the canopy, letting more air and light in without triggering a crazy panic-growth of new shoots. It's what helps to reveal that beautiful, layered branch structure that makes Japanese maples so special.
Where to Make The Final Cut
Sometimes you just want to shorten a branch, not remove it completely. Where you make that cut is just as important. You should always cut about ¼ inch above a bud or a side branch that is facing outwards, away from the centre of the tree.
Why? Because the new growth will follow the direction that bud is pointing.
By choosing an outward-facing bud, you encourage the new shoot to grow out and away, maintaining that open, graceful structure. Cut to an inward-facing bud, and the new growth will just head straight back into the middle of the tree, creating the very congestion you were trying to fix. Getting these small, precise cuts right is the real art of gently guiding your tree's future.
Common Pruning Mistakes to Avoid
Even with the best of intentions, it’s surprisingly easy to make a wrong move when pruning a Japanese maple. These common slip-ups can stress the tree, ruin its beautiful shape, and even invite disease. Honestly, learning what not to do is just as important as mastering the right techniques.
Think of this as learning from others' past gardening blunders. By sidestepping these frequent errors, you’ll be well on your way to helping your tree become the healthy, vibrant centrepiece of your garden.
The Problem with Over-Pruning
One of the most damaging mistakes is simply getting a bit too carried away with the loppers and removing too much at once. It's so tempting to try and tackle an overgrown tree in one go, but this often sends it into a state of shock.
When a maple feels threatened like this, its survival instinct kicks in. It throws out a flurry of weak, vertical shoots called watersprouts, which completely disrupts the tree's natural, elegant form. You're left with a stressed-out tree that looks more like a bristly mess than a graceful specimen.
A good rule of thumb is to never remove more than 20-25% of a Japanese maple's living canopy in a single year. Patience is key; a slow, considered approach always wins out.
This aggressive pruning also strips away a huge percentage of the tree’s leaves—its food-making factories—weakening it significantly. While some UK guides suggest mature maples can handle losing up to a third of their canopy, this should be done gradually over several years. For more on this sustainable approach, you can discover more insights about maple pruning on japanesemaplelovers.com.
Cutting Flush or Leaving Stubs
Where you make your cut is absolutely crucial for the tree's ability to heal itself. Two mistakes, which are complete opposites, are equally harmful: cutting flush against the trunk and leaving a long, awkward stub.
- Flush Cuts: When you remove a branch right up against the trunk, you’re slicing into the branch collar. This slightly swollen area is packed with specialised cells the tree needs to seal the wound. Damage it, and you create a large, slow-healing gash that’s an open invitation for decay.
- Leaving Stubs: On the other hand, leaving a long piece of the branch sticking out is just as bad. The tree can't seal over this dead-end, so it just sits there and eventually starts to rot, providing a perfect entry point for pests and fungal diseases to get into the heart of your tree.
The goal is always to find that sweet spot just outside the branch collar, leaving it intact to work its healing magic.
Pruning at the Wrong Time of Year
Timing is everything. Pruning a Japanese maple in late winter or early spring as it's waking up is a classic mistake. The sap pressure is building rapidly, and any cut you make will cause it to "bleed" profusely.
While this sap bleeding isn't usually fatal, it drains the tree of precious energy it desperately needs for pushing out new leaves and growth. The ideal window for any major structural pruning is during its deepest dormancy, from November to January.
For minor, corrective snips, you can do those in late spring or early summer once the leaves have fully unfurled. This careful timing also helps the tree prepare for the colder months ahead; our guide on protecting plants in winter has more tips on getting your garden ready.
Your Japanese Maple Pruning Questions Answered

Even with the best instructions, sometimes you find yourself standing in front of your tree, secateurs in hand, feeling a bit stuck. It happens to all of us. This is where we tackle those common dilemmas and tricky "what if" moments with some straight-talking advice.
Think of this as your quick-reference guide for making confident cuts that will keep your tree healthy and looking its best for years to come.
Can I Prune a Japanese Maple That Has Never Been Touched?
Absolutely. Tackling a tree that’s been left to its own devices can feel daunting, but it’s entirely possible. The key here is patience. You can't undo years of neglect in one go without seriously shocking the tree. It’s far better to see it as a gentle restoration project over two or three seasons.
Start during the dormant season with the absolute basics: get rid of any wood that's dead, damaged, or looks diseased. Then, hunt down branches that are crossing over and rubbing against each other – those friction points are open invitations for problems.
Once you’ve done that initial clean-up, step back. Have a proper look at the tree's overall structure. Pick just one or two of the worst-offending branches to remove completely. The golden rule is to never take more than 20-25% of the total canopy in a single year. This slow-and-steady approach lets the tree recover and gives you a much better canvas to work with next winter.
What Should I Do If My Tree Is Bleeding Sap?
Seeing sap weeping from a fresh cut is alarming, but it’s rarely the catastrophe it looks like. It's simply a sign that the pruning was done a little too late in the season, probably as the tree was waking up for spring and sap pressure was high.
The best thing to do? Nothing at all. Seriously. Whatever you do, resist the temptation to slap on any of those wound dressings or pruning paints. All they do is trap moisture against the cut, creating the perfect damp conditions for fungal and bacterial diseases to set up shop.
The sap will stop on its own as the tree’s internal pressure balances out and it starts to heal itself. Just make a note of when you pruned it and aim for a bit earlier next time. Using something like our UK planting calendar to plan your big garden jobs can really help you stay on track.
While sap bleeding looks dramatic, a healthy tree will recover. The most important lesson is learning from the timing to ensure it doesn't happen again next year.
How Do I Prune a Weeping Japanese Maple?
Pruning weeping varieties is all about celebrating that gorgeous, cascading habit, not trying to tame it into something it isn't. Your goal is to create a sense of lightness and reveal the beautiful, intricate branch structure hidden beneath the leaves.
The best approach is to work from the inside of the tree outwards.
- Thin out congestion: Gently remove some of the twiggy growth in the densest areas to let more light and air in.
- Remove upward growth: Keep an eye out for any rogue branches growing straight up or back towards the centre. Snip these out, as they spoil the weeping effect.
- Trim the tips: You can absolutely shorten the draping branches to keep them off the ground or define their shape. Just make sure to cut just above a bud or leaf node that faces outwards and downwards.
- Clear the underside: Have a quick look underneath the canopy for dead twigs and snip them away. It tidies things up and removes a potential hiding spot for pests.
The aim is a soft, delicate curtain of foliage, not a heavy, solid mass.
Is Pruning Seal or Paint Necessary for Cuts?
In a word, no. In fact, most experts, including the Royal Horticultural Society, now advise against using them. It turns out trees are perfectly capable of healing themselves.
They have a fantastic natural defence mechanism called compartmentalisation. When you make a cut, the tree forms a barrier around the wound to stop decay from spreading. Slathering on a sealant can get in the way of this process, trapping moisture and creating an environment where pathogens can thrive.
A clean, sharp cut, made at the right angle and the right time of year, is the very best thing you can do to help your Japanese maple heal all by itself.