A well-curated gallery wall is more than just a collection of pictures; it's a personal statement, a visual story that brings character and life to any room. But transforming a blank canvas into a perfectly balanced display can feel daunting. Where do you start? What layout best suits your space and style? This guide demystifies the process, offering a comprehensive look at actionable gallery wall ideas to spark your creativity and help you design a feature that is uniquely yours.
We will explore nine distinct approaches, from the classic, eclectic Salon-Style hang to the clean lines of a modern Grid Layout. Whether you want to create a cohesive narrative with a themed collection or make a bold statement in an overlooked corner, you'll find practical advice here. We'll break down the specific techniques for achieving each look, providing clear, step-by-step guidance.
Get ready to turn your cherished art, favourite photographs, and unique memorabilia into a stunning focal point. Each concept is designed to be achievable, whether you're an experienced decorator or a first-time homeowner, ensuring you have the confidence to create an impressive display you’ll love for years to come.
1. The Grand Statement: Salon-Style Gallery Wall
The salon-style gallery wall is a timeless and dramatic approach to art display, inspired by the grand art salons of 18th-century Paris. This maximalist method involves covering a significant portion of a wall, often floor-to-ceiling, with a dense arrangement of artworks in various sizes, orientations, and mediums. It’s one of the most impactful gallery wall ideas for those with a large and eclectic collection, turning a blank space into a captivating visual narrative. The key is to create a sense of organised chaos, where each piece contributes to a stunning, cohesive whole.
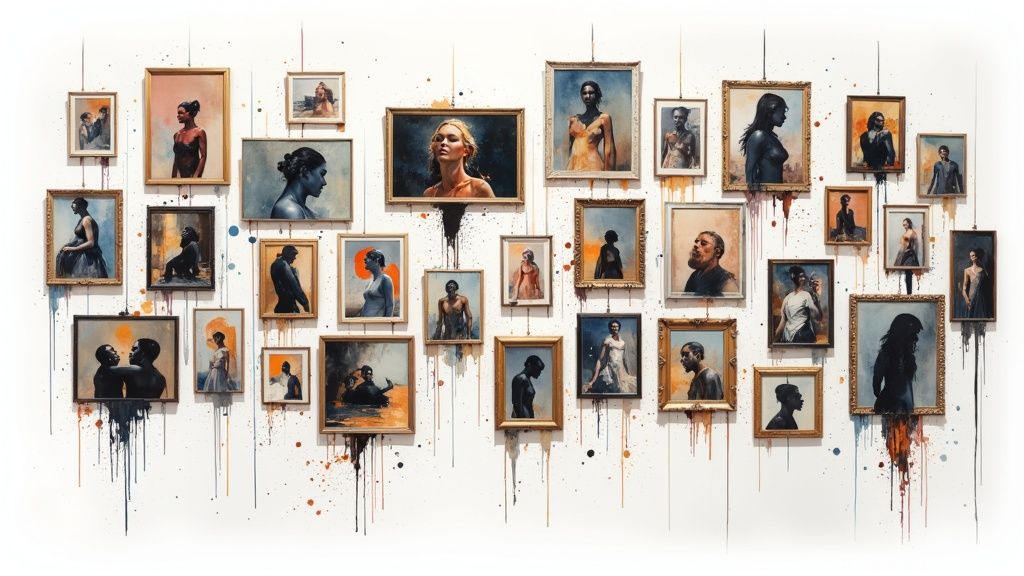
This style is perfect for making a bold statement in a living room, dining area, or along a staircase. By filling the wall, you create an immersive experience that draws the eye and invites closer inspection.
How to Achieve the Salon-Style Look
Mastering the salon look requires careful planning to avoid a cluttered feel. The goal is a display that feels both abundant and balanced.
- Find a Common Thread: Unify your diverse collection with a consistent element. This could be a single frame colour (e.g., all black, all gold, or all natural wood), a shared colour palette within the artwork, or a subtle thematic link like landscapes or portraits.
- Start with an Anchor: Begin by placing your largest or most significant piece. Position it slightly off-centre at eye level to create a natural starting point for the eye to travel from.
- Plan Your Layout: Before making any holes, create paper templates for each frame. Arrange these on the floor or tape them to the wall with low-tack painter's tape to perfect the layout and spacing.
- Mix Orientations and Shapes: Combine vertical and horizontal pieces, along with square, round, or oval frames. This variation adds rhythm and visual energy to the arrangement.
2. Grid Layout Gallery Wall
The grid layout gallery wall offers a structured, symmetrical alternative to more eclectic arrangements. This systematic approach involves arranging artwork in precise rows and columns, with uniform spacing between each piece, creating a look that is clean, cohesive, and highly organised. Popularised by the Scandinavian design movement and frequently seen in modern art museums, this is one of the best gallery wall ideas for bringing a sense of order and sophistication to a space. It’s the perfect solution for showcasing a series of related prints or photos.
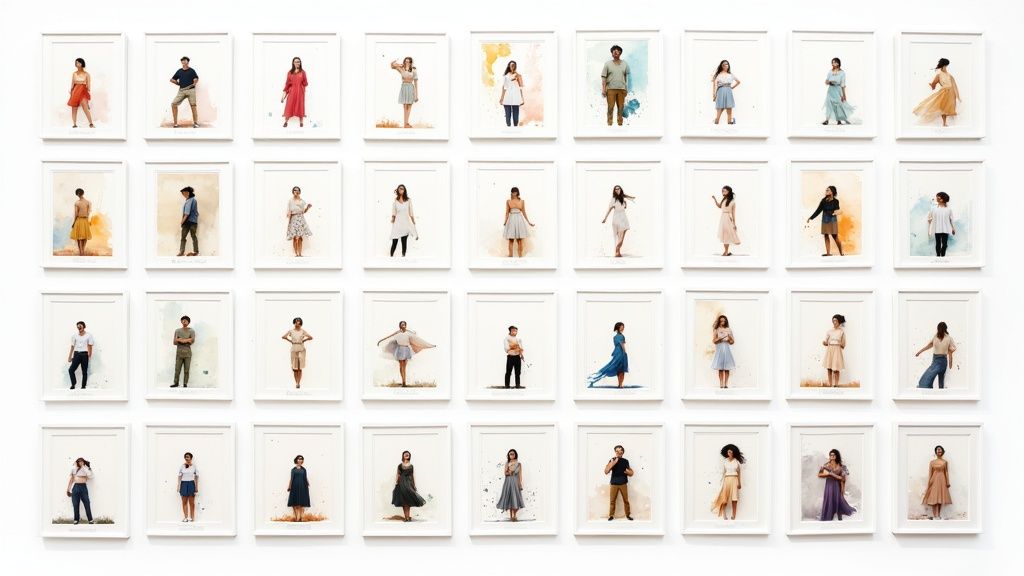
This style is particularly effective above a sofa, bed, or sideboard, where its clean lines can complement the furniture's form. The result is a polished and intentional display that feels both modern and timeless, transforming individual pieces into a single, unified work of art.
How to Achieve the Grid Layout Look
Precision is the cornerstone of a successful grid layout. Unlike the salon style, there is no room for improvisation; every measurement must be exact to achieve the desired effect.
- Use Identical Frames: For maximum impact and a truly uniform look, use frames that are identical in size, style, and colour. This reinforces the grid’s geometric precision and lets the artwork itself take centre stage.
- Maintain Consistent Spacing: The gap between each frame is crucial. Aim for consistent spacing of 2-3 inches on all sides: top, bottom, and between each frame. This negative space is just as important as the art itself.
- Plan with Precision: A spirit level, measuring tape, and pencil are your most important tools here. Measure your total wall space and calculate the layout beforehand to ensure it is perfectly centred and balanced.
- Consider the Wall’s Proportions: A large wall can accommodate a larger grid (e.g., 3x3 or 4x4), while a smaller space might be better suited to a simple 2x2 arrangement or a single horizontal row. Let the wall guide your grid’s scale.
3. Asymmetrical Balance Gallery Wall
The asymmetrical balance gallery wall offers a sophisticated, modern alternative to rigid, grid-like layouts. This approach achieves visual harmony by carefully arranging different-sized pieces without relying on perfect symmetry. It blends the organic, collected feel of a salon-style hang with more deliberate spacing, resulting in a look that feels both curated and effortlessly chic. Popularised by design bloggers and major retailers like West Elm, this is one of the most versatile gallery wall ideas for contemporary spaces.
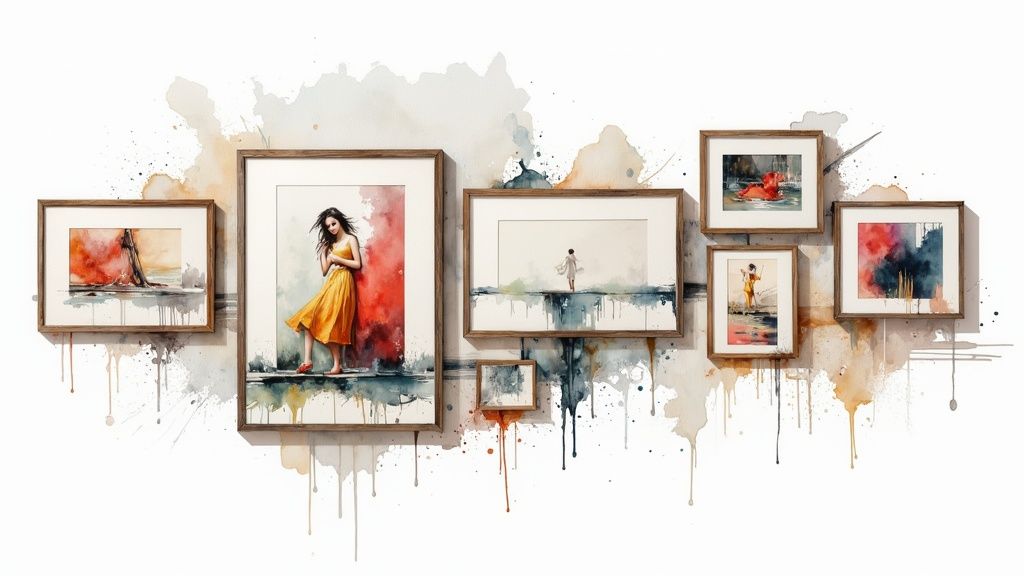
This style works exceptionally well above a sofa, bed, or console table, where it can create a dynamic focal point that isn't overpowering. It feels intentional and designer-led, perfect for showcasing a growing art collection with polish and personality.
How to Achieve an Asymmetrically Balanced Look
Mastering this look is about creating equilibrium through visual weight rather than identical pairings. The final arrangement should feel resolved and stable, despite its lack of symmetry.
- Start with an Anchor Piece: Position your largest or most impactful artwork off-centre. Placing it to one side, either above or below the horizontal midline, creates a natural starting point and prevents the layout from feeling static.
- Balance Visual Weight: The key is to counterbalance your anchor piece. If you place a large, dark frame on the bottom left, arrange several smaller, lighter pieces on the top right to achieve equilibrium. Think of it like a seesaw.
- Maintain Consistent Spacing: While the arrangement is irregular, the spacing between frames should be relatively uniform, typically around 5-8 cm. This consistency provides the underlying structure that makes the layout feel cohesive.
- Step Back and Assess: Frequently step away from the wall during the planning phase. This helps you to see the arrangement as a whole and judge its overall balance, making it easier to spot areas that feel too heavy or too empty.
4. Themed or Narrative Gallery Wall
A themed or narrative gallery wall tells a story or explores a specific subject through a carefully curated collection of artwork, photographs, and meaningful objects. This approach establishes cohesion through its content rather than purely visual elements like frame colour, making the display deeply personal and engaging. It’s one of the most compelling gallery wall ideas for transforming a space into a reflection of your passions, history, or travels.
This style is perfect for a study, hallway, or child’s room, where the story can unfold and be appreciated up close. Popularised by family historians, travel enthusiasts, and collectors, a narrative wall turns your collection into a visual conversation starter. For instance, a travel-themed wall might feature maps, ticket stubs, and photos from adventures, while a family heritage wall could display ancestral portraits alongside handwritten letters.
How to Create a Narrative Wall
Building a successful themed wall requires a clear focus to ensure the story is communicated effectively and elegantly. The goal is a display that feels both curated and authentic.
- Choose a Meaningful Theme: Select a theme that has lasting personal significance to you. This ensures your gallery wall will remain a cherished feature in your home. Examples include botanical illustrations, a family history timeline, or a tribute to your favourite musical artists with album covers.
- Mix Your Mediums: Incorporate a variety of items to add depth and texture. Combine framed art and photos with three-dimensional objects like small souvenirs, pressed flowers, or vintage keys that relate to your theme.
- Complement, Don’t Compete: Use frames that enhance the content. Simple, neutral frames often work best, allowing the story within the pieces to take centre stage.
- Embrace Negative Space: A narrative wall doesn’t need to be dense. Allow for breathing room between pieces to let each element tell its part of the story without creating a cluttered or overwhelming feel.
5. Symmetrical Gallery Wall
The symmetrical gallery wall is an exercise in precision and balance, bringing a sense of formal elegance and order to a room. This classic approach involves creating a mirror image on either side of a central axis, resulting in a display that feels calm, organised, and sophisticated. It is one of the most powerful gallery wall ideas for those who appreciate traditional design and structured beauty. The goal is to achieve perfect visual equilibrium, which makes a space feel intentional and harmonious.
This style is particularly effective in formal living rooms, dining areas, or above a key piece of furniture like a console table or fireplace. The inherent order of a symmetrical layout provides a restful counterpoint to more dynamic elements in a room.
How to Achieve the Symmetrical Look
Creating a perfectly balanced symmetrical wall requires meticulous planning and an eye for detail. The key is to ensure both sides feel equally weighted.
- Establish a Central Axis: Your first step is to identify the centre line of your display. This could be the centre of the wall, a fireplace, a doorway, or the middle of a piece of furniture you are hanging the art above. Use a measuring tape and a pencil to lightly mark this vertical line.
- Use Identical Frames: The most straightforward way to achieve perfect symmetry is by using identical frames for all your pieces. This creates an immediate sense of cohesion and makes balancing the arrangement much simpler.
- Balance Visual Weight: If you aren't using identical art, focus on balancing the visual weight. For example, a large, dark-coloured piece on one side can be balanced by two smaller, similarly toned pieces on the other. Step back frequently to assess the balance.
- Mirror the Layout: Place your first frame on one side of the central axis. Measure its distance from the centre line and its height, then place a matching frame in the exact same position on the opposite side. Continue this process for all pieces.
6. The Clean Line: Linear Gallery Wall
The linear gallery wall arranges artwork in a single, perfectly straight line, creating a streamlined and contemporary aesthetic. This methodical approach is one of the most sophisticated gallery wall ideas, ideal for establishing a sense of order and visual flow. It works exceptionally well in long, narrow spaces like hallways or above large pieces of furniture such as a sofa or sideboard, where it can accentuate the room’s horizontal dimensions. Popularised by modern interior designers and minimalist design blogs, its strength lies in its elegant simplicity.
This style is perfect for bringing a calm, organised feel to a room without overwhelming the space. It’s a fantastic choice for those who prefer clean lines and a less-is-more approach to décor, turning a collection of art into a single, cohesive design feature.
How to Achieve the Linear Look
Achieving a flawless linear display is all about precision. The goal is to create a look that feels intentional, balanced, and perfectly aligned.
- Establish a Guideline: Use a laser level or a measuring tape and pencil to draw a faint guideline on the wall. This ensures every frame is perfectly aligned, either along the bottom edges, top edges, or through the centre-line.
- Maintain Consistent Spacing: The gap between each frame is crucial. Keep the spacing uniform, typically between 5 to 10 cm, to create a sense of rhythm and prevent the arrangement from looking disjointed.
- Vary Frame Sizes (or Don’t): For a classic linear look, use frames of the same size and orientation. For a more dynamic but still organised feel, vary the sizes and orientations of your frames while keeping one edge (top or bottom) aligned.
- Consider the Wall Length: Plan the number of pieces based on the length of your wall. Too few may look sparse, while too many can feel crowded. Aim for the gallery to occupy about two-thirds of the width of the furniture it hangs above.
7. The Corner Gallery Wall
The corner gallery wall is a clever and dynamic design solution that transforms often-overlooked corners into captivating focal points. This approach involves extending an art arrangement across two perpendicular walls, creating an immersive and cohesive display that wraps around the viewer. It's one of the most innovative gallery wall ideas for making the most of every inch of your space, adding depth and visual intrigue where you least expect it. Popularised by boutique hotels and cosy cafes, this style creates an intimate, cocoon-like atmosphere.
This method is ideal for defining a specific zone within a larger room, such as a reading nook, a home office corner, or a small seating area. By treating the corner as a single canvas, you create a seamless and deliberate design statement.
How to Achieve the Corner Gallery Look
Creating a successful corner gallery wall means thinking of the two walls as one continuous composition rather than separate displays.
- Plan as One Composition: Lay out your arrangement on the floor first, treating the line where the two walls meet as a central axis. This ensures the flow from one wall to the next feels natural and balanced.
- Use the Corner as a Guide: The corner itself can act as a natural dividing line. You could use it to separate two complementary themes or colour schemes, such as placing family photos on one wall and abstract prints on the other, united by a common frame style.
- Incorporate Three-Dimensional Elements: Add depth by including small floating corner shelves, wall-mounted sculptures, or hanging planters. This enhances the wrap-around effect and makes the corner feel more engaging and textured.
- Consider Corner Lighting: Proper lighting is crucial for a corner display. Install a dedicated picture light, a stylish wall sconce, or a small floor lamp to illuminate the art and prevent the corner from feeling dark or forgotten.
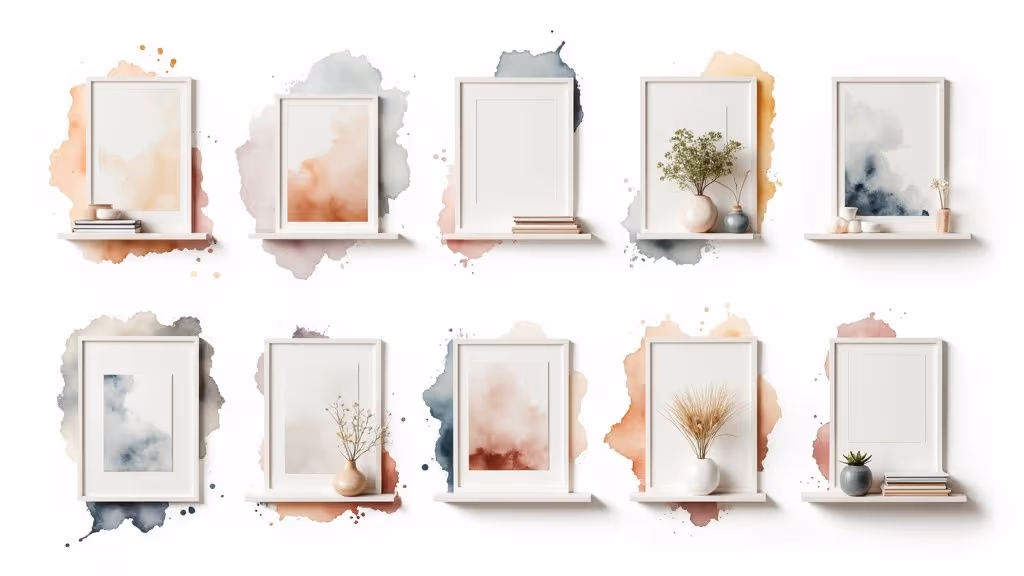
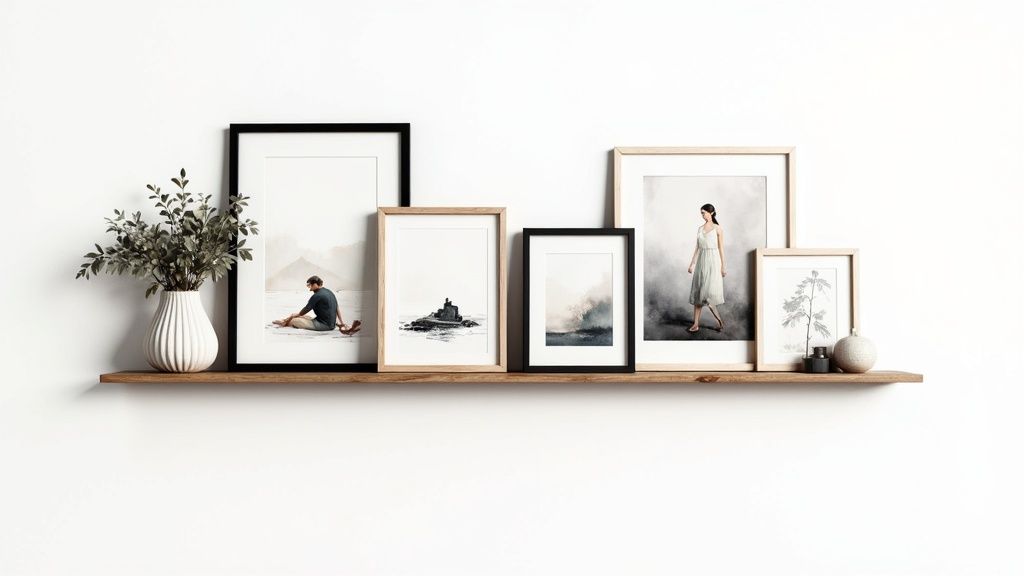
8. The Flexible Ledge Gallery Wall
The ledge gallery wall offers a modern, versatile alternative to traditional hanging methods. It uses narrow picture ledges or shelves to display artwork, allowing for effortless updates and rearrangements without creating new holes in the wall. This flexibility makes it one of the best gallery wall ideas for renters, children's rooms, or anyone who enjoys frequently refreshing their décor. The beauty of this style lies in its casual, layered aesthetic that feels curated yet approachable.
This approach works brilliantly above a sofa, bed, or in a home office where you might want to switch out motivational prints or family photos. Popularised by brands like IKEA and rental-friendly design blogs, the picture ledge provides a chic and practical display solution.
How to Achieve the Ledge Gallery Look
Creating a stylish ledge display is all about balancing composition and depth. The goal is a relaxed, collected vibe that avoids looking like a simple line-up of frames.
- Layer with Confidence: The key to a dynamic ledge gallery is layering. Place larger frames at the back, leaning against the wall, and smaller ones in front. Overlap the edges slightly to create a sense of depth and connection between the pieces.
- Mix Media and Objects: Don't limit yourself to just framed prints. Incorporate small sculptures, miniature potted plants, candles, or even beautiful books. This variety adds texture and personality, turning the ledge into a multi-dimensional display.
- Consider Asymmetry: Instead of centring every single item, create visual interest by grouping pieces asymmetrically. You could have a cluster of three frames on one side and a single, larger frame on the other, connected by a small object in the middle.
- Secure Your Ledges Properly: While this method is renter-friendly, safety is paramount. Always secure the ledges to the wall according to the manufacturer's instructions, ideally fixing them into wall studs for maximum stability, especially if you plan to display heavier items.
9. Stairway Gallery Wall
A stairway gallery wall transforms a functional, often overlooked area into a dynamic and personal art feature. This design follows the diagonal line of a staircase, creating a beautiful ascending or descending visual flow that guides you from one floor to the next. It’s one of the most effective gallery wall ideas for utilising transitional spaces, turning the journey up or down the stairs into an engaging experience. The key is to create an arrangement that feels intentional and complements the unique architecture of the space.
This style is particularly striking in historic townhouses, contemporary homes with dramatic staircases, or any multi-level space. It adds character and narrative to the home, making the transition between floors a moment of visual delight.
How to Create a Stairway Gallery Wall
Achieving a polished stairway gallery requires precision to handle the slope and varying viewpoints. The aim is a display that feels both elegant and perfectly aligned with its surroundings.
- Establish a Consistent Line: The most common method is the stepped layout. Align the centre of each frame to an imaginary diagonal line that runs parallel to the stair nosing. Maintain a consistent height above the steps, typically around 150 cm (60 inches) measured vertically from the tread.
- Plan with Templates: Before hammering any nails, cut paper templates for each frame. Use painter's tape to arrange them on the wall, allowing you to perfect the layout and spacing without commitment. This is crucial for getting the diagonal alignment just right.
- Maintain Even Spacing: Keep the distance between each frame consistent, both horizontally and vertically, to create a clean and organised look. A gap of 5-10 cm between frames is a good starting point.
- Consider Lighting and Safety: Ensure the area is well-lit, not only to showcase your art but also for safe navigation. If adding new lighting, position it to minimise glare on the glass frames and prevent shadows on the steps.
Gallery Wall Styles Comparison Guide
Your Wall, Your Story: Bringing Your Vision to Life
You've explored the structured elegance of the symmetrical grid, the organic flow of an asymmetrical layout, and the personal narrative power of a themed collection. We’ve journeyed from the classic grandeur of the Salon-Style hang to the modern simplicity of a linear arrangement, and even wrapped our creativity around corners and up stairways. The vast world of gallery wall ideas is not about finding a single 'correct' answer; it's about discovering the perfect language to tell your unique story.
The true magic of a gallery wall lies in its ability to transform a blank surface into a dynamic reflection of your life, passions, and aesthetic. It’s a design feature that grows with you, allowing for swaps, additions, and edits as your tastes evolve or you acquire new, meaningful pieces. This isn't just decoration; it's a living, breathing part of your home's identity.
Your Action Plan for a Perfect Gallery Wall
Feeling inspired? It's time to move from idea to implementation. Don't let analysis paralysis stop you from starting. Here’s a clear path forward to bring your vision to life:
- Curate Your Collection: Gather your potential pieces. This includes artwork, photographs, mirrors, textiles, and any objects you love. Don't edit too harshly at this stage; just get everything in one place.
- Define Your Space and Style: Look at your chosen wall and consider its relationship to the room. Revisit the styles we've discussed, from the formal grid to the eclectic Salon hang. Which one genuinely excites you and complements your existing décor?
- Create Paper Templates: This is the most crucial step. Trace each frame onto kraft paper or newspaper and cut out the shapes. This allows you to experiment with layouts on the wall using painter's tape, risk-free.
- Map and Measure: Once you've perfected your paper template layout, mark where the nail for each frame will go. Measure twice, hang once. This meticulous planning prevents unnecessary holes and ensures a professional finish.
The Enduring Value of a Personalised Space
Mastering the art of the gallery wall is more than just learning a design technique. It's about gaining the confidence to infuse your personality into your home in a bold, visual way. Whether you're aiming for a calming, cohesive look with a linear ledge or a vibrant, energetic display that climbs your stairway, the principles remain the same: balance, scale, and personal meaning.
Your home should be a sanctuary and a source of joy. By thoughtfully curating a collection of images and objects that you love, you are actively creating a space that inspires and comforts you every single day. So, embrace the process, trust your creative instincts, and start building the gallery wall that tells your story. Your masterpiece awaits.


