Growing potatoes is one of life's simpler pleasures. Get your hands on some quality seed potatoes, give them a chance to sprout (a process we call 'chitting'), pop them in well-prepared soil, and 'earth up' the stems as they grow. That's the gist of it, and following these steps will give your spuds the best shot at becoming a fantastic harvest.
Selecting and Chitting Your Seed Potatoes
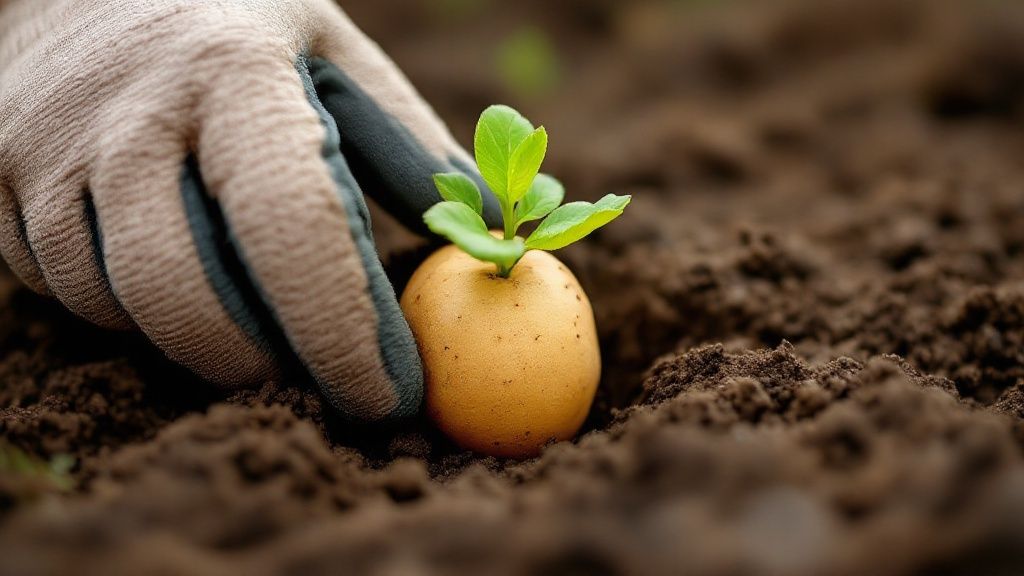
A brilliant harvest doesn't just happen on planting day; it all starts with picking the right seed potatoes. You can't just use spuds from the supermarket – they're often treated to stop them from sprouting. What you need are certified seed potatoes, which are grown specifically to be vigorous and disease-free. They give your crop the best possible head start.
When you're choosing, look for firm tubers about the size of a hen's egg. If they're small, you can plant them whole. Got a few larger ones? No problem. You can cut them into pieces, just make sure each piece has at least one or two 'eyes' on it. It’s a great little trick to make your stock go further.
Understanding Potato Varieties
The variety you choose makes a huge difference, affecting everything from when you plant them to how they'll taste on your plate. We're lucky in the UK to have such a rich history of potato cultivation, which has given us some absolute classics. Think of the King Edward, which came about in 1902 and is still unbeatable for fluffy roasties. Then there's the Maris Piper, developed in 1966 and now the most widely grown spud in the country – an absolute hero for chips and mash.
When you’re browsing the options, you'll generally see them split into two camps:
- Earlies: These are the sprinters. Varieties like 'Rocket' or 'Charlotte' grow fast and are often ready to be dug up from June onwards.
- Maincrop: These guys take their time. Varieties like 'King Edward' or 'Maris Piper' mature later in the season, producing bigger potatoes that are perfect for storing over the winter.
The Art of Chitting
Once you've got your seed potatoes, it's time to chit them. Chitting is just a fancy word for encouraging them to sprout before they go in the ground. It gives them a bit of a head start and can lead to an earlier, bigger harvest. It’s a simple step, but a crucial one.
All you need to do is arrange your potatoes in a single layer in an egg box or a shallow tray. Make sure the end with the most 'eyes' is facing up. Then, find a cool, bright spot for them that's free from frost – a windowsill in a spare room or a porch is ideal. Just keep them out of intense, direct sunlight.
In about four to six weeks, you should see short, sturdy, purplish-green sprouts starting to form. That's exactly what you want! If you get long, weak, white sprouts, it's a sign they're not getting enough light.
This little bit of prep work is so simple but makes all the difference, setting your plants up for strong growth once they're in the soil. If you're just getting your patch set up, our guide on how to start a vegetable garden has plenty of tips to get you ready for planting day.
Preparing the Ideal Soil for Potato Growth

While potatoes are surprisingly forgiving, the real secret to a spectacular harvest is all in the prep work. Honestly, spending a bit of time on your soil before you plant can easily double your yield. It’s a step you really don't want to skip.
What you're aiming for is a loose, fertile, and slightly acidic home where the tubers have plenty of room to stretch out and grow.
Potatoes are hungry plants—they're what we call 'heavy feeders', meaning they gobble up nutrients from the soil. To give them the fuel they need, you’ll want to enrich your planting patch with loads of organic matter. Well-rotted manure or good garden compost is ideal for this. It not only provides a slow, steady release of nutrients but also works wonders for the soil structure.
A few weeks before you plan to plant, dig over the area and work in a generous layer of that compost or manure. This simple act creates the light, crumbly soil that potatoes adore, making it much easier for those tubers to swell to a good size.
Getting the Location and Acidity Right
Where you plant is just as crucial as what you plant in. Potatoes need a good six to eight hours of direct sunlight every day, so find a nice sunny spot in your garden or allotment.
They also absolutely must have well-drained soil. Potatoes will quickly rot in soggy, waterlogged ground, so steer clear of any low-lying areas that tend to get boggy after a downpour.
They’re also a bit particular about their soil's pH level, preferring things on the acidic side.
- The Sweet Spot: Potatoes thrive in soil with a pH between 4.8 and 5.5.
- Why It Matters: This acidic environment is fantastic for warding off a common disease called potato scab, which causes those ugly rough patches on the skin of the tubers.
- Easy Tweaks: If you know your soil is a bit on the alkaline side, you can gently lower the pH by working in some sulphur pellets or even pine needles. Just be sure to avoid adding lime (which many other veggies love) to your potato patch.
This is exactly why many seasoned gardeners dedicate a specific plot just for their spuds, rather than mixing them into established raised beds where other plants prefer a more neutral, limed soil.
Preparing Containers and Grow Bags
No garden? No worries. Potatoes grow brilliantly in large containers or grow bags, making them a perfect crop for patios, balconies, or any small space.
Just make sure you choose a container that's at least 30-40 litres in size to give the tubers enough space to form properly.
Good drainage is non-negotiable, so check for plenty of holes at the bottom. To get it ready for planting, fill the bottom third with a high-quality, peat-free compost mixed with a handful of slow-release fertiliser. This creates a really nutrient-rich base to get your seed potatoes off to the best possible start.
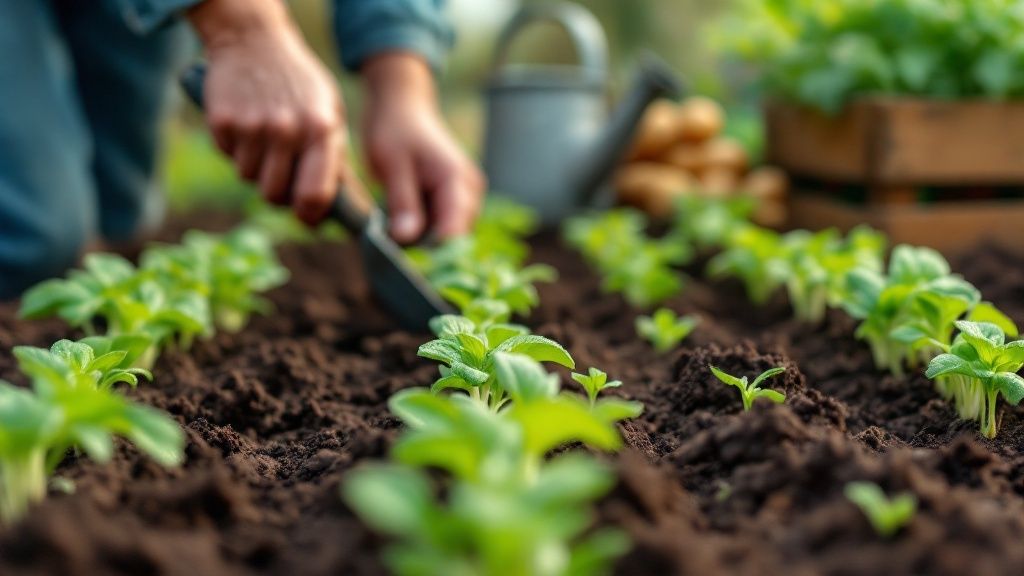
Getting Your Spuds in the Ground
Right, your seed potatoes are chitted and the soil is ready. Now for the exciting bit – planting day! This is where all that prep work really starts to pay off, giving your spuds the best possible start. Whether you're using a traditional garden bed, a raised bed, or containers, the basic rules of depth and spacing are pretty much the same.
The whole idea is to give each plant enough elbow room to grow without a fight for sunlight, water, and nutrients. Think of it as setting the stage for a successful treasure hunt. The better you set it, the more treasure you'll dig up later.
Digging the Perfect Trench
If you're planting straight into the garden, the classic trench method is the way to go. You’ll want to dig a shallow trench about 10-15cm (4-6 inches) deep. That's just right – deep enough to protect the tuber, but shallow enough for the new shoots to break through the surface without a struggle.
Once your trench is ready, you can start placing your chitted seed potatoes.
- Spacing: Pop each tuber in about 30cm (12 inches) apart from its neighbour. This gives each plant plenty of personal space.
- Orientation: Gently place them with the strongest, healthiest-looking sprouts pointing up towards the sky.
- Row Distance: If you’re planting more than one row, make sure they’re roughly 60-75cm (24-30 inches) apart. This gives you room to walk between them and, more importantly, to ‘earth up’ the soil later on.
After you've placed the tubers, carefully push the soil back into the trench, covering them with about 5-7cm of soil. Don't fill it all the way to the top just yet – you'll be adding more soil as the plants shoot up.
It's amazing to think that home gardeners play a part in the bigger picture. The UK produced around 4.7 million metric tons of potatoes in 2023, and that staggering number is built on the success of every single plant. Getting these planting basics right is your key to a fantastic yield.
Planting in Containers and Raised Beds
Growing spuds in containers or grow bags works on a similar principle, just in a more contained space. Start by putting about 15cm of good-quality compost in the bottom of your container. Place two or three seed potatoes on top, spaced out as much as you can, and cover them with another 10cm of compost. As the shoots grow taller, you’ll keep adding more compost to earth them up right inside the container.
While raised beds are brilliant, some gardeners prefer to save that prime real estate for crops that give a bigger return for the space they take up. Potatoes need a lot of underground room and can make harvesting a bit of a messy business if you've got other veggies planted nearby.
For a clearer picture of what to plant and when, have a look at our handy UK planting calendar. It can help you map out your entire veg patch for the year, making sure every plant gets the best possible conditions to thrive.
Caring for Your Growing Potato Plants
Once those first green shoots have pushed through the soil and started reaching for the sun, your job shifts from planter to caretaker. The attention you give your plants now, during their most vigorous growth phase, is what will turn them into a fantastic harvest later on.
It's all about providing the right support, moisture, and protection. Think of it as guiding your plants through their teenage years to make sure they produce plenty of healthy, delicious spuds.
The Crucial Art of Earthing Up
Of all the jobs you'll do, earthing up (or hilling) is probably the most important. It’s a simple technique, but it’s absolutely vital for getting a good crop.
You’ll want to start when the leafy stems are about 20cm (8 inches) high. Just use a hoe or a rake to gently draw the surrounding soil up against the stems. You’re aiming to create a mound or a ridge that buries the bottom half of the plant.
This does two incredibly important things:
- It boosts your harvest. Potatoes don't just grow from the seed potato; new tubers actually form all along the buried part of the stem. So, the more stem you cover with soil, the more spuds you’ll get. Simple as that.
- It protects your potatoes. If a developing spud gets exposed to sunlight, it turns green. This green colour comes from a build-up of a nasty toxin called solanine, which makes the potatoes taste bitter and completely inedible. Earthing up keeps them safely in the dark.
Keep doing this every couple of weeks until you see the plants start to flower. It’s the best way to ensure all your developing potatoes are tucked away safely underground.
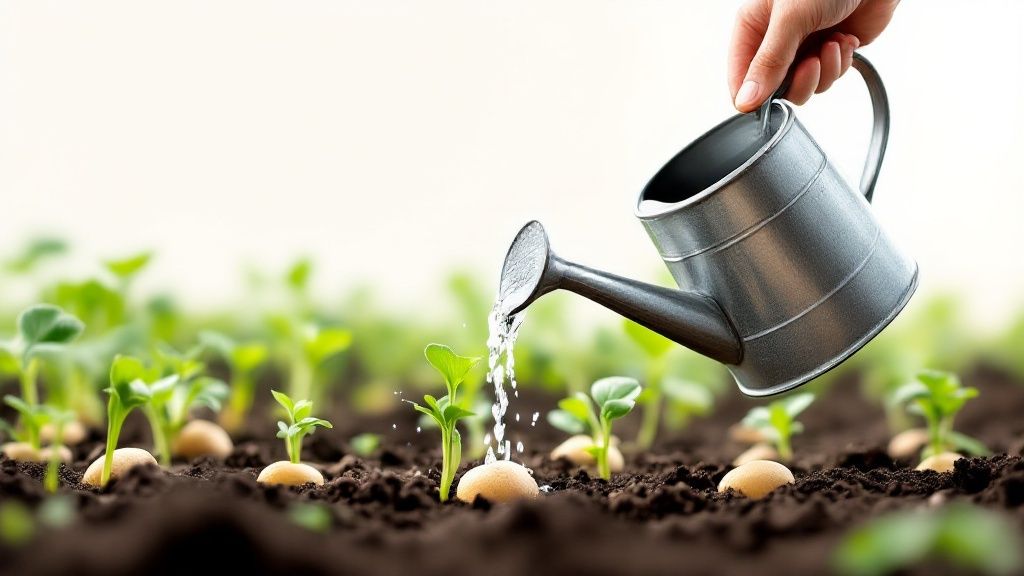
Watering for Perfect Potatoes
Potatoes are thirsty plants. If their water supply is erratic, you’ll end up with a disappointing crop. The goal is to keep the soil consistently moist, but you definitely don't want it waterlogged.
A good rule of thumb is to give them about 2.5cm (1 inch) of water a week, whether that’s from rain or your watering can. During any particularly hot and dry spells, you'll need to be a bit more generous. The most critical time for watering is when the plants start flowering, as this is when the tubers are really starting to bulk up.
A classic mistake is letting the soil dry out completely and then giving it a massive soaking. This sudden shock of water can cause the potatoes to crack or develop hollow centres. A little and often approach is much better for smooth, even growth.
Tackling Common Pests and Diseases
A little vigilance goes a long way in the potato patch. Keeping a regular eye out for pests and diseases means you can deal with any trouble before it really takes hold. Here in the UK, there are a few common culprits to watch out for.
The biggest threat is easily potato blight. It’s a fungal disease that absolutely loves warm, damp weather. You’ll spot it as dark brown patches on the leaves, and it can spread frighteningly fast, rotting both the leaves and the tubers. Good air circulation is your best defence, so make sure your rows are spaced properly. If you do see any signs, snip off the affected leaves and get rid of them immediately.
Slugs and snails can also be a real pain, chewing holes in the leaves and even tunnelling into the potatoes themselves. Organic slug pellets, beer traps, or just encouraging natural predators like birds and hedgehogs can all help to keep the slimy army at bay. We often think about protecting plants in winter, but this kind of summer vigilance is just as crucial. Many of the principles in our guide for protecting plants in winter are about being observant, which is a skill that applies all year round.
Harvesting and Storing Your Potato Bounty
After months of nurturing your potato plants, the moment everyone waits for has arrived: digging for buried treasure. Honestly, there's nothing quite like the satisfaction of unearthing your very own spuds. Knowing when and how to harvest is the key to enjoying them for months to come.
The right time to start digging really depends on the variety you've planted. For 'early' types, like a classic Charlotte, you can start having a look around 10-12 weeks after planting. The biggest tell-tale sign is when the plants start to flower. When you see them, you can have a gentle rummage around the base of the plant with your hands and pull out a few tender, delicious ‘new’ potatoes for dinner.
Maincrop potatoes are a different story; they're the ones you grow for storing through the winter, so a little more patience is needed. You'll know they're ready when the foliage (the leaves and stems) begins to yellow and die back. This is your sign that the plant has poured all its energy into the tubers underground.
The Best Way to Lift Your Potatoes
When harvest day comes, the aim of the game is to get your potatoes out without spearing or bruising them. Any damaged spuds simply won't store well.
Try to pick a dry day for the job. It’s not just more pleasant for you, but it helps the potatoes dry off much faster. Armed with a garden fork (or a hand trowel if you're growing in containers), start digging about 30cm (12 inches) away from the main stem. This gives you a safe buffer zone and dramatically reduces the risk of accidentally stabbing a potato.
Gently press your fork into the soil and lever the whole plant upwards, loosening the earth all around. From there, you can get your hands dirty and feel around for the potatoes. It’s always a brilliant surprise to see just how many have been hiding under there.
Once they're out, let your potatoes lie on the surface of the soil for a couple of hours so the skins can dry a little. Just don't forget about them! Any longer and the sunlight will start to turn them green.
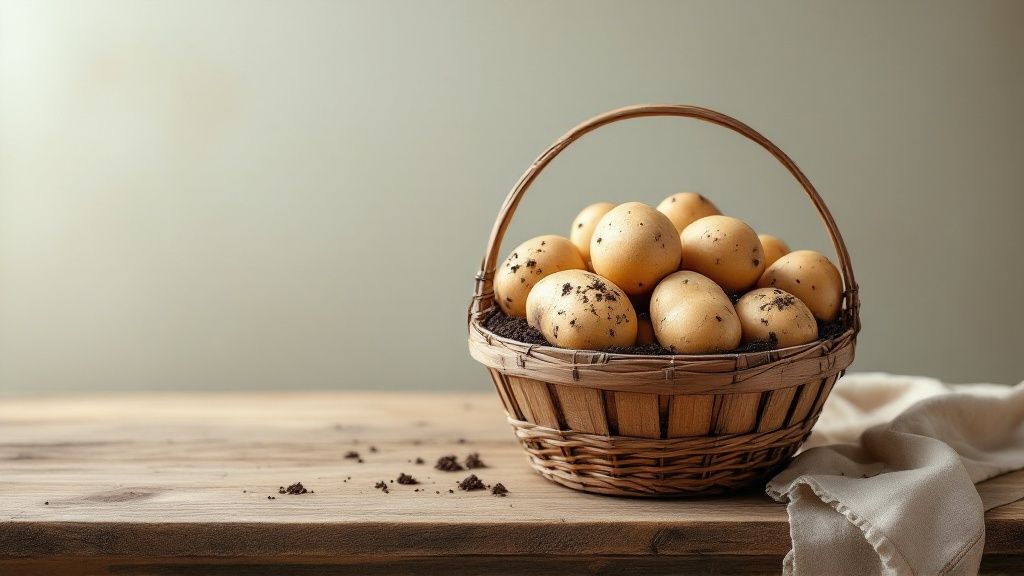
Curing and Storing for the Months Ahead
Proper storage actually starts with a quick process called curing. This simple but crucial step helps to toughen up the potato skins and heal any minor nicks, which is what allows them to last for months on end.
To cure them, just lay the potatoes out in a single layer, perhaps on some old newspaper or in shallow crates. Find them a dark, dry, and well-ventilated spot for about one to two weeks – a spare room, garage, or shed is usually perfect.
Once cured, they’re ready to be tucked away for winter. The three golden rules for potato storage are:
- Cool: A steady temperature between 7-10°C (45-50°F) is ideal. A chilly garage or a pantry often fits the bill.
- Dark: Light is the absolute enemy of stored potatoes. It causes them to sprout and turn green.
- Ventilated: They need to breathe! Good air circulation prevents rot. Store them in hessian sacks, paper bags, or slatted wooden crates. Never, ever use plastic bags.
With the potato patch now clear, you can start thinking about what to grow next. Our guide on what to plant now in the UK offers plenty of inspiration for keeping your garden productive.
Common Questions About Growing Potatoes in the UK
No matter how many seasons you've been gardening, potatoes can always throw a few curveballs. We get asked a lot of questions, so I've put together some quick, practical answers to the most common queries we see from UK gardeners. Hopefully, this will help you troubleshoot any issues and get the best spuds you've ever grown.
Can I Successfully Grow Potatoes in Bags?
You certainly can. In fact, grow bags are a fantastic and tidy way to get a crop, especially if you're working with a patio, balcony, or just a small patch.
The trick is to go big. Make sure you choose a large bag, something around 30-40 litres, to give those tubers plenty of space to swell.
Just pop a few inches of good compost in the bottom, place your seed potatoes on top, and cover them with a bit more compost. As the green shoots climb, keep topping up the bag with more compost to 'earth up' the stems. It's this process that encourages more potatoes to form along the buried stem.
One thing to watch with containers is watering. The compost in bags can dry out much quicker than soil in the ground, so check it daily. You're aiming for consistently moist, but never waterlogged.
Why Are My Potato Plant Leaves Turning Yellow?
Yellowing leaves can signal a few different things, and timing is everything. If it's happening late in the season, don't panic! It’s usually just a natural sign that the tubers are mature and the plant is putting its energy into them before dying back. Harvest time is near.
If the leaves turn yellow earlier on, it's more likely a sign of a nitrogen deficiency. A quick dose of a liquid seaweed feed will often sort this out. It could also be a watering issue—either too much or too little. Before you do anything else, stick a finger in the soil to check the moisture level.
What Does Earthing Up Mean and Why Do It?
Earthing up, sometimes called hilling, is simply the act of drawing soil up and around the main stem of the potato plant as it grows taller. It might seem like a chore, but it’s absolutely vital for a couple of reasons.
First, it shields the developing tubers near the surface from sunlight. When potatoes are exposed to light, they turn green and produce a toxic compound called solanine, which you definitely don't want.
Second, burying more of the stem encourages the plant to produce more tubers along its length. It’s a simple technique that can seriously increase your final harvest.
This is also why starting with great seed stock is so important. The Scottish potato industry, for example, is world-renowned for its high-health seed potatoes, which are the backbone of UK supply chains. Healthy stock means vigorous plants that respond well and give you a much better yield.
And if you're already thinking about what's next, you might be interested in our guide on the 7 best autumn vegetables to grow to keep your garden going.


