Struggling with a sprawling open-plan layout? Or maybe just trying to carve out a dedicated workspace that doesn't blend into your living room? A DIY room divider is a brilliant, non-permanent fix. It’s the kind of clever solution that adds flexibility and style without the dust and expense of a full-on renovation, letting you create functional zones and inject a bit of personality into any room.
Why a DIY Room Divider Is Your Smartest Space Solution
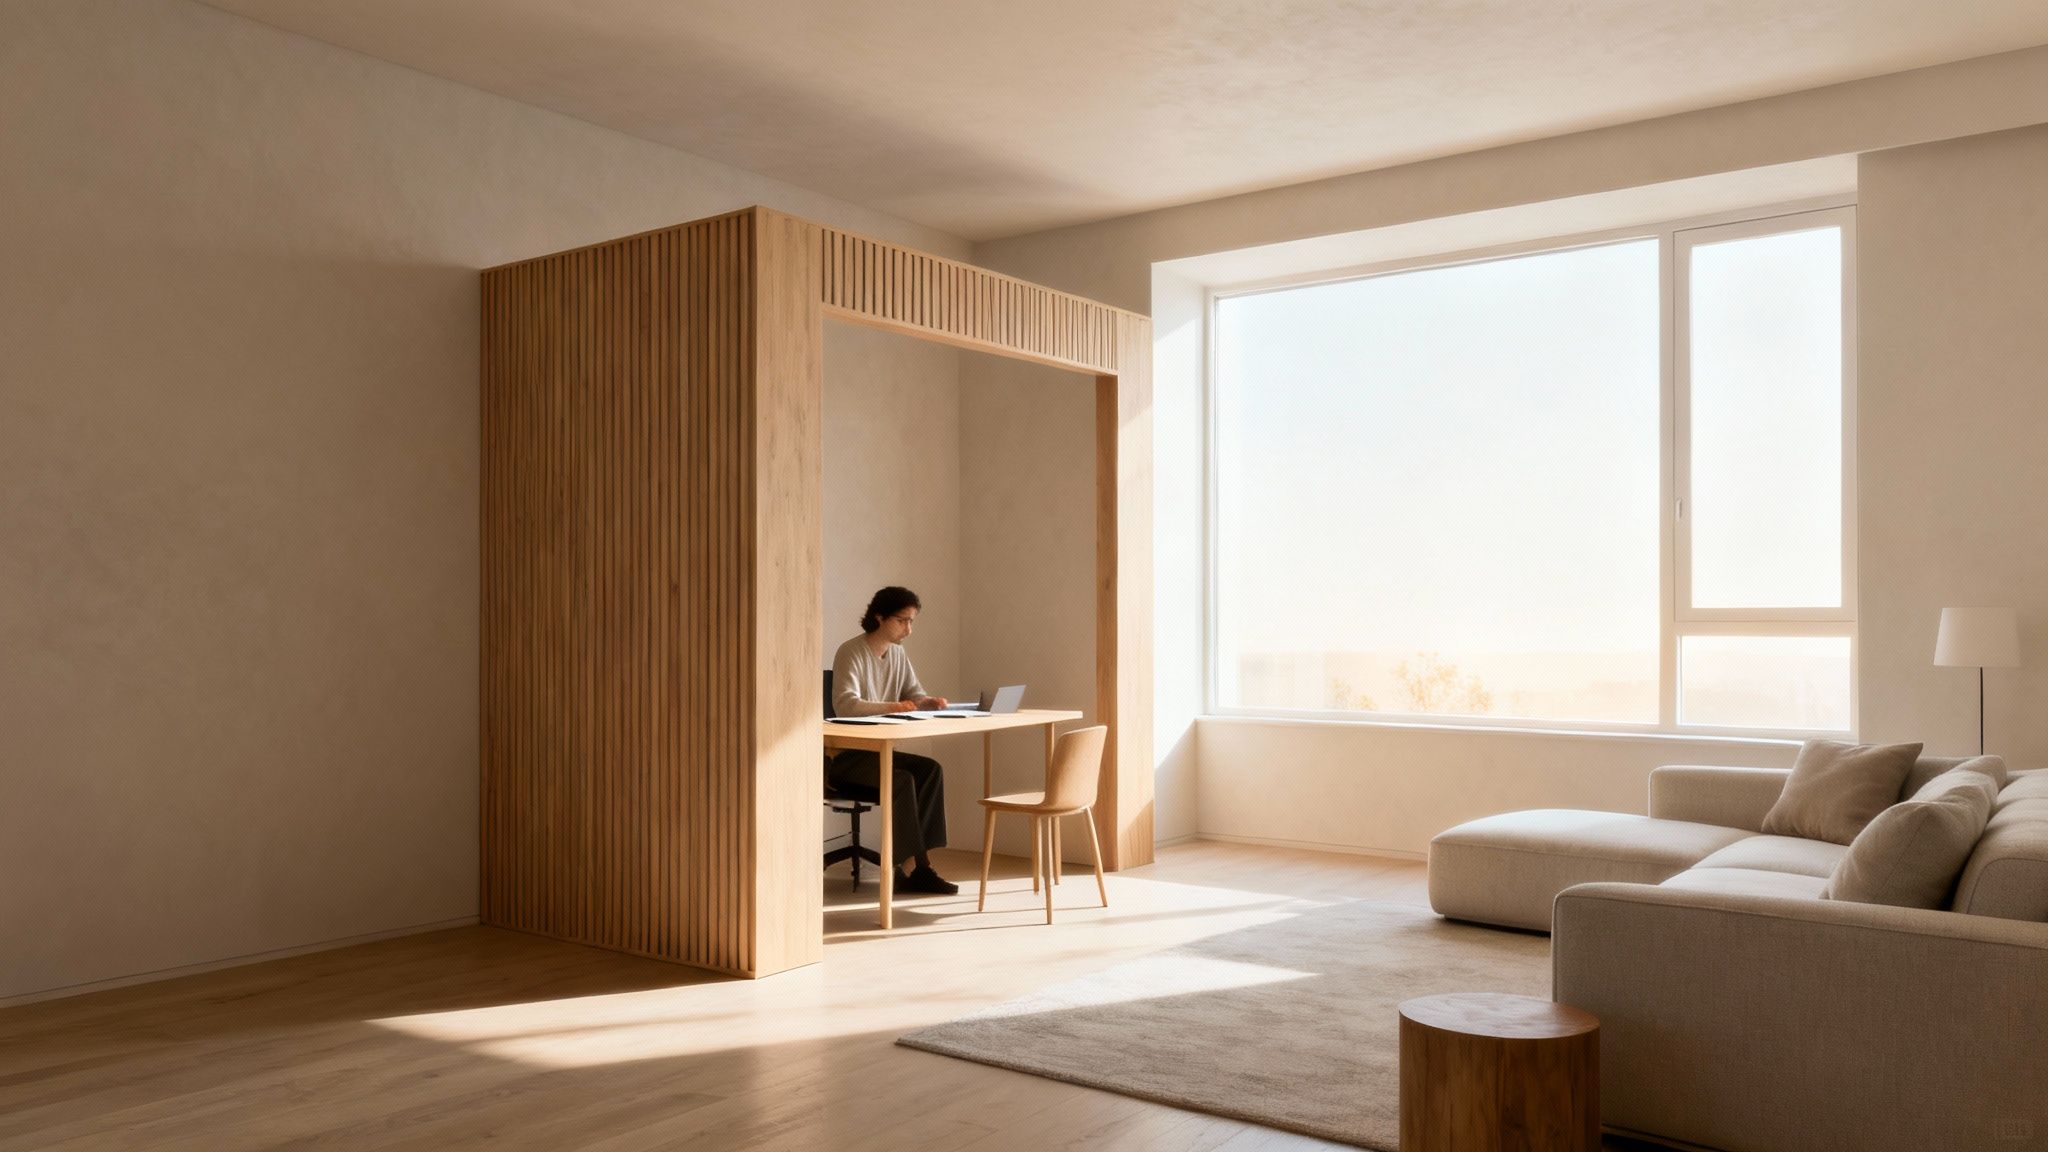
Open-plan living is great for creating that lovely, airy sense of space, but let’s be honest, it often lacks the practical separation we need for modern life. A well-placed divider can instantly define specific areas, turning one large room into a multi-functional hub that actually works for you.
Imagine carving out a quiet home office in the corner of your living room, or creating a cosy reading nook in a bedroom that feels a bit too big. A custom-built partition makes this possible, providing a visual and psychological boundary that helps you switch off and focus. It’s more than just a piece of furniture; it’s a way to make your home adapt to you.
Redefining Your Space with Purpose
The appeal of a DIY room divider has shot up recently, especially with so many of us working from home more often. In fact, by 2024, 37% of UK employers had made hybrid working their main model, pushing homeowners to find clever ways to create private workspaces without calling in the builders. This shift has created a huge demand for solutions that offer separation without permanent walls.
Going the DIY route has some serious perks:
- Cost-Effective: Let’s face it, building your own divider is worlds cheaper than putting up a proper wall. You’ll save a bundle on materials and labour.
- Flexibility: Unlike a solid wall, a DIY divider can be moved, re-styled, or taken down completely as your needs change. This is perfect for renters or anyone who loves to refresh their decor.
- Personalisation: You’re in complete creative control. You get to choose the materials, colours, and design to perfectly match your home’s aesthetic.
More Than Just a Barrier
A DIY room divider is also a powerful design tool. It can add texture, colour, and architectural interest to an otherwise plain room. Think of it as a vertical canvas where you can really show off your personal style.
A well-designed divider doesn't just divide a room; it enhances it. By carefully considering materials and placement, you can create a feature that improves both the function and the beauty of your space.
For example, a slatted wood divider keeps things feeling open and airy while still marking out different zones. A fabric-covered screen, on the other hand, can add a soft, elegant touch and even help dampen sound. And you can’t go wrong with a strategically placed bookshelf, which works as a functional partition while giving you some much-needed storage.
If you’re working with a smaller space, a divider can also create the illusion of a larger area by breaking up the visual field. For a few more tricks, check out our tips on how to make a small room look bigger.
Choosing the Right Divider for Your Space and Skills
The secret to a great DIY project isn't just about having the right tools; it’s about having the right plan. Before you even think about cutting a single piece of wood, it pays to figure out which type of room divider really fits your space, your budget, and your confidence levels.
From classic freestanding panels to clever bookshelf partitions, every DIY room divider brings its own blend of style and function. The first thing to ask yourself is: what problem am I trying to solve? Are you looking to create a completely private home office nook, or just gently hint at a separation between your lounge and dining area?
Figure Out Your Needs and Skills
It’s also worth thinking about how permanent you want this to be. If you’re renting, you’ll probably want something that leaves zero trace behind, like a tension-rod curtain or a freestanding bookshelf. Homeowners, on the other hand, might feel more comfortable with a fixed solution, like a ceiling-mounted track or a semi-permanent wood slat wall.
Let’s be honest about DIY experience, too. Some of these projects, like hanging a simple curtain, are wonderfully beginner-friendly and can be done in an afternoon. Others, like building a slatted wall, require a bit more precision and a few more tools. Being realistic about your skills and the time you have will keep the project fun, not frustrating.
Your perfect divider should solve a practical problem while adding something to your home’s aesthetic. Don’t just think about blocking a view; think about what you’re adding in terms of texture, colour, and form.
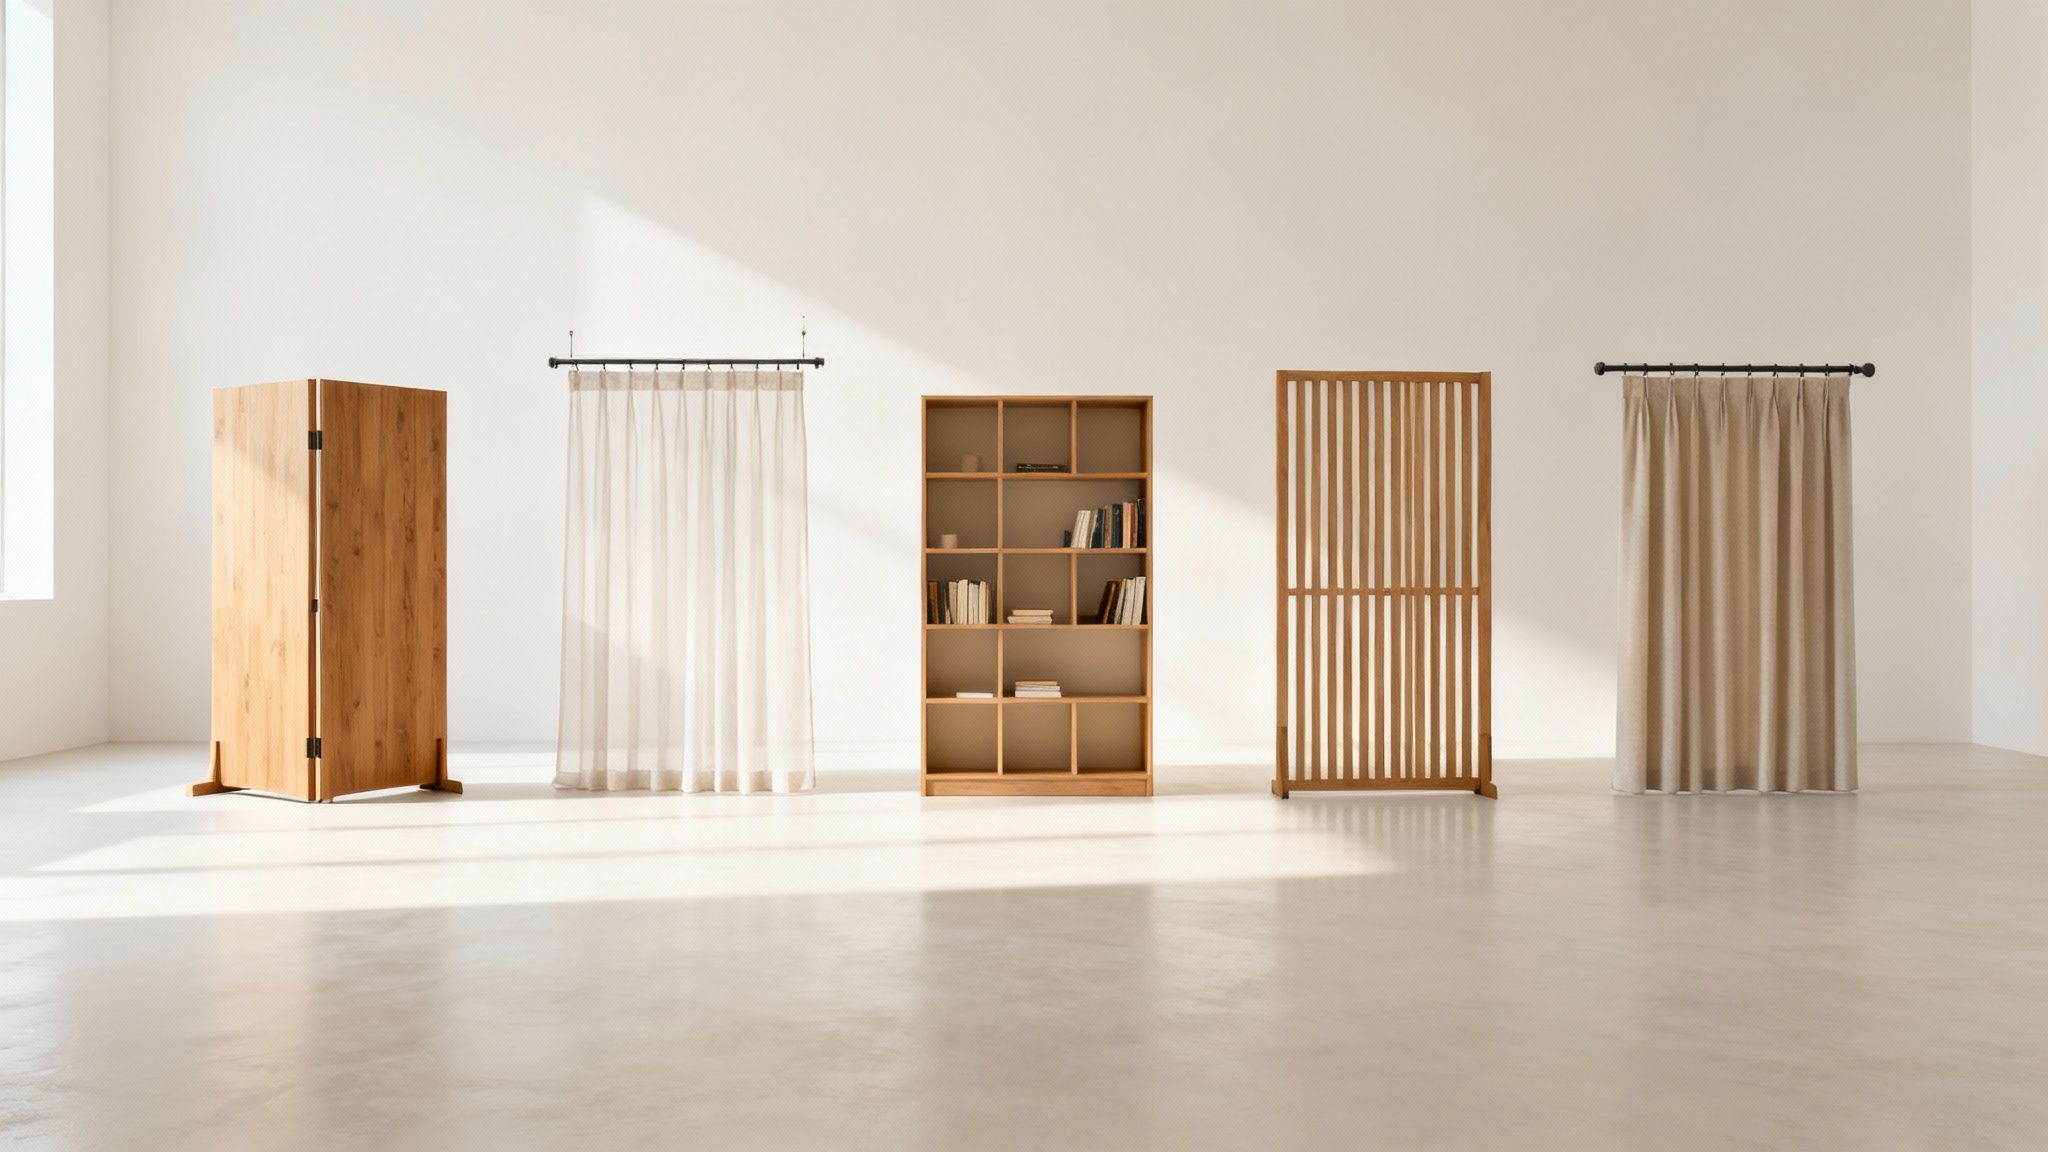
Popular DIY Divider Options
Let’s run through five of the most popular divider types and where they work best. Each one serves a different purpose and suits a different kind of space.
- Freestanding Panels: A brilliant starting point for beginners. These are super versatile and can be moved whenever you fancy a change. They’re perfect for sectioning off a corner for a hobby space or adding a bit of temporary privacy when guests stay over.
- Hanging Curtains: This is the ultimate renter-friendly fix. A simple curtain on a ceiling track or tension rod creates a soft, elegant division – ideal for carving out a cosy bedroom nook in a studio flat. If this sounds like you, our guide on how to choose curtains for your living room has some great pointers on fabrics and styles.
- Bookshelf Partitions: A fantastic multi-tasker. An open-back bookshelf divides a room while giving you precious storage space. It works beautifully to separate a lounge area from a home office, keeping things feeling connected but still distinct.
- Wood Slat Walls: For a modern, architectural vibe, a slatted divider is hard to beat. It’s a great way to define a space, like an entryway, without completely blocking light, so the room still feels open and airy. This one does require a bit more precision.
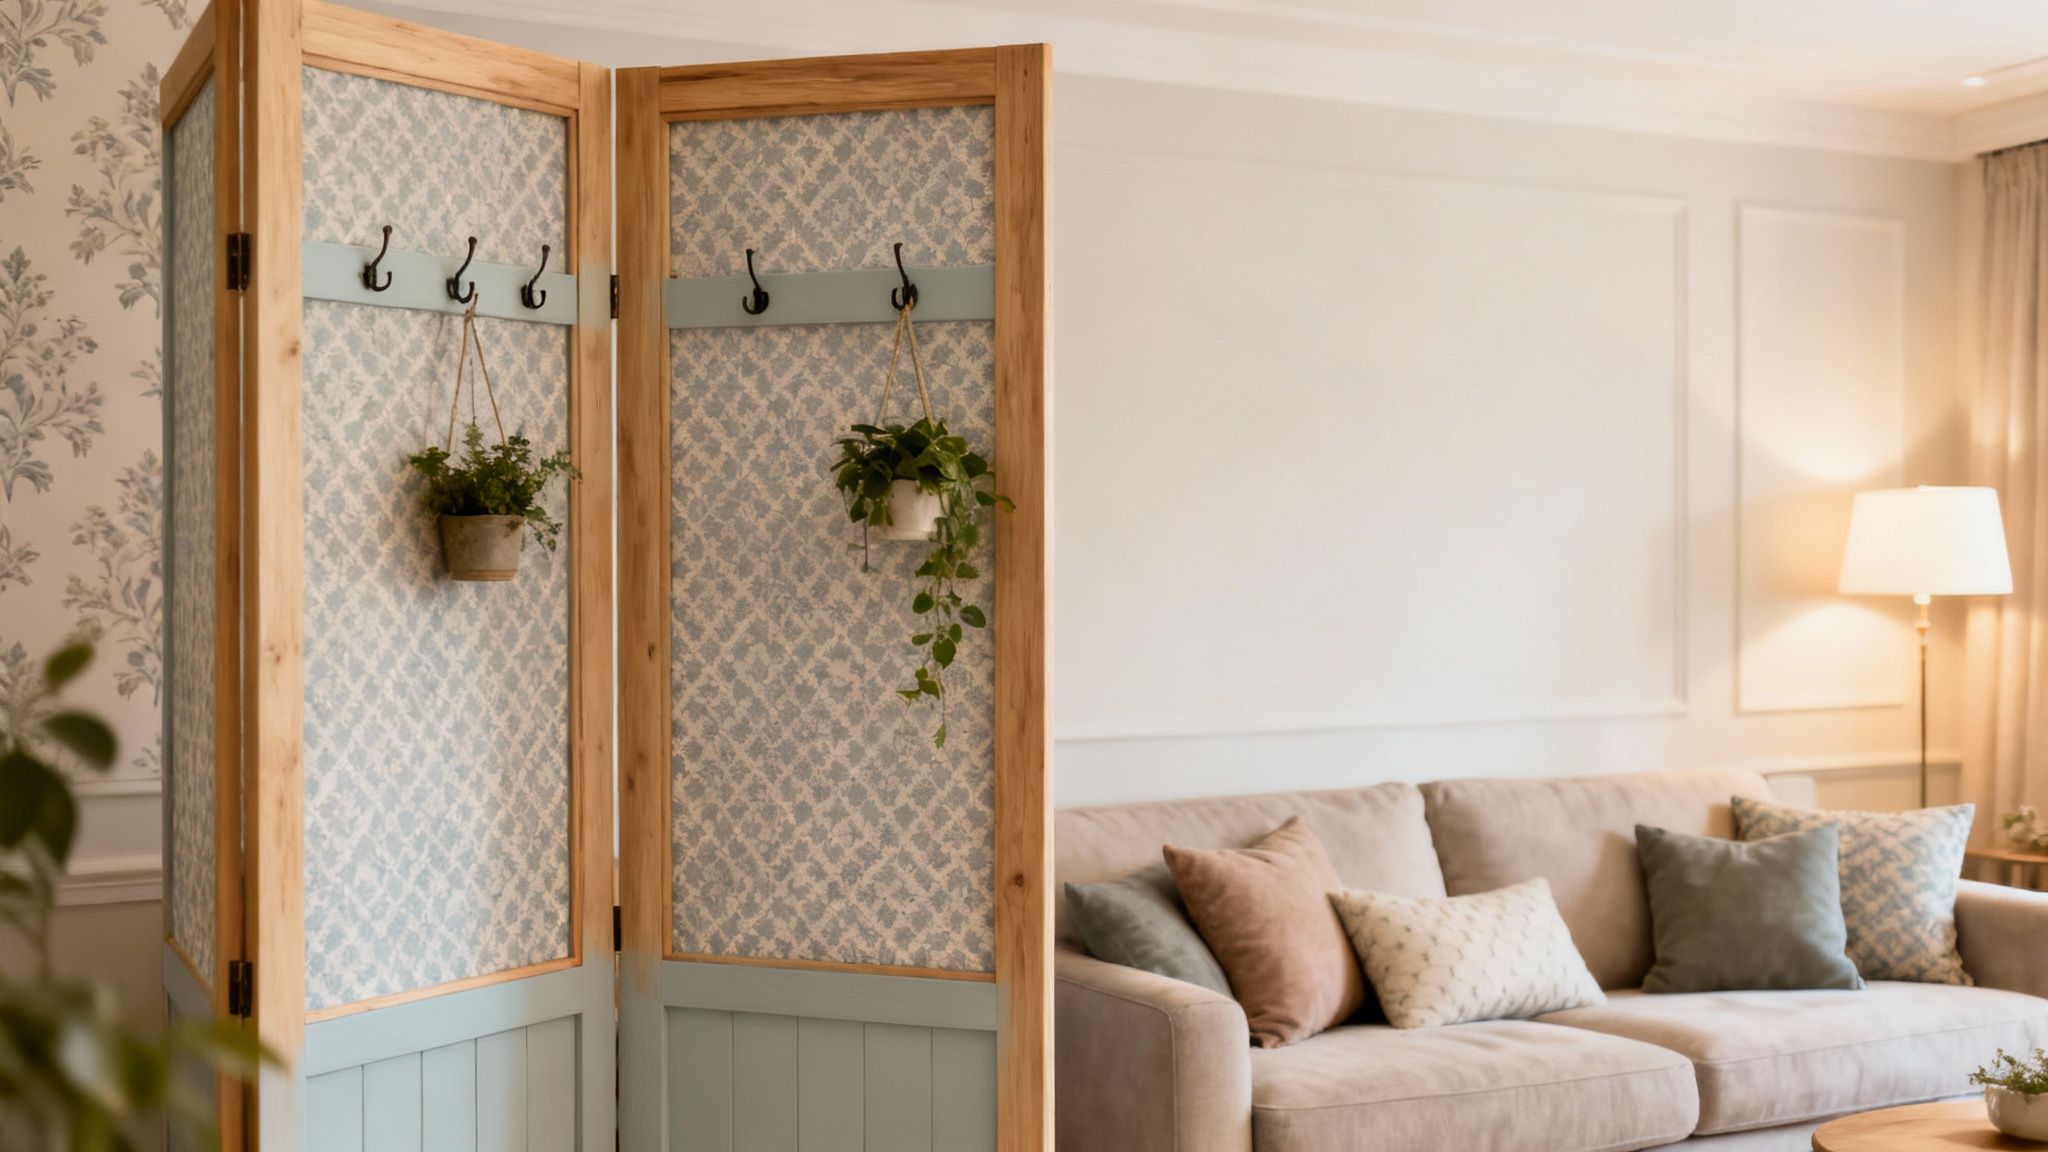
- Folding Screens: Lightweight, easy to store, and perfect for when you only need occasional privacy. You could use one to hide a workout corner when it’s not in use or to create a makeshift changing area in a large bedroom.
Comparing Your DIY Room Divider Options
Still weighing things up? This quick comparison should help you choose the best fit for your home, skills, and weekend availability.
Each option has its perks, whether you're after a quick fix or a more permanent feature. Now, let’s get into the step-by-step guides for making them a reality.
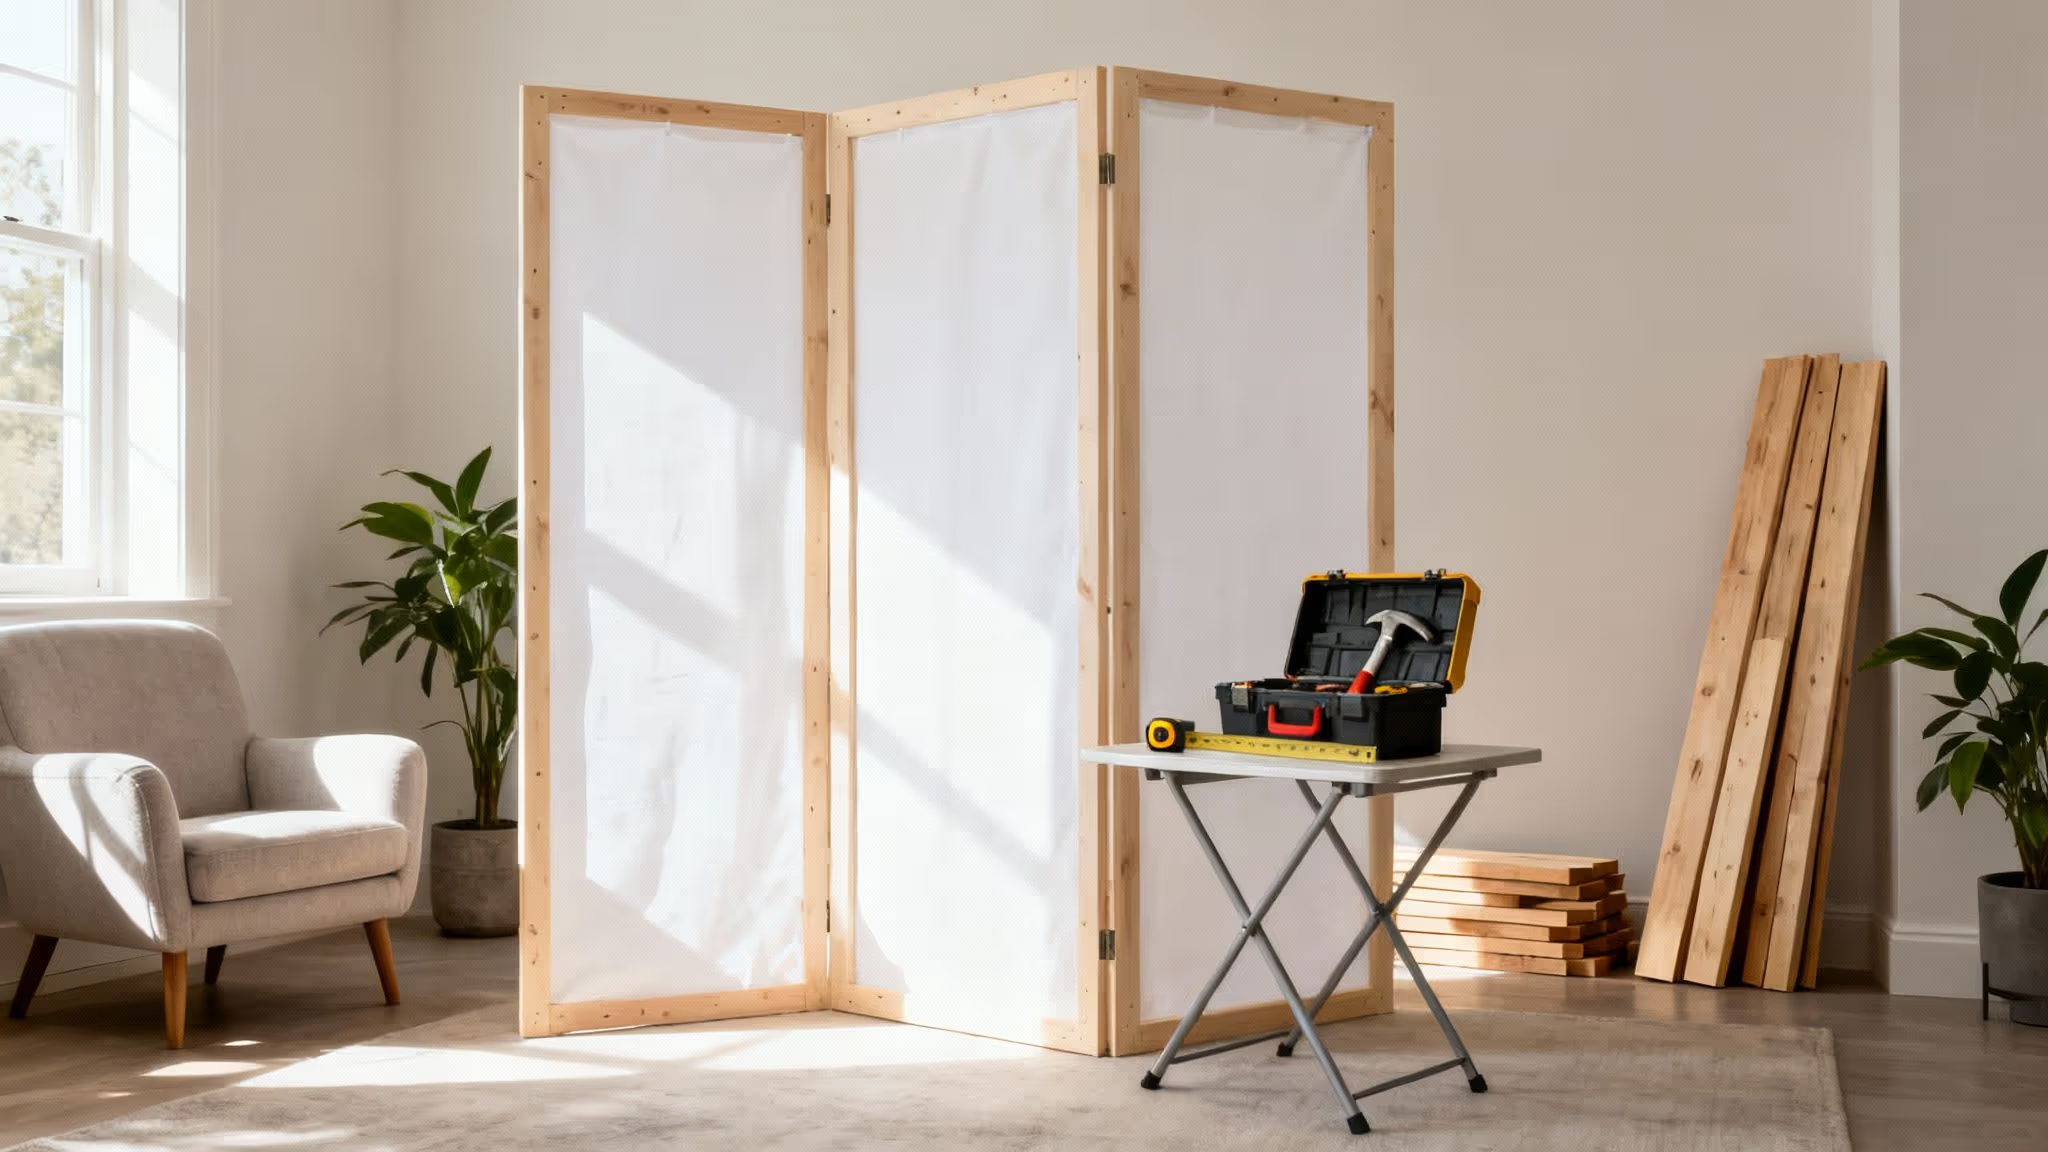
Building a Classic Freestanding Panel Divider
Ready to get your hands dusty? The classic freestanding panel divider is a brilliant first project if you're dipping your toes into DIY. It’s functional, completely customisable, and you don’t need a workshop full of fancy tools to get a result that looks surprisingly professional.
This style of DIY room divider is a perennial favourite for a reason: it’s just so adaptable. You can move it around, swap out the fabric when you redecorate, or even add more panels down the line. It's no surprise that floor-standing dividers lead the global market – they’re incredibly easy to install and reposition whenever the mood strikes.
The worldwide demand for room dividers is huge, estimated at around USD 2.5–2.9 billion, with Europe accounting for about a quarter of that. It just goes to show how many of us are looking for clever ways to zone our homes and offices. If you’re curious, you can dive into the full research on room divider popularity. This weekend project puts you right on trend.
Gathering Your Materials and Tools
First things first, let’s get everything in one place. Nothing stalls a project faster than having to hunt for a tape measure halfway through. For a standard three-panel screen, this is what you’ll be looking for.
Essential Materials:
- Timber for the Frames: You’ll need six longer pieces for the sides (say, 1.8m each) and six shorter ones for the top and bottom (60cm each). A smooth, planed timber like pine is a great, budget-friendly option.
- Fabric or Covering: Enough to cover your three panels. A good rule of thumb is to have about 10cm extra on all sides for stretching and stapling. Canvas, muslin, or a nice upholstery fabric all work beautifully.
- Hinges: You'll need at least four, but six is much better for stability (three for each join). Look for double-acting hinges so your screen can fold in both directions.
- Screws and Wood Glue: For putting the frames together so they’re rock-solid.
Tools You'll Need:
- A saw (a simple hand saw will do the job, but a mitre saw is the secret to getting perfectly square corners)
- A drill with screwdriver bits
- A staple gun and plenty of staples
- A tape measure and pencil
- Sandpaper for smoothing off any rough edges
Pro Tip: Before you even think about heading to the timber yard, sketch out your design. Nailing down the final height and width of each panel helps you calculate exactly how much wood to buy and cuts down on waste.
Constructing the Panel Frames
With your materials all laid out, it’s time to build the skeletons of your divider. Taking your time here is crucial – accurate cuts and square corners will ensure your finished screen stands tall and doesn’t wobble.
Start by cutting your timber to the lengths you decided on for each panel frame.
Once everything’s cut, lay out the four pieces for one panel on a flat floor. Run a thin bead of wood glue along the ends of the shorter top and bottom pieces. Press the longer side pieces against them to form a rectangle, then drive a screw into each corner to hold it all together. Do this for all three panels.
For taller frames, adding a central brace is a smart move. Just fit a single piece of timber horizontally across the middle of each frame. It’ll stop the frame from warping over time and gives you another surface to staple your fabric to. If you’re using reclaimed wood, like from old pallets, just make sure it’s clean and sanded down. For more inspiration, check out these brilliant pallet wood projects.
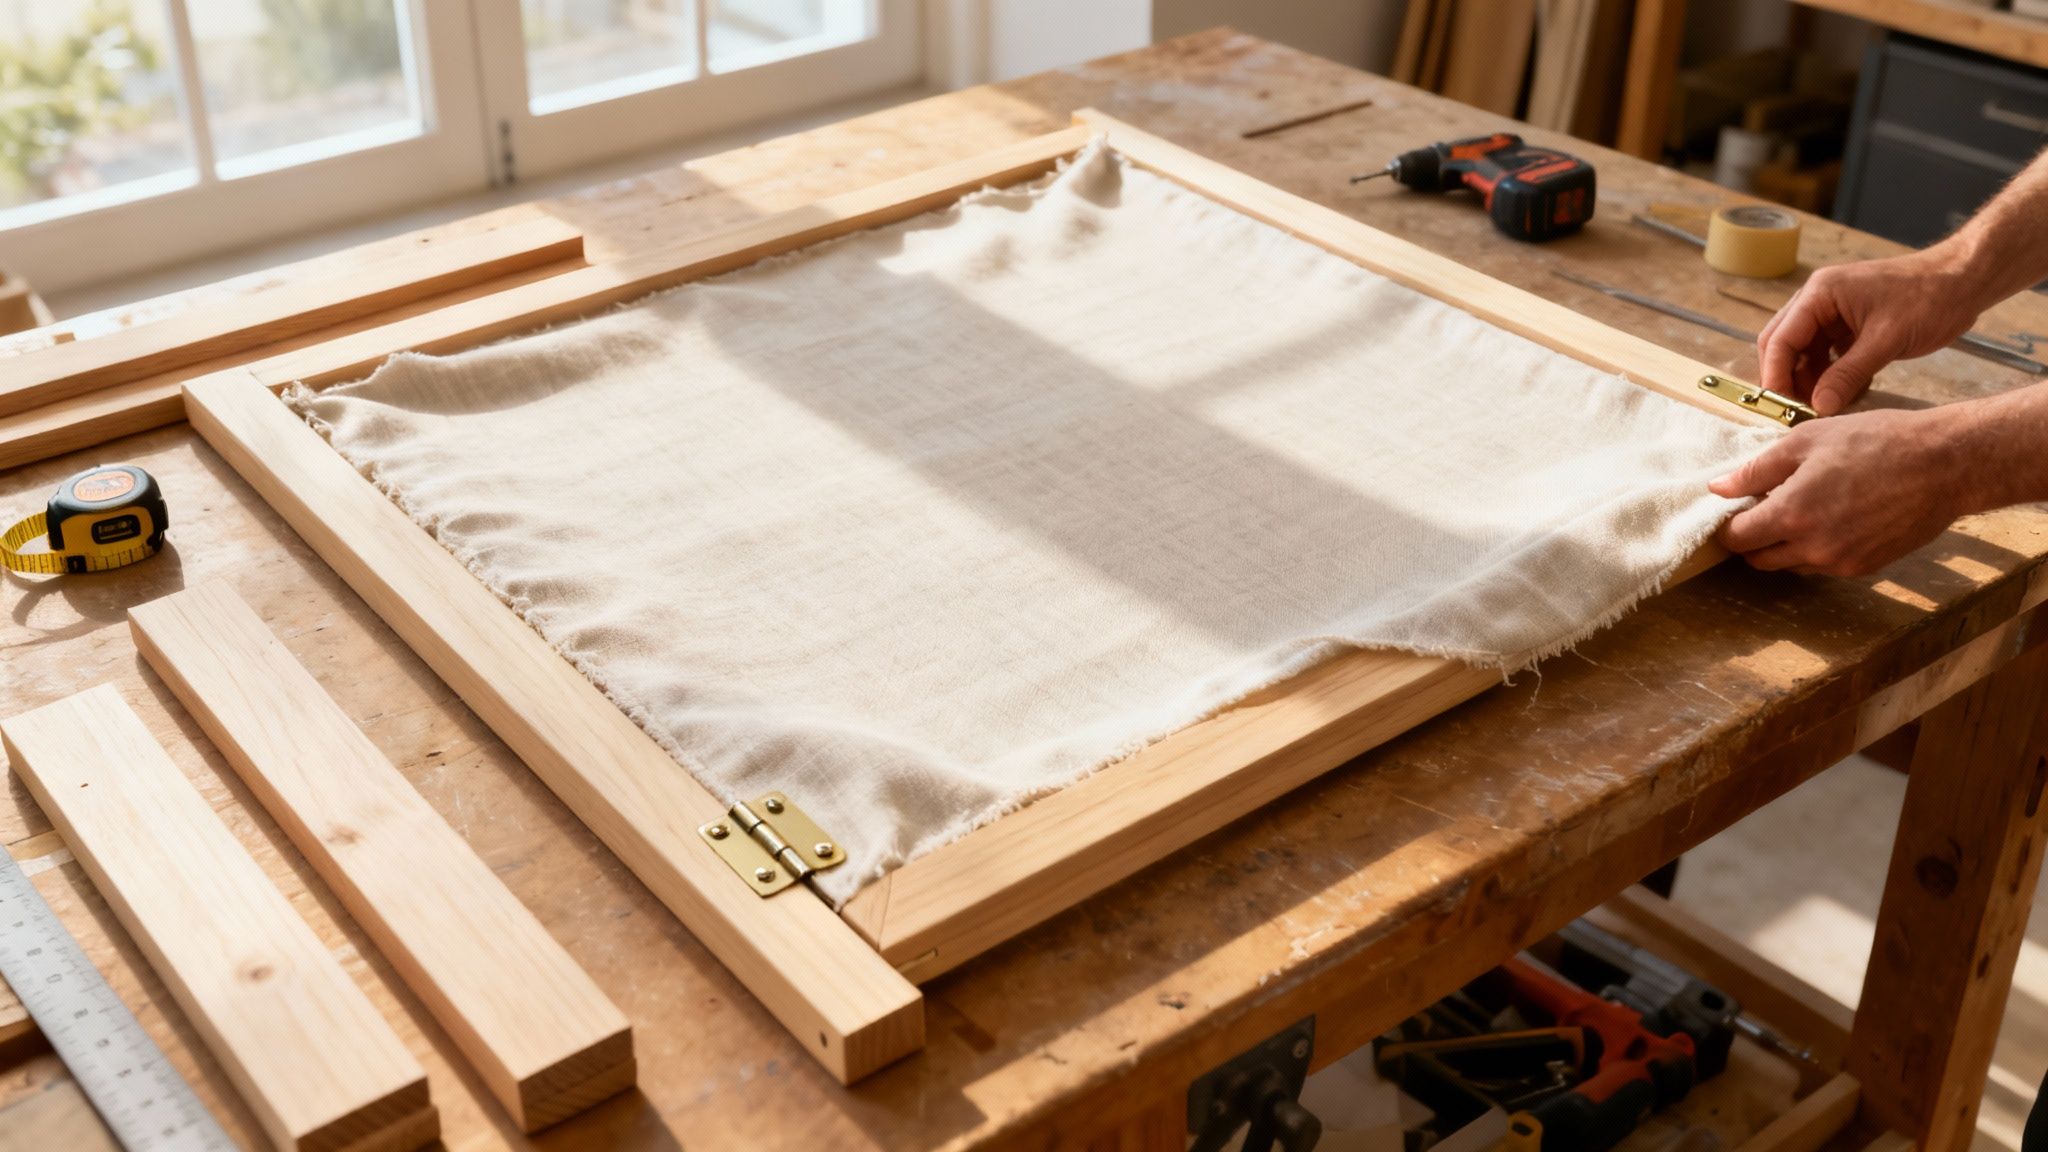
Attaching the Fabric and Final Assembly
Here’s where your divider really starts to come to life. Lay your chosen fabric flat on the floor, with the pattern-side facing down, and place one of your wooden frames on top.
Start in the centre of one of the long sides, pull the fabric nice and taut, and fire a staple into the back of the frame. Now, move to the opposite side, pull the fabric tight again, and pop another staple in. Keep going like this, working from the centre outwards and alternating sides. It’s a bit like stretching a canvas for a painting – the key is to keep the tension even to avoid any wrinkles.
Finally, lay two of your finished panels side-by-side and mark where your hinges should go. Screw them in, making sure the panels can fold smoothly. Attach the third panel in the same way, stand it up, and admire your work. Your classic freestanding divider is complete.
Creative Builds With Curtains and Bookshelves
Not every room divider needs a power tool and a pile of sawdust. Sometimes the best solutions are the ones hiding in plain sight, using everyday items in a clever new way.
Enter curtains and bookshelves. One offers a soft, flowing boundary that can hide clutter or create a cosy nook in seconds. The other is a sturdy, practical partition that doubles your storage space. It’s a win-win, and here’s how to get it right.
The Elegant and Easy Curtain Divider
A curtain is probably the simplest and most renter-friendly DIY room divider going. It’s a soft partition that you can pull back to open up a room or close for instant privacy—perfect for carving out a sleeping area in a studio flat.
You’ve got two main routes for installation:
- Ceiling Track: This is the more permanent option, involving a metal or plastic track screwed directly into the ceiling joists. It gives a really polished, seamless look and lets the curtain glide like a dream. Sturdy, clean, and very professional.
- Tension Rod: If you’d rather not get the drill out, a heavy-duty tension rod is your best friend. It fits securely between two walls without leaving a single mark, making it a zero-damage fix you can put up in minutes.
The fabric you choose completely changes the feel. A sheer linen will gently filter light, defining a space while keeping it feeling bright and airy. On the other hand, a heavy velvet or thick cotton offers maximum privacy and even helps dampen sound a little.
In fact, since the pandemic, there’s been a huge rise in using fabrics for their acoustic benefits. People are realising that a simple curtain can make a room feel calmer and quieter, which you can read more about in this report on how acoustics influence material choices at datainsightsmarket.com. It's a low-cost, high-impact upgrade.
Transforming a Bookshelf into a Partition
Using a bookshelf as a room divider is a classic for a reason—it’s just so practical. An open-backed unit like the IKEA KALLAX is ideal because it doesn't block light, preventing the newly divided spaces from feeling small and dark.
The two things you need to nail are stability and styling. An unsecured bookshelf is a serious safety hazard, especially if you have kids or pets running around. Always, always use L-brackets to fix the top of the unit to a wall stud. If you’re floating it in the middle of a room, you might even consider securing it to the floor or ceiling for total peace of mind.
The magic of a bookshelf divider is that it’s not just a wall; it’s a living display. It showcases your personality from both sides with books, plants, and favourite objects.
Styling is where the fun begins. Arrange your items thoughtfully, leaving some breathing room on the shelves to keep things from looking cluttered. Mix books with decorative objects, trailing plants, and stylish storage baskets. You want to create a feature that looks good from every angle.
If you’re stuck for ideas, our guide on how to style bookshelves has plenty of tips to get you started. The goal is to make your divider a beautiful focal point, not just a bulky piece of furniture.
Styling Your Divider to Elevate Your Decor
Right, the structure is up. But let's be honest, the project isn't really finished until your new divider looks less like a DIY project and more like a considered piece of your home. This is the fun part, where a functional object gets its personality.
The quickest win? Colour. A simple coat of paint is the easiest way to tie a wooden divider into your room's existing scheme. Go for the same shade as your walls for a subtle, almost built-in look, or be brave with a bold accent colour that turns it into a proper focal point.
But don’t just stop at paint. Got some leftover wallpaper or a fabric offcut you love? Now's its time to shine. Covering the panels can add an amazing pop of pattern. A sharp geometric print instantly modernises a space, while a soft floral can bring in a bit of cottage charm, proving how small touches lead to big affordable interior design wins.
Adding Personality and Function
Good styling makes your DIY room divider work a bit harder for its spot in the room. By adding a few clever, functional bits, you not only make it look better but also give it more purpose.
- Pop on a few small hooks for hanging delicate fairy lights, tote bags, or even your keys if it's carving out an entryway.
- Stick a corkboard panel to one side. Perfect for creating a mini-memo station in your new WFH corner.
- Weave in some greenery. Add a few clips for draping air plants or hang small planters from the top of the frame for a living, breathing touch of nature.
The goal is to make your divider feel truly integrated, not just plonked down. The way you style it should hint at the purpose of the new zone you’ve created, whether it's for work, sleep, or just chilling out.
To really finish the look, think about what’s around it. A cool floor lamp placed next to the divider can cast a lovely, warm glow in the evening. Or, you could put a big potted plant at its base to soften the lines and help it blend in. It’s these little details that anchor the divider in the room, making it look intentional and part of your home’s story.
Your DIY Room Divider Questions Answered
Even the best guides can leave you with a few questions. You're halfway through a project, covered in sawdust, and a problem pops up that definitely wasn't in the instructions. This is your go-to spot for those last-minute queries about your DIY room divider.
From stopping it from wobbling to making sure you get your deposit back, we've got you covered.
How Can I Make My Freestanding Divider More Stable?
Ah, the dreaded wobble. It’s a common headache, especially if you’ve gone for a taller, lighter design. The quickest fix is to give it a wider base. Simply attach small, flat ‘feet’ made from scrap wood, making them stick out perpendicularly a few inches on either side of the bottom frame. It’s a small change that makes a huge difference to its footprint.
Another trick is all in the angles. Make sure your panels are hinged to create a sharp zig-zag when you stand it up. A divider that’s only slightly bent is just asking to be knocked over. If you’ve got a three-panel screen, really go for that pronounced ‘Z’ or ‘U’ shape. That’s where it gets its strength.
The secret to a stable freestanding divider isn't weight; it's geometry. A wider base and sharper angles will do more to prevent tipping than simply using heavier materials.
What Are the Best Budget Materials That Don't Look Cheap?
Creating a divider that looks like it came from a high-end interiors shop doesn't have to cost a fortune. You just need to get a bit creative with your materials.
- Fabric Choices: Forget pricey upholstery fabric. Have a look at canvas drop cloths from a hardware shop. They're incredibly durable, have a lovely, natural texture, and are a dream to paint or dye. Even basic muslin, when stretched really taut, gives you a clean, minimalist look.
- Frame Materials: While smooth, planed timber is lovely, don't write off PVC pipe. Seriously. A couple of coats of matte black or metallic spray paint, and it suddenly looks very cool, industrial, and modern.
- Creative In-fills: Think outside the box. Reed or bamboo fencing, the kind you find in affordable rolls at garden centres, is brilliant. You can cut it to size and pop it into a frame for a beautiful, textured screen that still lets a bit of light through.
Are There Any Good Divider Options for Renters?
Absolutely. The golden rule for renters is to pick something completely non-permanent that won't leave a single mark on the walls, floors, or ceiling. Your best friends here are freestanding designs that support themselves.
Bookshelf dividers are perfect because they’re completely self-supporting and add loads of storage. In the same way, a well-built folding screen needs no installation whatsoever.
If you want a softer partition, a heavy-duty tension rod is the ultimate renter-friendly tool. You wedge it between two walls, and the pressure holds it firmly in place – no drills, no screws. Just add a substantial curtain, and you’ve got a private, separate space in minutes.


