To get your garden beds ready for planting, you first need to get to know your soil—its texture, pH, and what nutrients it’s holding. From there, it's all about improving its structure and fertility with organic goodies like compost and making sure it drains well. This foundational work isn't just a chore; it’s the single most important factor for a successful garden.
Why Great Gardens Start with Healthy Soil
Before you even think about buying a single plant or packet of seeds, take a look down. The real secret to a stunning garden is right there under your feet. Preparing your soil properly is the best investment you can make for your garden's future. It’s a step many people rush, leading to frustration later on, but getting it right from the start promises healthier plants and bigger harvests.
Many of us in the UK are working with less-than-ideal native soils. It might be stubborn, heavy clay that turns into a swamp after a good rain, or it could be sandy soil that dries out in a flash, with all the nutrients washing away. Figuring out what you're starting with is the only way to create a place where plant roots can truly thrive.
The Essential Framework for Success
You can break the whole process down into a simple, logical flow: Test, Amend, and Prepare. This isn't about guesswork; it's about giving your soil precisely what it needs to support life. Think of it like building a house—you wouldn't put up walls on a dodgy foundation. Your soil is that foundation.
Investing time in your soil before planting pays dividends all season long. You’ll spend less time troubleshooting problems like nutrient deficiencies or pest issues and more time enjoying a vibrant, productive garden.
This is a particularly big deal here in the UK. We're facing some serious soil health challenges, with an estimated 95% of UK agricultural soils at risk of compaction and over 2 million hectares vulnerable to erosion. These problems choke root growth, stop water from draining, and slash yields, costing the UK economy around £1.2 billion every year. While that figure is from farming, the principles are just as relevant to your back garden. Good soil preparation builds resilience against these very same issues. For a deeper dive, the Farming Advice Service offers great insights into UK soil health.
Getting this groundwork right sets the stage for everything else. It’s a core principle that ties into many modern gardening philosophies. In fact, if you’re keen on staying up-to-date, you’ll find that healthy soil is at the heart of the most exciting garden trends for 2025.
Decoding Your Garden: A Practical Guide to Soil Testing

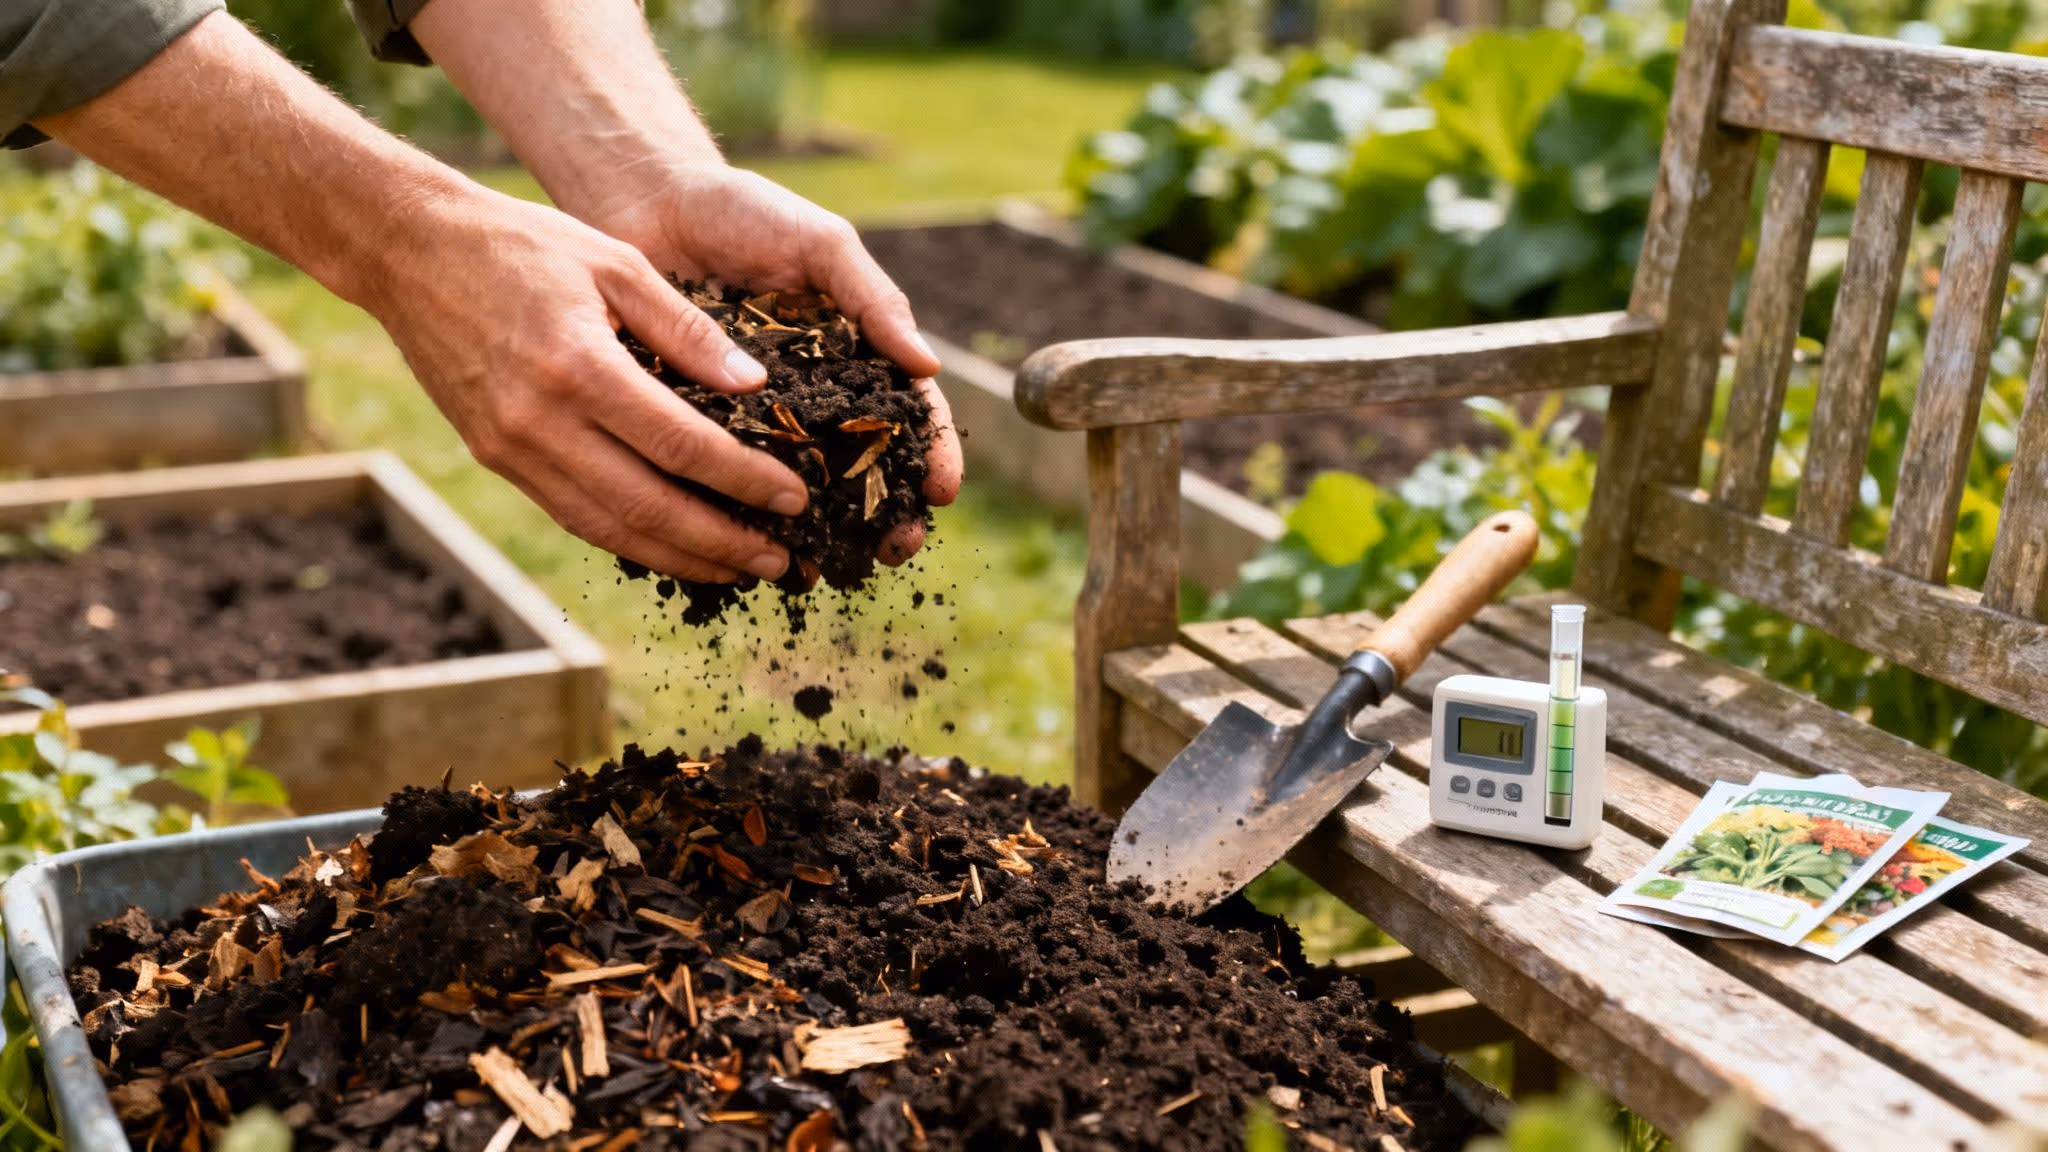
Before you even think about adding compost or fertiliser, you need to understand what you’re working with. Tossing amendments into your garden without knowing what the soil actually needs is a bit like trying to bake a cake without a recipe—you might get lucky, but you’ll probably end up with a mess.
Gathering real data is the first step. It’s how you move from guesswork to a targeted action plan that will actually make a difference. Luckily, you can learn a tremendous amount with a few simple, hands-on tests you can do yourself.
Getting to Know Your Soil Texture and Drainage
First up, let’s figure out what your soil is made of. The soil texture—the mix of sand, silt, and clay particles—is hugely important. It dictates how well your soil holds onto water, air, and nutrients, which are all vital for healthy plant roots.
Just as crucial is drainage. If your soil holds too much water, it can literally drown your plants. A simple percolation test can show you how quickly water moves through the soil, flagging potential waterlogging issues before they become a problem.
Understanding your soil’s texture and drainage is non-negotiable. These two factors control nearly everything else, from nutrient availability to root health. Get this right, and you're halfway to a successful garden.
For a quick and easy way to get a handle on your soil's basic characteristics, you can perform a couple of simple tests at home without any fancy equipment. These will give you a solid baseline to work from.
Quick Soil Texture and Drainage Tests at Home
These hands-on tests give you invaluable local knowledge. It’s a principle applied on a massive scale across the UK, where rural soils cover 85% of the land area. Organisations like the British Geological Survey use sophisticated mapping to help farmers manage their land and support sustainable soil preparation, showing just how critical this information is.
Why Your Soil pH Matters
Beyond its physical makeup, the chemical balance of your soil—its pH—is a real game-changer. Think of pH as the gatekeeper for nutrients. Even if your soil is packed with goodness, if the pH is too high (alkaline) or too low (acidic), many of those essential nutrients become 'locked up' and unavailable to your plants.
Most vegetables, fruits, and flowers are happiest in a slightly acidic to neutral pH range, somewhere between 6.0 and 7.0. When the pH is outside this sweet spot, plants can show signs of stress like yellowing leaves (chlorosis), even when there are plenty of nutrients in the soil.
You can check your soil's pH with an inexpensive home testing kit from any garden centre. They’re incredibly easy to use and give you a quick, reliable reading in minutes.
When to Consider a Professional Lab Test
While DIY tests give you a fantastic overview of texture, drainage, and pH, they don't tell the whole story. They won't, for instance, pinpoint specific nutrient deficiencies, like a lack of phosphorus or potassium. If you've corrected your pH and improved the structure but your plants are still struggling, it might be time to call in the experts.
A professional lab test will provide a detailed report on:
- Macronutrient levels (Nitrogen, Phosphorus, and Potassium – N, P, K).
- Micronutrient availability, including magnesium, calcium, and iron.
- Organic matter percentage, a crucial indicator of overall soil health.
This level of detail is particularly useful if you’re starting a new garden on unknown ground or dealing with persistent issues. It removes the final bit of guesswork and gives you a precise prescription for what your soil truly needs.
Choosing the Right Amendments for Your Soil Type

With your soil test results in hand, you’ve swapped guesswork for a proper strategy. Now, we can start prescribing the perfect treatment for your garden, creating a thriving home for whatever you plan to grow. Choosing the right amendments isn’t about just tipping a bag of compost on the beds; it's about making targeted changes based on exactly what your soil needs.
This is where you get to be a bit of a soil architect. You'll be adding specific materials to improve the structure, fertility, and pH balance. Think of it less as a chore and more like crafting a bespoke recipe for your patch of earth. Each amendment has a particular job, and getting the combination right is the key to unlocking your garden's true potential.
Taming Heavy Clay Soil
If you’re gardening anywhere in the UK, there's a very good chance you're dealing with heavy clay. We all know the signs: it’s dense, holds water for what feels like an eternity after a downpour, and bakes rock-solid in the summer sun. It can be a real battle for plant roots to push through. The goal here is simple: improve its structure and drainage.
Your number one tool for this job is organic matter. Incorporating well-rotted compost, leaf mould, or aged manure is non-negotiable. These materials work their magic by binding the tiny, sticky clay particles into larger clumps, known as aggregates. This process creates crucial air pockets that allow water to drain away and roots to finally breathe.
For particularly stubborn, compacted clay, adding some horticultural grit can make a world of difference. It's important not to use fine builder's sand, as that can actually worsen compaction. Coarse grit physically separates the clay particles, boosting aeration even further. A good mix of organic matter and grit is a powerful combination for transforming heavy clay into a workable, fertile loam.
Boosting Sandy Soil
At the complete opposite end of the spectrum is sandy soil. Its main problem is the inability to hold onto water and nutrients. Water runs straight through it, taking valuable minerals along for the ride. Your mission, should you choose to accept it, is to increase its "sponge factor"—its capacity to retain moisture and nutrition.
Once again, organic matter is your best friend. Amendments like well-rotted manure and coir (coconut fibre) act like a binding agent, filling the large gaps between sand particles. They add much-needed body to the soil and are brilliant at soaking up water, releasing it slowly to your plants when they need it.
Simply put: in clay soil, organic matter creates space; in sandy soil, it fills the space. This is precisely why good compost is often called the universal soil conditioner—it has a knack for correcting problems at both extremes.
"The golden rule of soil improvement is simple: feed the soil, not the plants. A healthy, living soil rich in organic matter will provide your plants with a steady supply of everything they need to flourish."
Adding a generous layer of compost will dramatically improve your sandy soil's water-holding capacity, meaning you’ll spend less time with the watering can. You might also find that creating your own nutrient-rich amendments is easier than you think; you can get started with our guide on making homemade plant food.
Getting the Balance Right With Fertilisers
While compost and manure are the cornerstones of long-term soil health, sometimes your garden needs a more immediate nutrient boost. This is especially true if a lab test has flagged specific deficiencies. Fertilisers have their place, but they must be used wisely. Chucking too much on can harm the delicate ecosystem in your soil and lead to nutrient runoff, polluting local waterways.
It's encouraging to see that this message is getting through on a larger scale. UK soil nutrient data from 2022 shows that the national nitrogen surplus on farms decreased by 14.5% from the previous year. Inputs of inorganic nitrogen and phosphorus also dropped by around 10% and 10.5% respectively. This reflects a better understanding of applying only what crops need—a principle every home gardener should follow. If you're interested in the details, you can review the official UK soil nutrient balance statistics from gov.uk.
Common UK Soil Problems and Their Solutions
Every garden presents unique challenges. This table is a quick reference guide to help you identify some common issues found in UK soils and choose the right amendments to fix them.
By matching the right solution to the problem, you can make significant improvements to your soil's health and productivity over time.
Adjusting Your Soil pH
Your soil’s pH level is a critical piece of the puzzle. If it's too acidic or too alkaline, plants simply can't access the nutrients available in the soil, even if they are plentiful. It's like having a locked pantry.
Here’s how to get it right:
- For Acidic Soil (Low pH): If your soil is on the sour side, you'll need to make it more alkaline. The most common way to do this is with garden lime (calcium carbonate). It's best applied in autumn, as it takes a few months to start working its magic.
- For Alkaline Soil (High pH): To lower the pH and make your soil more acidic, you can work in materials like sulphur pellets or ericaceous compost. This is essential if you dream of growing acid-loving plants like rhododendrons, blueberries, or camellias.
Always, always follow the application rates on the product packaging. Adding too much of any pH adjuster can swing the balance too far in the other direction, creating a whole new set of problems. The goal is always a gradual, controlled adjustment.
How to Build the Perfect Planting Bed
Once you've got a feel for your soil and have your amendments ready, it’s time to build the beds where your plants will live. Creating a planting bed is more than just marking out a rectangle; it’s about choosing a technique that works for your garden, your body, and your long-term goals. The method you choose has a huge impact on soil health, water retention, and how much weeding you'll be doing later on.
Thankfully, there are several fantastic methods to choose from. Whether you want to work with nature's processes, need to break up rock-hard ground, or just fancy a setup that’s easier on your back, there’s an approach that will suit you perfectly. Let's look at the most popular and effective ways to get your beds ready.
The Gentle Power of the No-Dig Method
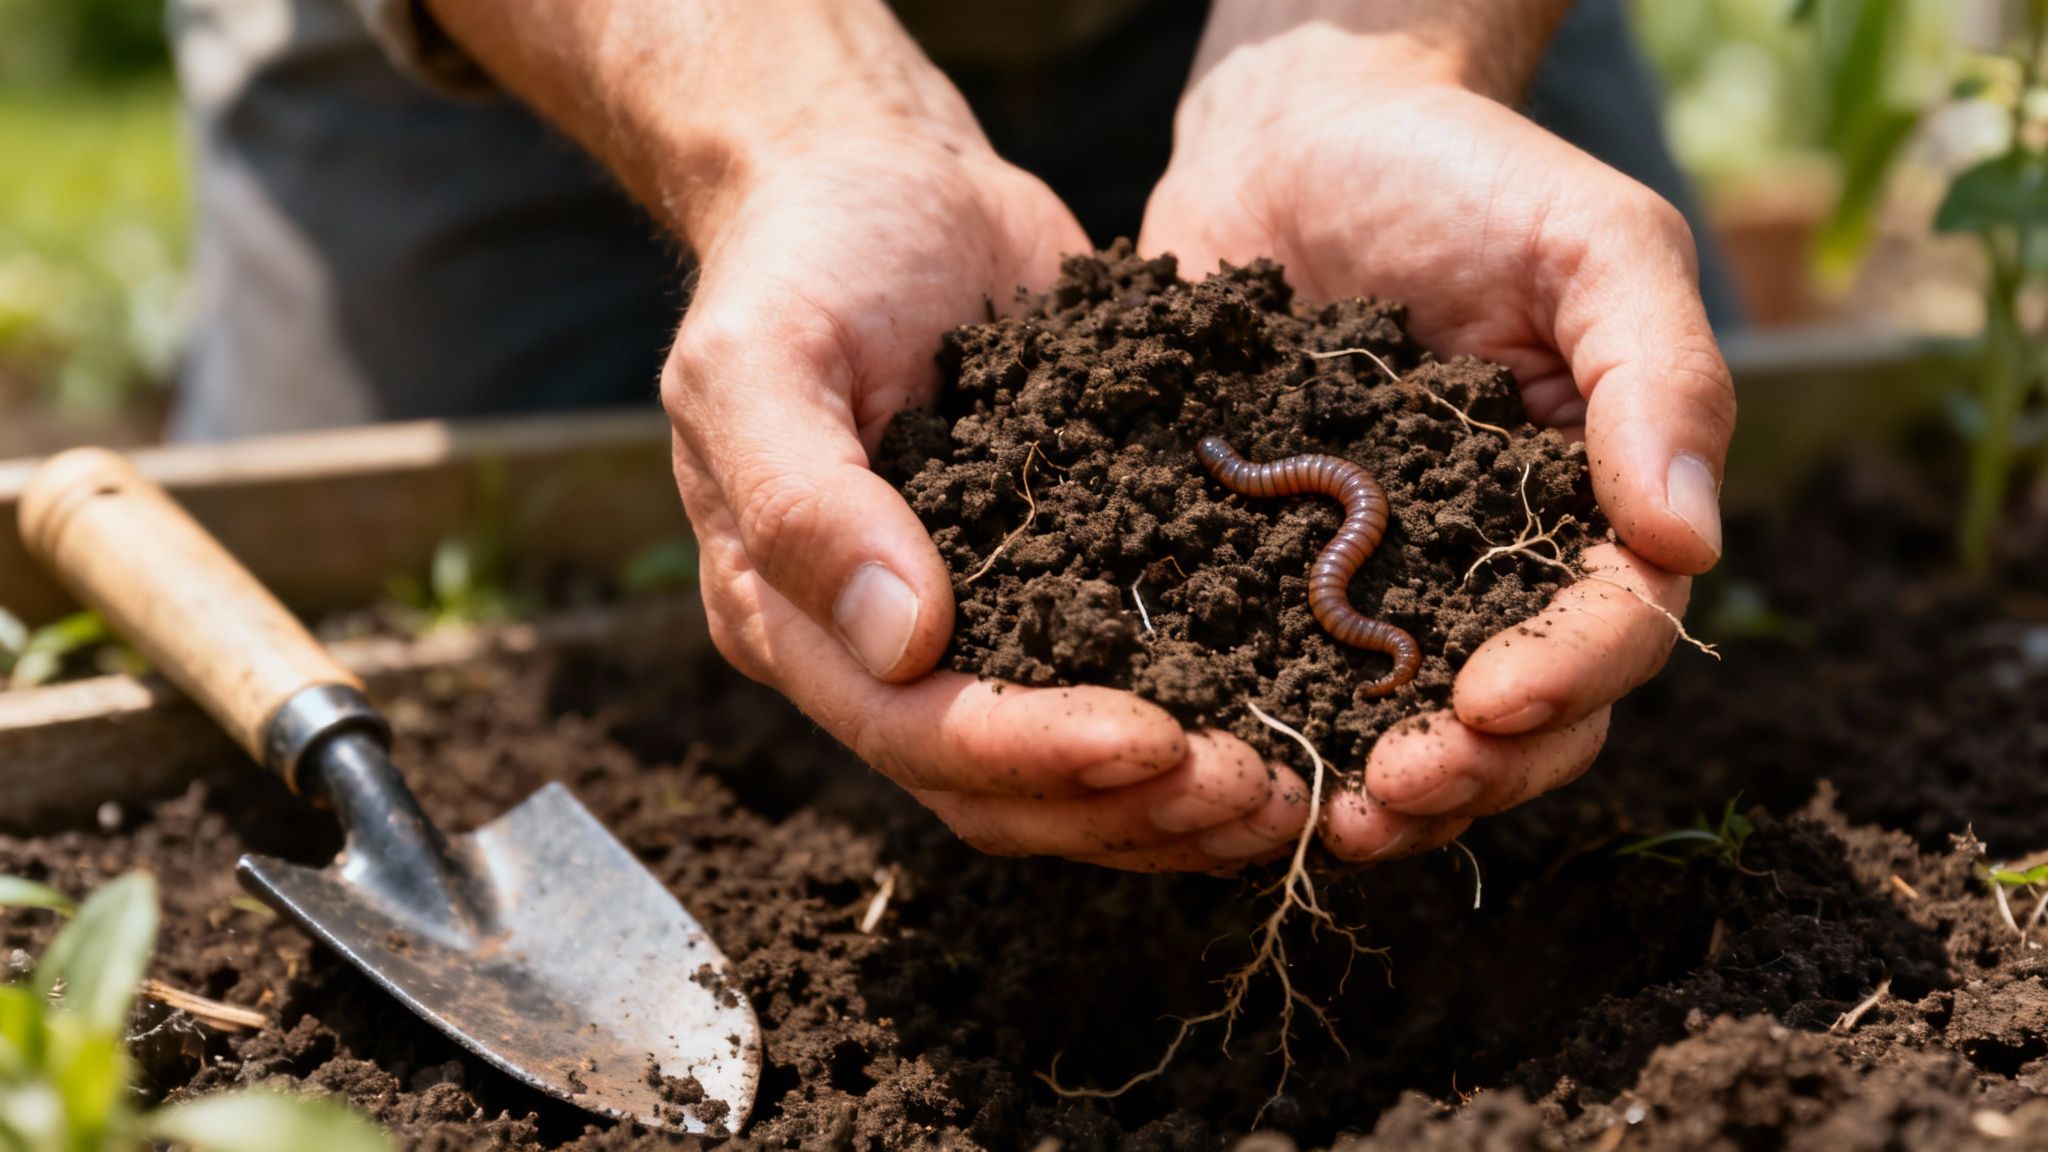
The no-dig approach is a wonderfully low-impact way to prepare your garden, and it's become incredibly popular for a very good reason. The whole philosophy is about preserving the delicate ecosystem just beneath the surface. Instead of turning everything over with a spade, you simply add layers of organic matter, like compost, directly on top.
This process feeds the soil from the top down, just as it happens in nature. All the hard work is done by earthworms and microorganisms, which pull the nutrients down, improve the soil structure, and create an incredibly fertile environment for your plants.
By not disturbing the ground, no-dig gardening preserves the soil's natural structure. This leads to far better water retention, fewer weeds popping up, and a thriving community of beneficial microbes and fungi that are essential for healthy plants.
To get a new no-dig bed started, lay cardboard over existing grass or weeds to block out the light. Then, pile on a thick layer of good quality, peat-free compost—at least 10-15 cm deep. You can plant straight into this layer. Over time, the soil underneath will become unbelievably rich and easy to work with.
When to Consider Double-Digging
While no-dig is a dream for most situations, sometimes you need to bring out the big guns. If you're starting with extremely compacted ground—think of a new-build garden where heavy machinery has squashed the life out of the soil—the traditional double-digging method can be a real lifesaver.
Double-digging involves taking off the top layer of soil (about a spade's depth), then using a garden fork to loosen the subsoil below before putting the topsoil back. It’s undeniably hard work, but it can dramatically improve drainage and aeration in seriously compacted clay. Think of it as a one-off reset button for a new bed; once it's done, you can easily switch to a no-dig approach for future maintenance.
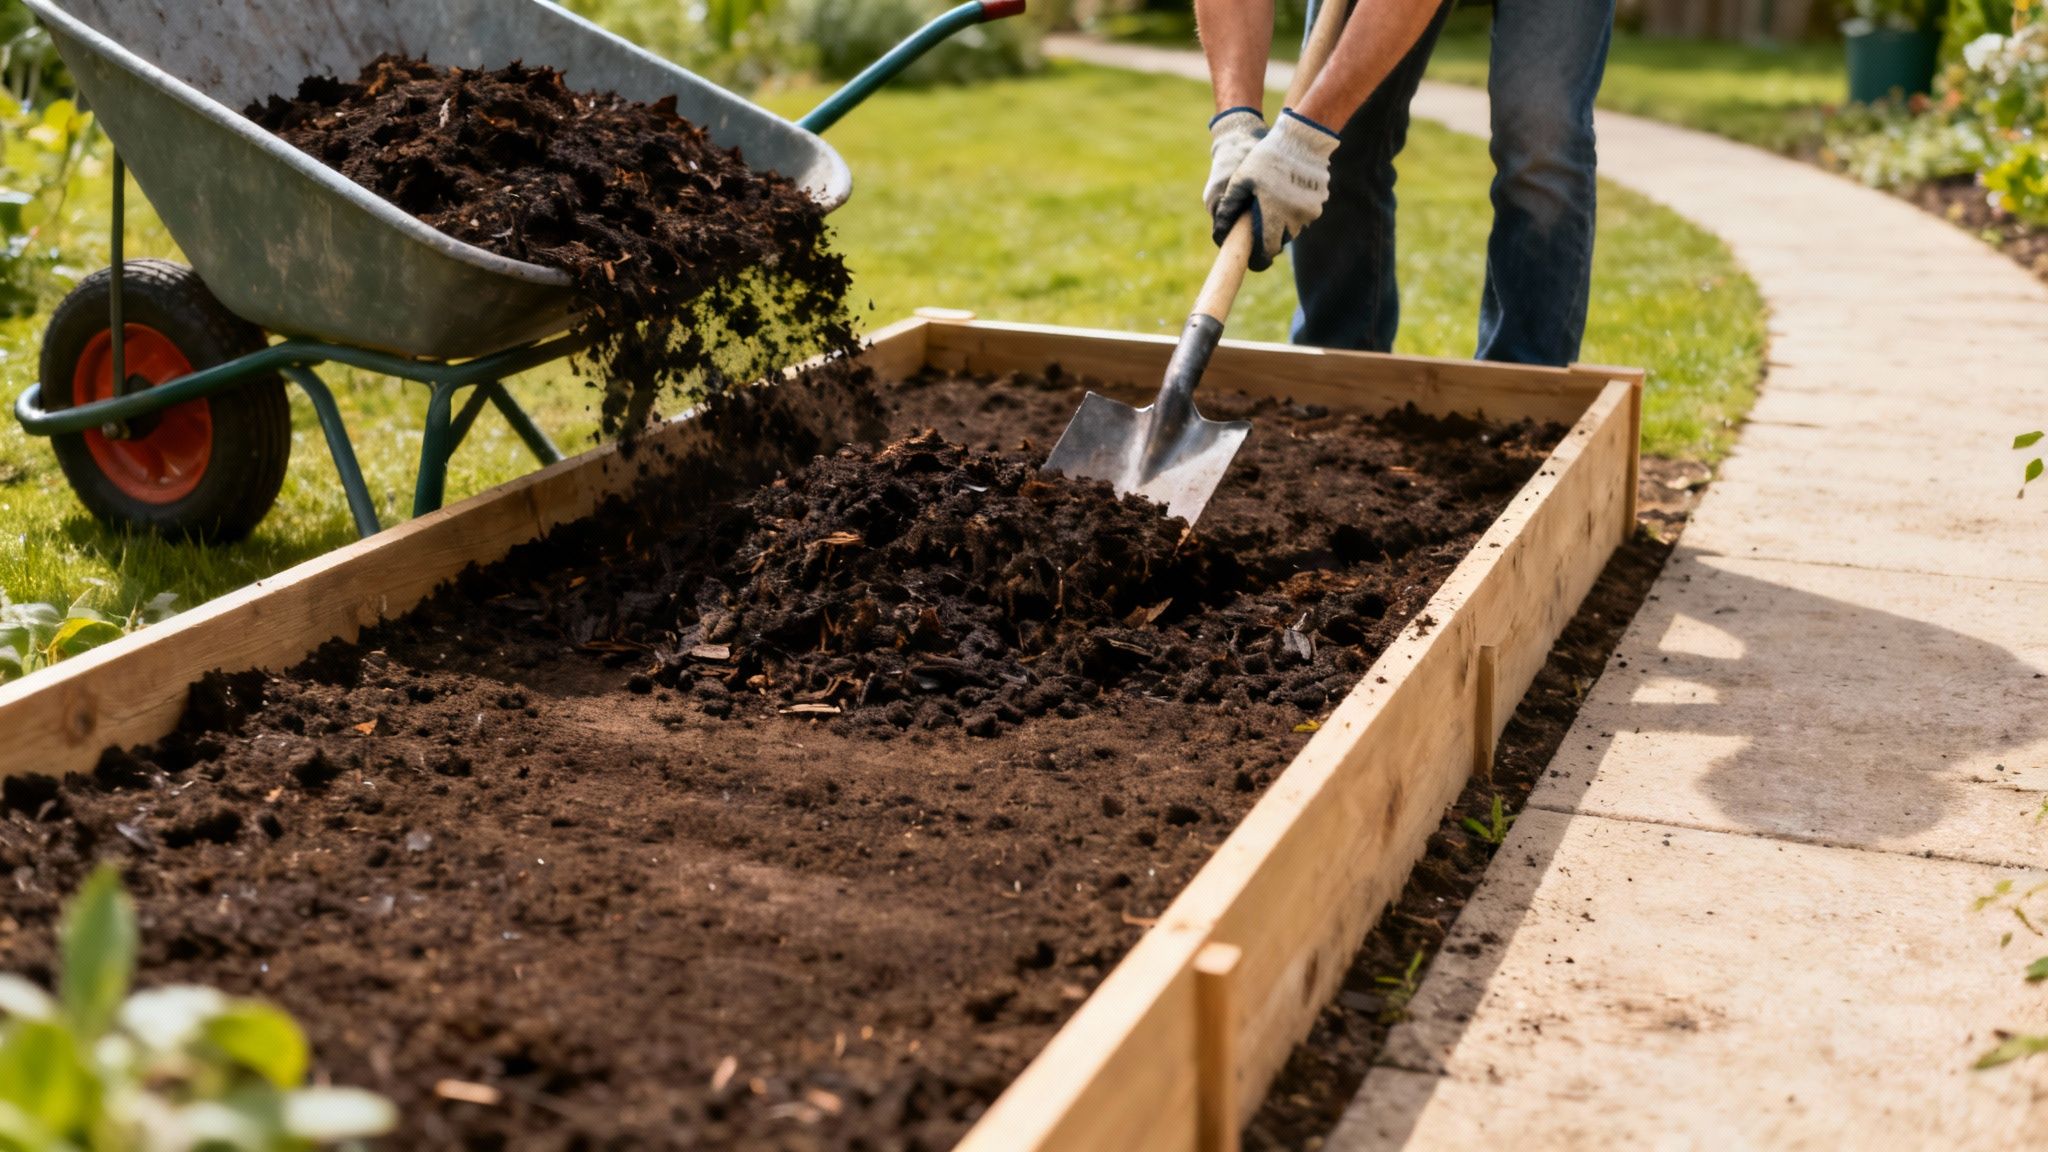
Building and Filling Raised Beds
Raised beds are a brilliant solution for all sorts of gardening challenges. They're perfect if your native soil is poor, constantly waterlogged, or you're worried about contamination. They also offer a much more ergonomic setup, saving your back and knees from a lot of strain.
You can build raised beds from all kinds of materials, from timber and stone to recycled plastic. If you're after a sustainable and creative weekend project, our guide on things to make from pallets has some fantastic ideas for building your own.
Filling them correctly is the secret to success. You don’t need to fill the entire bed with expensive topsoil. A layered approach works best:
- Bottom Layer: Cardboard to smother any weeds below.
- Middle Layer: Bulky organic stuff like logs, branches, and grass clippings (a technique known as Hügelkultur).
- Top Layer: A high-quality mix of topsoil and compost, at least 20-30 cm deep, giving your plants plenty to root into.
Container Gardening Soil Mixes
For anyone with a patio, balcony, or small garden, containers are the perfect solution. The one thing to remember is you can't just scoop soil from the garden into a pot. Garden soil is too dense; it compacts quickly, leading to waterlogged conditions and suffocated roots. You'll need a proper potting mix.
It's easy to make your own fantastic potting mix by combining three simple ingredients. This recipe provides the perfect balance of moisture retention, drainage, and aeration that plants in pots need to thrive.
Basic Container Soil Recipe:
- 1 part coco coir (or peat moss): Provides a light, sponge-like base that holds onto moisture.
- 1 part perlite or coarse sand: This is crucial for creating air pockets and ensuring excellent drainage.
- 1 part well-rotted compost: Adds vital nutrients and beneficial microbes to feed your plants.
By choosing the right bed preparation method from the start, you're setting yourself up for a brilliant and less stressful gardening season. Each of these approaches helps create the perfect growing environment, giving your plants everything they need to flourish.
A Seasonal Calendar for Soil Preparation
Getting your soil right isn’t a one-and-done job you blitz in the spring. I like to think of it as a year-round conversation with my garden. When you start working with the seasons instead of against them, you build incredible soil health over time, and each year’s harvest gets better for it.
Thinking seasonally breaks the work down into manageable chunks and stops that mad spring rush. The effort you put in during autumn pays dividends for spring planting, which in turn sets the stage for a thriving summer garden. It all connects.
Autumn: The Foundation Season
Autumn is, without a doubt, the most important time of year for building brilliant soil here in the UK. Once you’ve cleared out the last of the summer crops, you have a golden opportunity to add bulky materials that need a bit of time to work their magic.
- Pile on the organic matter: Now’s the moment to spread thick layers of well-rotted manure, garden compost, or my personal favourite, leaf mould. You don’t need to break your back digging it in. A light forking over the surface is plenty; the winter weather and an army of worms will do the heavy lifting for you.
- Sow a green manure: Planting a cover crop like winter tares, phacelia, or crimson clover is one of the best things you can do for bare soil. These plants act as a living blanket, stopping nutrients from washing away in the rain and adding a boost of organic matter when you chop them down in spring.
The real beauty of autumn prep is giving these amendments the time they need to mellow. By spring, all that coarse material will have transformed into a rich, crumbly tilth, ready to feed your new plants.
Winter: Rest and Protect
Winter is when your soil needs to rest, letting all that lovely organic matter you added in autumn break down. Your main job now is simply to protect it. It’s vital to stay off the soil as much as possible, especially when it’s frozen solid or completely waterlogged.
If there’s one rule every gardener should live by, it’s this: never work wet soil. Walking on or digging saturated ground, especially heavy clay, will wreck its structure by squeezing out all the air. This causes serious compaction that can take years of work to reverse.
If you didn't get a green manure in, you can still shield your beds. Cover them with a layer of cardboard, some black plastic sheeting, or even a thick mulch of straw. This stops weeds from popping up and prevents heavy winter downpours from washing away your precious topsoil.
Spring: The Final Touches
As the ground finally starts to warm up, it’s time for the final prep before you can start planting. The signal to get going is when the soil is moist but not sodden—grab a handful, give it a squeeze, and it should crumble apart easily. Your goal is to create a perfect seedbed, what gardeners call a fine tilth.
The work now is all about refinement. That manure you spread in the autumn? You’ll find it’s broken down beautifully and just needs a gentle forking into the top few inches. If you planted a green manure, simply chop it down and let the leaves wilt on the surface for a week or two before lightly turning them in.
This is also the time to add any quick-acting fertilisers your soil test called for. Once your bed is raked to a fine, level crumb, it’s game on. Timing is everything, and for a detailed guide on what to plant when, our comprehensive UK planting calendar is a brilliant resource.
Summer: Maintain and Mulch
During the height of summer, your soil prep work shifts into maintenance mode. All the hard work you’ve done means your soil will hold onto moisture much better, but you can give it a helping hand.
A good mulch of compost, grass clippings, or straw spread around your plants works wonders. It helps conserve water, keeps weeds down, and stops the soil from baking hard in the sun. This simple cycle—feeding, protecting, and mulching—ensures your garden’s foundation gets stronger with every passing year.
Got Questions About Prepping Your Garden Soil?
Even the most seasoned gardeners run into questions when they're digging in. Learning how to prepare your soil is a process, and hitting a few snags is perfectly normal. Here, I'll tackle some of the most common queries I hear, giving you straightforward answers to help you get unstuck.
Think of this as the troubleshooting section of your journey—clarifying those little uncertainties that pop up along the way.
How Often Should I Be Testing My Soil?
If you're breaking ground on a brand-new garden bed, testing the pH and nutrient levels right at the start is a must. It gives you a vital baseline to work from.
After that initial test, you can ease up. Checking the pH every 2-3 years is usually plenty, unless you start noticing your plants are looking unhappy.
A full nutrient analysis isn't something you need to do all that often. Re-testing every 4-5 years is a good rule of thumb, especially if you're consistently adding plenty of rich, homemade compost each year. But if you're growing demanding crops like tomatoes or spot problems like yellowing leaves (chlorosis), a targeted test can pinpoint the issue and save your harvest.
The real aim of adding compost regularly is to build a healthy, self-sustaining soil ecosystem. The better your soil gets, the less you'll need to interfere with it. Natural cycles will start to provide a steady stream of nutrients for your plants.
Can I Use Compost That Isn't Fully Broken Down?
That’s a great question, and the answer really comes down to how you plan on using it. If the compost is still a bit ‘active’ – maybe it feels warm to the touch or you can still see bits of recognisable food scraps – you don't want to mix it directly into the soil where you’ll be planting.
The decomposition process can temporarily pull nitrogen from the surrounding soil, essentially robbing your plants of this key nutrient just when they need it.
However, this unfinished compost is brilliant when used as a mulch on the surface. Spread it over your beds in the autumn, and it will finish breaking down over the winter months. This process slowly feeds the soil and protects its structure from winter rains. For digging into a planting hole or adding to a potting mix, you always want to use mature, finished compost that looks and smells like rich, dark soil.
Is Bagged Compost Better Than Homemade?
They both have their place, and frankly, most gardeners I know use a bit of both. Homemade compost is a brilliant, zero-cost way to recycle garden and kitchen waste into what we call 'black gold'. If you're tight on space, don't let that put you off; our guide to composting for small gardens is packed with practical tips.
On the other hand, a good-quality bagged, peat-free compost gives you consistency and sterility. This is perfect for starting seeds or for potting up container plants, where you really don't want to introduce any lurking weed seeds or diseases.
A smart approach is to use your precious homemade compost to enrich your main garden beds and save the high-quality bagged stuff for those more controlled uses. Whatever you choose, the most important thing is to always choose peat-free options to help protect our vital peatland habitats.
What's the Difference Between Soil Structure and Soil Texture?
Getting your head around this is one of the biggest lightbulb moments in gardening. It’s the key to understanding what you can change about your soil and what you simply have to work with.
Soil Texture: This is all about the proportion of sand, silt, and clay particles your soil is made of. You can’t really change it—it’s just what your garden came with.
Soil Structure: This refers to how those individual particles clump together into little aggregates. The good news is, you can dramatically improve your soil structure.
Just about every piece of advice on preparing soil is ultimately about improving its structure. Adding organic matter is the single best thing you can do. In heavy clay, it works its way in and pries the tiny particles apart, creating crucial air pockets for drainage and root growth. In free-draining sandy soil, it acts like a sponge, helping those bigger particles cling onto water and nutrients that would otherwise wash away.


