The right lighting can transform a kitchen from a purely functional space into the warm, inviting heart of your home. Yet, with countless fixtures and configurations, choosing the perfect setup can feel overwhelming. Effective kitchen illumination isn't just about a single central fixture; it's a carefully layered system that provides clarity for chopping, warmth for dining, and ambience for late-night chats. These 10 kitchen ceiling lighting ideas move beyond the basics, offering practical solutions and design-led inspiration to help you create a space that is both beautiful and brilliantly lit.
We will explore everything from the sleek integration of recessed cans and soffit lighting to the statement-making appeal of pendant fixtures over an island. You will discover how to implement a layered approach, blending ambient, task, and accent lighting for maximum impact. This guide provides actionable insights for each concept, covering installation tips, styling advice, and cost considerations to ensure you have the knowledge to plan a lighting scheme that works for your specific needs and aesthetic. Whether you are undertaking a complete renovation or just looking for a simple, impactful upgrade, let's shed some light on the best options to brighten your culinary world.
1. Recessed Can Lighting (Ceiling Cans)
Recessed lighting, often called ceiling cans or downlights, is a cornerstone of modern kitchen design. These fixtures are installed directly into the ceiling cavity, creating a flush, minimalist profile that makes the space feel larger and more open. This uncluttered aesthetic is perfect for providing broad, even ambient light across the entire kitchen, forming a foundational layer in a well-thought-out lighting scheme.
Why Choose Recessed Lighting?
This style is one of the most versatile kitchen ceiling lighting ideas available. It provides excellent general illumination without visually cluttering the ceiling, making it ideal for kitchens with lower ceiling heights or those aiming for a sleek, contemporary look. They work beautifully as the primary light source, which can then be supplemented with decorative task and accent lighting.
Implementation Tips for a Flawless Finish
To achieve a professional and effective layout, consider these practical tips:
- Spacing is Key: Position fixtures approximately 4 to 6 feet apart. A common mistake is placing them too close together, which creates harsh hot spots. Proper spacing ensures uniform light distribution.
- Embrace Dimmers: Always install recessed lights on a dimmer switch. This allows you to adjust the brightness from full-power task lighting for food preparation to a soft, ambient glow for evening entertaining.
- Select the Right Colour Temperature: For a warm and welcoming kitchen atmosphere, opt for LED bulbs with a colour temperature of 2700K to 3000K. This range mimics the inviting hue of traditional incandescent bulbs.
- Plan Your Layout: Map out the placement before installation. Focus on illuminating key work areas like countertops, the sink, and the hob, positioning the lights so your body doesn't cast a shadow over your workspace. Consider a grid pattern for overall coverage.
2. Under-Cabinet Task Lighting
While not strictly on the ceiling, under-cabinet lighting is a crucial component of any layered kitchen lighting scheme, working in tandem with overhead fixtures. LED strips or puck lights are installed directly beneath wall cabinets to cast a focused, shadow-free light onto your worktops. This method provides brilliant task lighting for food preparation, chopping, and reading recipes, enhancing both safety and functionality.

Why Choose Under-Cabinet Lighting?
This style is indispensable for eliminating the shadows cast by overhead kitchen ceiling lighting ideas when you stand at the counter. As seen in professional kitchens and high-end residential designs, it provides targeted illumination exactly where it is needed most. It also serves as beautiful accent lighting, highlighting your splashback and adding depth to the kitchen’s overall design. It's a functional touch that brings a professional, organised feel to your space.
Implementation Tips for a Flawless Finish
To integrate this lighting seamlessly, consider these professional tips:
- Select the Right Colour Temperature: A colour temperature of 3000K is ideal for food preparation, as it renders colours accurately without being too harsh or clinical.
- Reduce Glare: Install LED strips inside an aluminium channel with a frosted diffuser. This creates a soft, even line of light and prevents distracting reflections on polished worktops.
- Ensure Even Coverage: If using puck lights, space them approximately 12 to 18 inches apart to avoid dark spots and create consistent illumination along the counter.
- Add Dimmers for Versatility: Connecting your under-cabinet lights to a dimmer allows you to switch from bright task lighting to a soft, ambient glow, perfect for evening atmosphere. For more tips on creating an efficient workspace, learn how to organise your kitchen.
3. Pendant Lighting Over Kitchen Island
Pendant lighting offers a perfect marriage of form and function, suspended over a kitchen island to serve as both a practical task light and a striking decorative centrepiece. These hanging fixtures draw the eye, define the island as a distinct zone within the kitchen, and add a layer of personality and style that broader ambient lighting cannot achieve on its own. They are ideal for illuminating meal preparation, casual dining, and socialising.

Why Choose Pendant Lighting?
This style is one of the most impactful kitchen ceiling lighting ideas for creating a focal point. Pendants add vertical interest and character, turning a functional island into a designer statement. From sleek, minimalist cylinders to large, dramatic domes or rustic glass jars, there is a pendant to suit every aesthetic, making it a versatile choice for elevating your kitchen’s overall design scheme.
Implementation Tips for a Flawless Finish
To hang pendants effectively and create a balanced look, consider these practical tips:
- Height is Crucial: For optimal task lighting without obstructing views, hang pendants so the bottom of the fixture is 30-36 inches (76-91 cm) above the countertop.
- Group in Odd Numbers: Installing a series of three or five smaller pendants creates a more dynamic and visually appealing arrangement than an even number. For more guidance on placement, you can explore detailed guides on lighting for kitchen islands.
- Coordinate Your Finishes: Select pendants with finishes that complement other elements in your kitchen, such as cabinet hardware, taps, or appliance accents, to create a cohesive look.
- Embrace Dimmability: Always use dimmable bulbs and switches. This allows you to transition from bright, functional light for cooking to a soft, ambient glow for dining or entertaining.
4. Layered Lighting (Tri-Level System)
Layered lighting is less a single fixture type and more a comprehensive design philosophy. It involves strategically combining three distinct types of light to create a functional, flexible, and visually appealing kitchen. This tri-level system includes ambient (overall illumination), task (focused light for work areas), and accent (light to highlight architectural features or décor). This approach transforms a kitchen from a purely utilitarian room into a dynamic and inviting space.
Why Choose Layered Lighting?
This is arguably the most effective of all kitchen ceiling lighting ideas because it addresses every possible need. It provides bright, clear light for cooking and cleaning, soft ambient light for dining and socialising, and decorative highlights to add personality. By controlling each layer separately, you gain complete command over the mood and functionality of your kitchen, making it adaptable for any occasion.
Implementation Tips for a Flawless Finish
To successfully design a layered lighting scheme, focus on a cohesive and balanced plan:
- Plan Ahead: Integrate your lighting plan at the earliest stage of your kitchen design, before any electrical work begins. This ensures optimal placement for all fixtures.
- Separate Controls: Install separate switches and dimmers for each layer (ambient, task, accent). This is crucial for achieving true flexibility and control over the atmosphere.
- Mind Your Lumens: Aim for brighter light in key work zones. Task lighting above countertops and hobs should be around 75-100 foot-candles, while ambient light can be a softer 30-50 foot-candles.
- Ensure Colour Consistency: Use bulbs with a consistent colour temperature (2700K-3000K is ideal for a warm feel) across all three layers to create a unified and harmonious look. You can learn more about lighting ideas for your home to get the balance right.
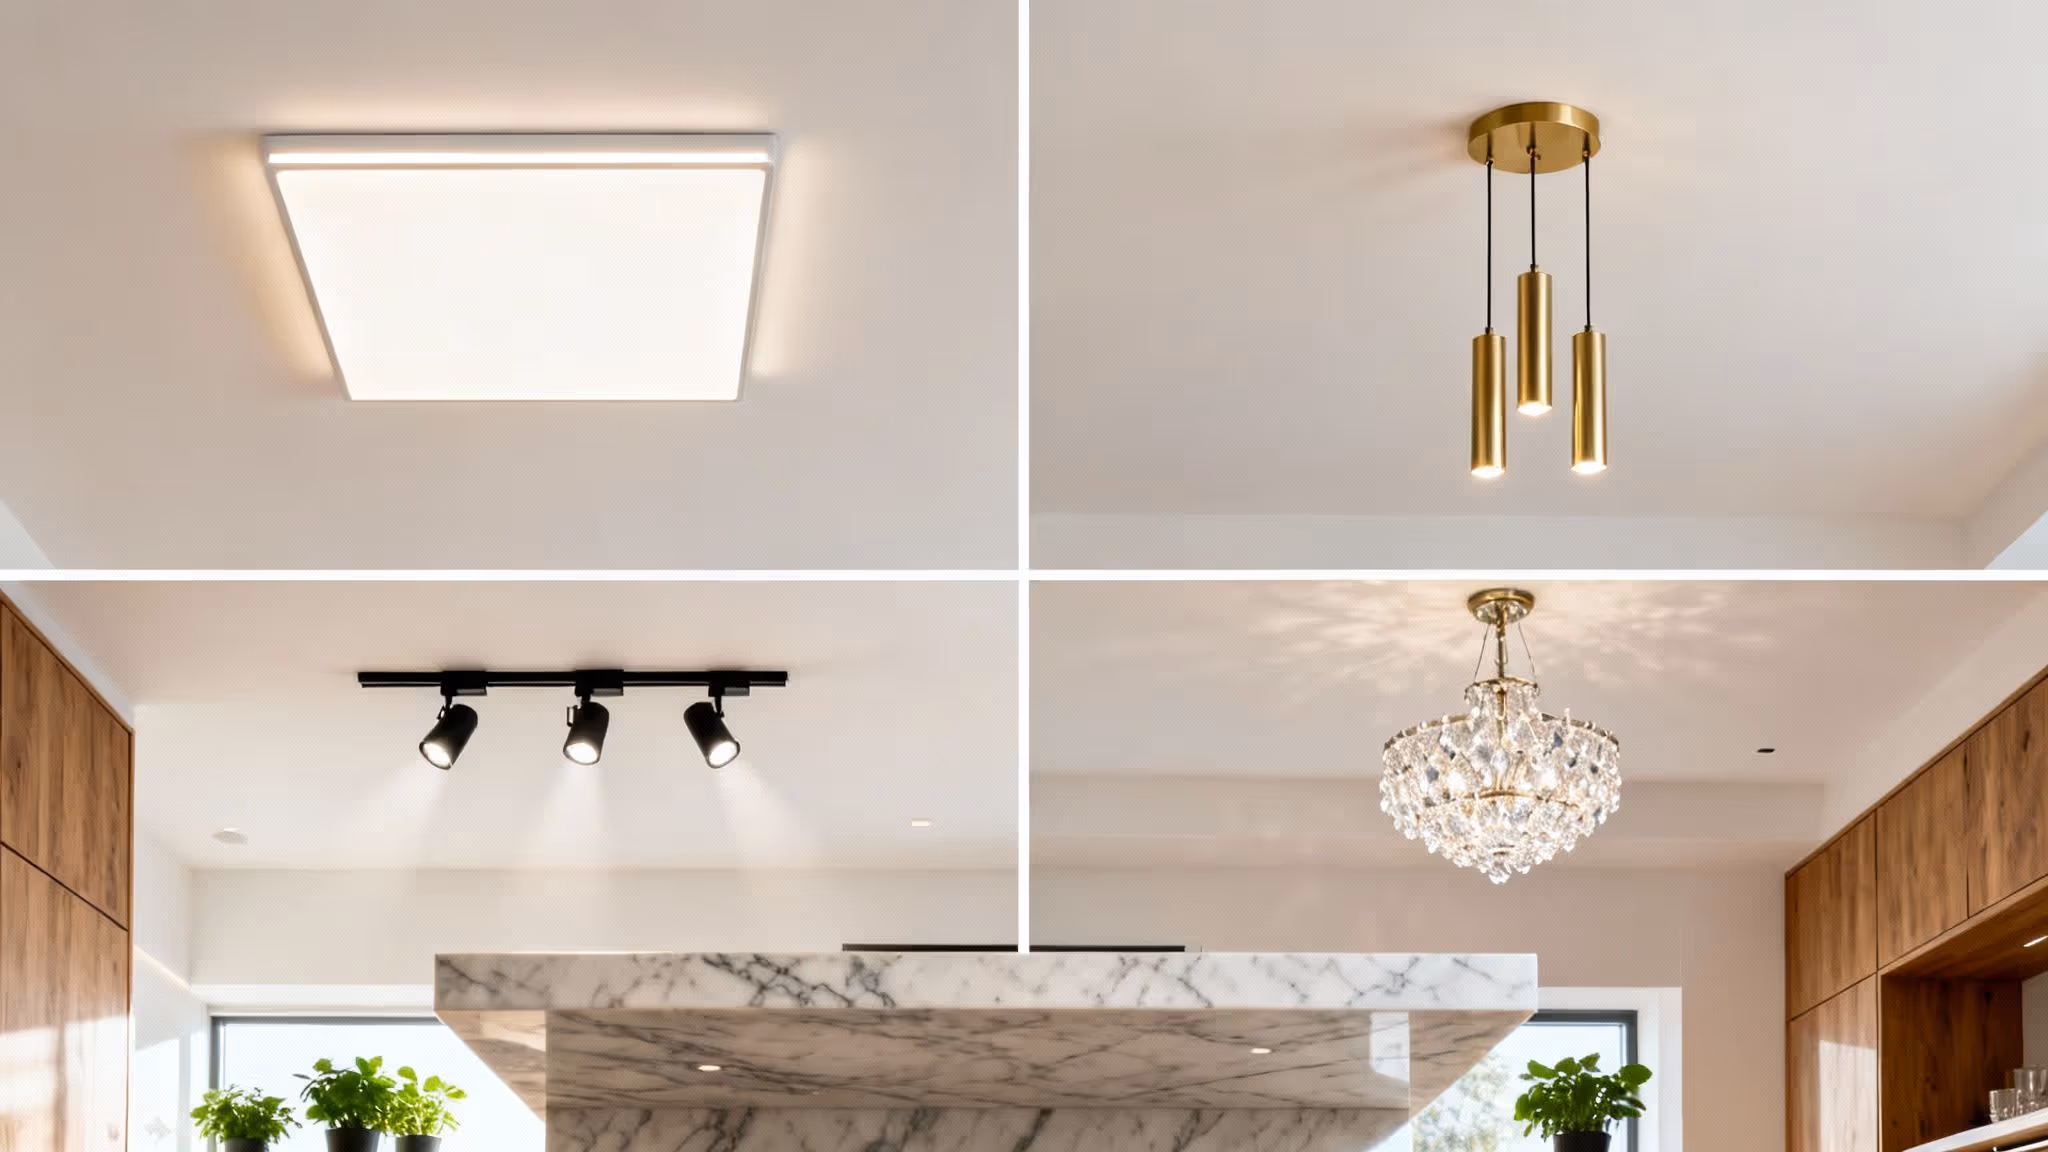
5. Track Lighting Systems
Track lighting offers a highly adaptable and modern solution for kitchen illumination. This system involves mounting individual light fixtures, or "heads," onto a continuous track device, which can be fixed directly to the ceiling or suspended from it. Its primary advantage is flexibility; each head can be repositioned and aimed independently, allowing you to direct light precisely where it's needed most.
Why Choose Track Lighting?
This style is one of the most customisable kitchen ceiling lighting ideas for dynamic spaces. It’s perfect for kitchens with evolving layouts, sloped ceilings, or for highlighting specific features like an art collection, an architectural detail, or a breakfast bar. Track lighting combines the broad coverage of ambient light with the precision of task and accent lighting, all within a single, streamlined system.
Implementation Tips for a Flawless Finish
To achieve a functional and stylish installation, consider these practical tips:
- Strategic Placement: Mount the track parallel to the longest dimension of the room or along key work zones, like above an island or countertop perimeter, for balanced coverage.
- Angle for Comfort: Position the light heads at a 30 to 45-degree angle to illuminate surfaces effectively while minimising direct glare for those standing in the kitchen.
- Mix Your Beams: Combine different types of heads on one track. Use floodlight heads for wider, ambient illumination and spotlights to focus on specific task areas like the sink or hob.
- Embrace Dimming and LEDs: Install a dimmer switch to control the mood and use energy-efficient LED heads. This combination provides full control over brightness while reducing electricity consumption.
- Consider System Type: For a minimalist aesthetic, look into modern cable or monorail track systems, which offer a more refined and less industrial appearance than traditional tracks.
6. Flush-Mount and Semi-Flush Ceiling Fixtures
Flush-mount and semi-flush fixtures are versatile workhorses in kitchen lighting, offering a blend of ambient illumination and decorative flair. Mounted directly against the ceiling (flush) or suspended on a short stem (semi-flush), they provide a centralised light source without demanding the vertical space required by pendants, making them ideal for standard or lower ceiling heights. This style serves as a fantastic foundational layer of light, especially in small to medium-sized kitchens.
Why Choose Flush-Mount and Semi-Flush Fixtures?
This is one of the most practical kitchen ceiling lighting ideas for rooms where a hanging fixture would feel overwhelming or obstructive. They offer a stylish alternative to purely functional lighting, introducing a design element that can complement your cabinetry and hardware. Semi-flush designs, in particular, cast light both downwards and upwards, creating a soft, ambient glow that reflects off the ceiling and brightens the entire space.
Implementation Tips for a Flawless Finish
To integrate these fixtures effectively, consider the following practical advice:
- Mind Your Scale: The fixture's diameter should be proportionate to the room. For a kitchen under 100 square feet, a single, well-chosen fixture is often sufficient. Larger kitchens may require two or more to ensure even coverage.
- Coordinate Your Style: Select a fixture that complements your existing décor. Match the metal finish to your cabinet handles, taps, or appliances to create a cohesive, professional look.
- Install a Dimmer Switch: Maximise versatility by adding a dimmer. This allows you to transition from bright, functional light for cooking to a gentle, atmospheric glow for dining or relaxing.
- Check Cabinet Clearance: When installing, ensure there is enough clearance between the bottom of the fixture and the top of your upper cabinet doors so they can open without obstruction.
7. Linear Suspended Lighting
Linear suspended lighting introduces a sleek, sculptural element to the kitchen ceiling. These contemporary fixtures hang as long, slender bars or tubes, providing a clean line of light that is both functional and highly decorative. Often suspended over a kitchen island or a long dining table, they offer broad, even illumination perfect for both task-oriented activities and setting an ambient mood.
Why Choose Linear Suspended Lighting?
This style is one of the most sophisticated kitchen ceiling lighting ideas for modern and minimalist spaces. It serves as a striking centrepiece that defines a zone, such as the food preparation area or breakfast bar, while delivering powerful, well-distributed light. Its elongated form complements the linear nature of kitchen islands and worktops, creating a harmonious and cohesive design statement.
Implementation Tips for a Flawless Finish
To integrate this elegant fixture effectively, consider these professional recommendations:
- Height and Proportion: Mount the fixture approximately 30-36 inches (76-91 cm) above the countertop for optimal task lighting without obstructing sightlines. Aim for a length that is around 75% of your island's length for balanced proportions.
- Embrace Dimmer Controls: A dimmable linear light is essential. It allows you to transition seamlessly from bright, functional light for cooking to a soft, atmospheric glow for dining or socialising.
- Coordinate Your Finishes: Match the fixture's finish (e.g., matte black, brushed brass, chrome) with your cabinet hardware, taps, or other metallic accents in the kitchen for a polished and unified look.
- Consider Your Layout: Before installation, ensure you have adequate electrical access in the ceiling directly above the desired location. For very long islands, you might opt for two shorter linear fixtures hung in tandem for a more customised effect.
8. Soffit and Cove Lighting (Indirect Lighting)
Soffit and cove lighting is a sophisticated technique that uses hidden light sources, typically LED strips, to wash walls and ceilings with a soft, diffused glow. Installed within architectural details like soffits, coves, or above cabinetry, this method creates indirect ambient light that bounces off surfaces, eliminating harsh shadows and cultivating an atmosphere of understated luxury. This approach adds depth and architectural interest to the room.

Why Choose Soffit and Cove Lighting?
This is one of the more architectural kitchen ceiling lighting ideas, ideal for creating a high-end, custom-built feel. It excels at making a space feel larger and more open by highlighting the ceiling plane, drawing the eye upward. It provides a beautiful, even layer of ambient light that is gentle on the eyes and perfect for setting a mood, especially when combined with more focused task lighting over work zones.
Implementation Tips for a Flawless Finish
To achieve a seamless and elegant indirect lighting effect, consider these professional tips:
- Conceal the Source: The goal is to see the light, not the fixture. Ensure LED strips are completely hidden from view from all common sightlines in the kitchen.
- Use Diffusers: Install LED strips within an aluminium channel that has a frosted diffuser. This prevents distracting "spotting" from individual diodes and creates a smooth, continuous line of light.
- Opt for Warmth: A colour temperature of around 3000K provides a warm, inviting ambiance that enhances most kitchen materials and finishes without feeling too yellow or sterile.
- Layer with Other Lights: Indirect lighting is primarily for ambience. Combine it with recessed downlights or pendants to ensure key areas like countertops and the sink are adequately illuminated for practical tasks.
- Install a Dimmer: A dimmer switch is essential for this style. It allows you to transition from a bright, welcoming glow to a subtle, atmospheric accent for quiet evenings or entertaining.
9. Smart and Adjustable Colour Temperature Lighting
Smart lighting introduces a new level of customisation to your kitchen, allowing you to tune the colour temperature of your lights throughout the day. These advanced LED systems can shift from a crisp, cool white (around 5000K) to a soft, warm glow (around 2700K) using a remote, an app, or even voice commands. This innovative approach allows your lighting to adapt to your daily routines, tasks, and even support your natural circadian rhythm.
Why Choose Smart and Adjustable Lighting?
This is one of the most dynamic kitchen ceiling lighting ideas for the modern home. It offers unparalleled flexibility, transforming your kitchen from a bright, functional workspace into a cosy, relaxing environment at the touch of a button. The ability to schedule lighting changes or create custom "scenes" for cooking, dining, or entertaining makes it perfect for multifunctional kitchen spaces in tech-forward homes.
Implementation Tips for a Flawless Finish
To integrate smart lighting effectively, consider these practical tips:
- Prioritise High-Use Areas: Start by installing adjustable fixtures in key zones like under-cabinet strips and pendants over the island to get the most impact from your investment.
- Tune for Your Task: Use a cooler white (4000K-5000K) in the morning and during food preparation for energising, clear visibility. Switch to a warmer white (2700K-3000K) in the evening to create a relaxing ambiance for dinner.
- Create Preset Scenes: Programme different lighting settings for specific activities. For example, a "Cooking" scene could activate bright, cool task lights, while a "Dinner" scene could dim them to a warm, inviting glow.
- Check System Compatibility: Before purchasing, ensure the system is compatible with your existing smart home setup (like Amazon Alexa, Google Assistant, or Apple HomeKit) for seamless voice control and integration.
10. Skylight and Natural Light Integration
Harnessing the power of the sun is a transformative way to illuminate a kitchen. Integrating skylights or light tubes directly into the ceiling floods the space with bright, natural daylight, creating an airy, uplifting atmosphere that artificial lights struggle to replicate. This approach not only enhances the room's ambiance but also reduces reliance on electricity during the day, making it a cornerstone of sustainable and energy-efficient design.
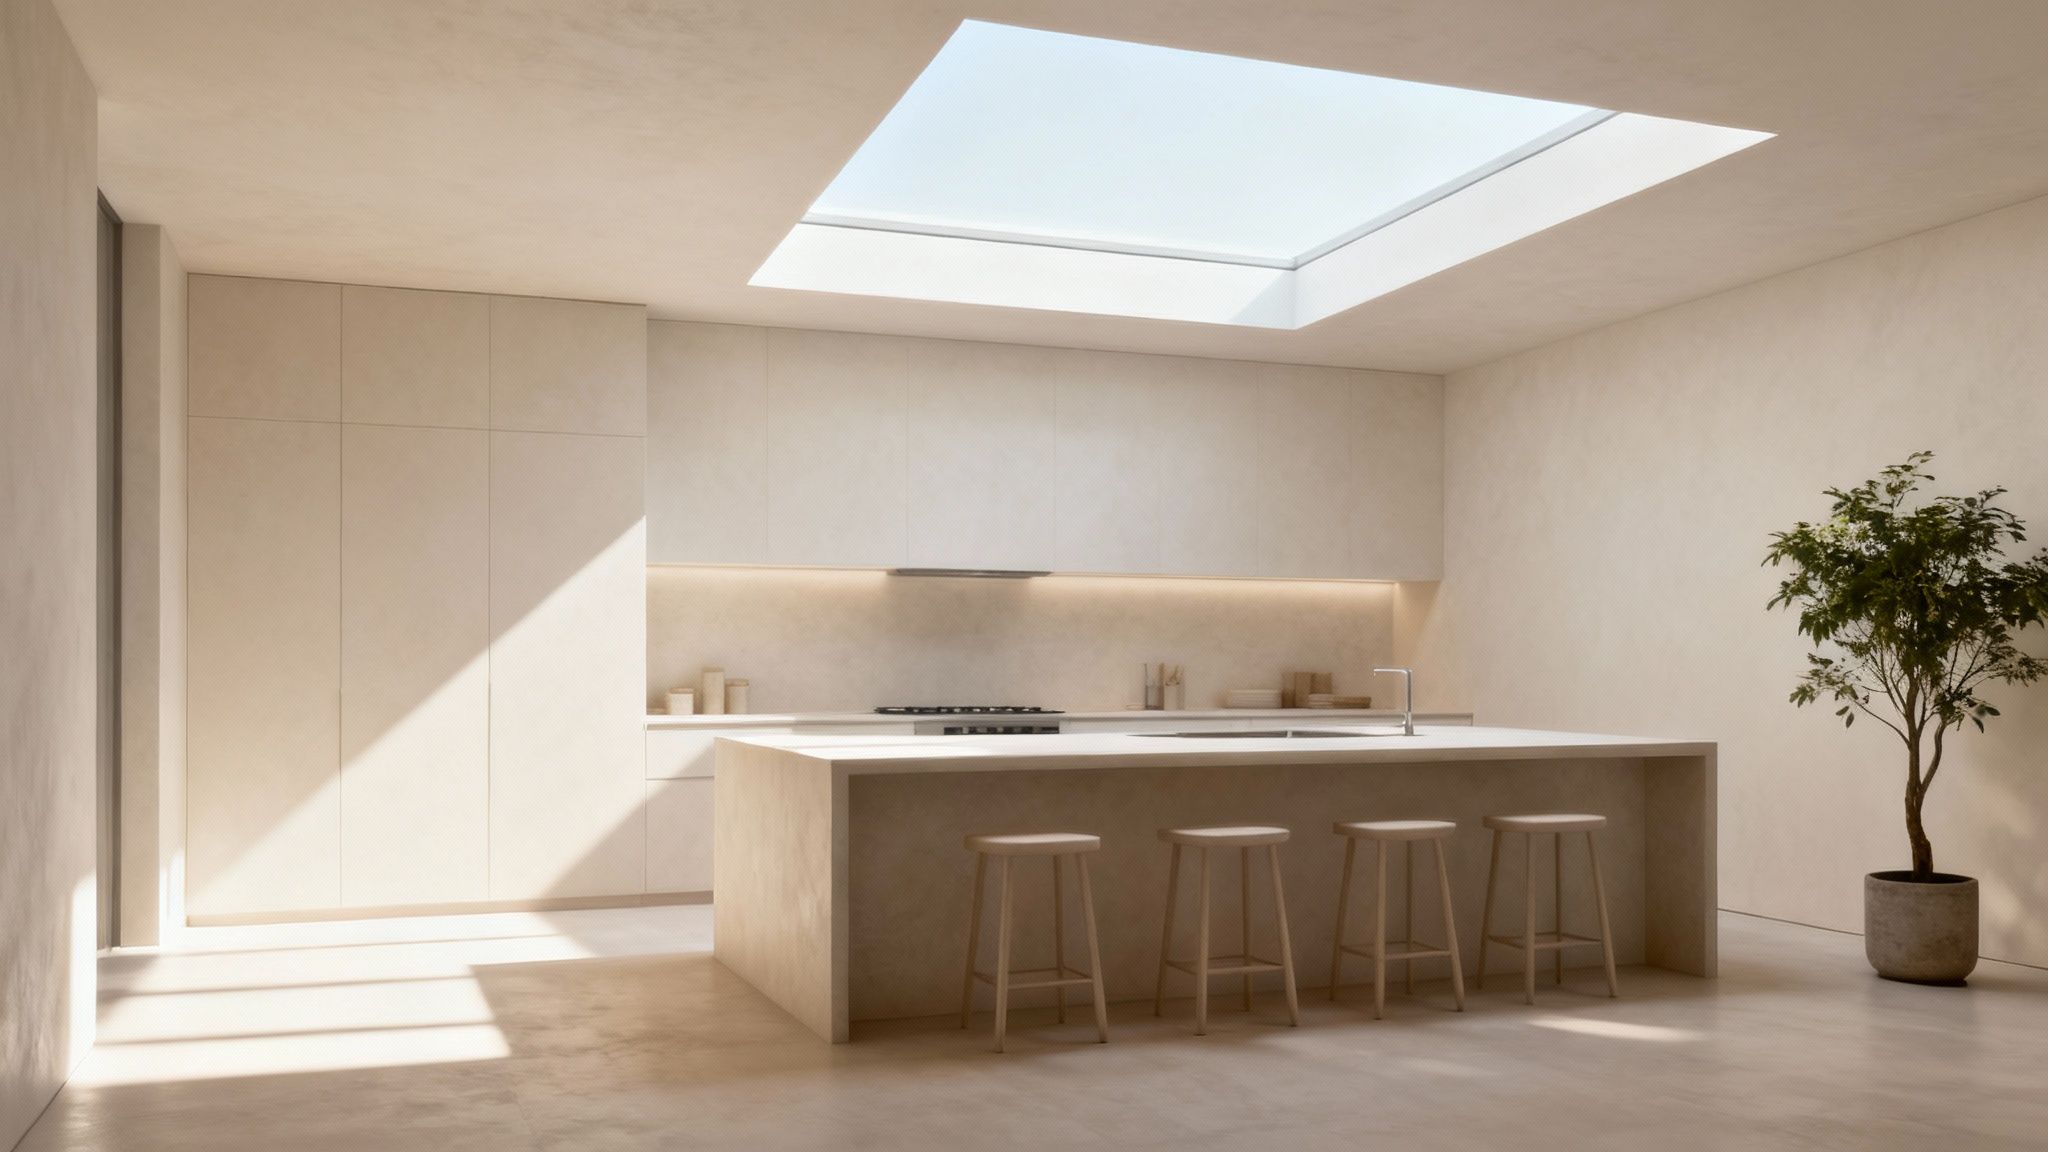
Why Choose Natural Light Integration?
This is one of the most impactful kitchen ceiling lighting ideas for connecting your home to the outdoors and improving well-being. It is perfect for modern farmhouse kitchens, contemporary open-plan homes, and any space that could benefit from a brighter, more spacious feel. Natural light renders colours accurately, making food preparation more enjoyable, and creates a dynamic environment as the light changes throughout the day. If you want to find out more, you can discover practical tips on how to brighten a dark room.
Implementation Tips for a Flawless Finish
To successfully integrate natural light while managing its effects, consider these expert tips:
- Mind the Direction: Install skylights on a north-facing roof to get consistent, soft light without the intense heat and glare from direct southern sun exposure.
- Consider Light Tubes: For kitchens without direct roof access, such as those with an attic above, light tubes are an excellent alternative. They funnel sunlight down through a reflective pipe into the room below.
- Add Control with Shades: Equip your skylights with motorised, remote-controlled blinds or shades. This allows you to easily manage heat gain and privacy, giving you full control over the light levels.
- Plan for Glare: Carefully plan the placement to avoid casting direct, harsh light onto key workspaces like your island or hob, which can create uncomfortable glare while cooking or socialising.
- Supplement with Artificial Light: Combine skylights with a robust layered lighting scheme, including under-cabinet and recessed lights, to ensure the kitchen remains functional on overcast days and after sunset.
10 Kitchen Ceiling Lighting Ideas — Comparison
Crafting Your Perfect Kitchen Glow
Illuminating your kitchen is far more than a practical necessity; it's an opportunity to define the heart of your home. As we've journeyed through the diverse world of kitchen ceiling lighting ideas, from the sleek subtlety of recessed cans to the dramatic flair of pendant clusters, a central theme has emerged: the most effective lighting schemes are layered, thoughtful, and deeply personal. A single, central fixture is no longer sufficient for the modern, multi-functional kitchen. True success lies in the artful combination of different lighting types to create a space that is both brilliantly functional and wonderfully atmospheric.
The journey from a dimly lit, uninspiring kitchen to a bright, welcoming hub begins with understanding your own needs. Think of your lighting as a toolkit. You wouldn't use a sledgehammer for a delicate task, and similarly, the bright, focused beam of under-cabinet lighting serves a different purpose than the soft, ambient glow from a flush-mount fixture. The power of a layered approach, integrating ambient, task, and accent lighting, gives you the flexibility to transform your kitchen's mood at the flick of a switch.
Your Action Plan for a Brighter Kitchen
To turn these kitchen ceiling lighting ideas into reality, it's time to create a tangible plan. Don't feel overwhelmed by the options; instead, see them as building blocks for your ideal design.
- Audit Your Current Space: Start by mapping out your kitchen's existing layout and lighting. Where are the dark corners? Which work areas, like the sink or chopping station, need more focused light? Note the activities that take place in each zone, from homework at the island to cooking at the hob.
- Prioritise Your Layers: Begin with the foundational ambient layer (e.g., recessed lighting, flush mounts). Next, pinpoint key work zones and add dedicated task lighting (e.g., under-cabinet strips, pendants). Finally, consider where an accent layer (e.g., track lighting on artwork, soffit lighting) could add character and depth.
- Embrace Modern Technology: Don't overlook the transformative power of smart lighting and dimmers. The ability to adjust both brightness and colour temperature is a game-changer, allowing you to shift from a cool, energising light for morning prep to a warm, relaxing glow for evening meals.
- Consult a Professional: For complex installations or if you're uncertain about electrical work, always consult a qualified electrician. They can ensure your plan is safe, compliant with regulations, and executed flawlessly, providing peace of mind alongside a beautiful result.
Ultimately, your kitchen lighting should be a reflection of your lifestyle. It should support your daily routines, enhance your home's architecture, and create an environment where memories are made. By combining the practical insights on track systems, skylights, and smart technology with the aesthetic potential of pendants and cove lighting, you are now equipped to design a cohesive and captivating scheme. Step back, envision the possibilities, and get ready to craft the perfect glow for your home.


