Cleaning engineered wood floors is simple once you get the hang of it. The golden rule? Think damp, not wet. A slightly damp mop and a gentle, pH-neutral cleaner are all you need to protect that beautiful top layer of real wood. Get this right, and you’ll avoid the water damage that can ruin an otherwise brilliant flooring choice.
Understanding Your Engineered Wood Floors

Before you grab a mop, it’s worth understanding what makes engineered wood different from solid hardwood. Its clever design—a thin layer of real wood veneer bonded to a super-stable core of layered plywood—is why it’s so popular. This construction makes it far more resilient to changes in temperature and humidity than a solid plank.
But here’s the rub: that layered structure is also its Achilles' heel when it comes to cleaning. Excessive water is the absolute enemy. If moisture seeps between the planks, it can weaken the adhesives holding everything together, leading to bubbling, warping, or peeling. And that kind of damage is often impossible to reverse.
The Role of Construction and Finish
Your floor’s finish is its first line of defence. Whether you have a tough, glossy lacquer or a more subtle, natural oil, this topcoat will dictate how you clean. Lacquered floors tend to be more forgiving with spills, while oiled floors might need a bit more specialised care to keep their lustre.
Knowing this helps you sidestep the most common cleaning blunders. Believe it or not, the biggest mistake we see homeowners make is simply using too much water. Industry studies have shown that over 60% of flooring damage claims are a direct result of improper moisture during cleaning.
The one thing to remember when cleaning engineered wood is to protect the layers. Every single step, from a quick sweep to a deeper clean, should be about preserving the integrity of that top wood veneer and the core beneath it.
Why This Knowledge Matters
When you know how your floor is built, you can choose the right tools and products with confidence. It’s the difference between a floor that looks fantastic for decades and one that needs costly repairs after just a few years.
Its multi-layered construction, for instance, is what makes it such a great choice for rooms with fluctuating temperatures and humidity, which is why it often comes up when we’re discussing flooring ideas for the kitchen. By respecting its unique composition, you’re not just cleaning your floor—you’re protecting your investment.
Getting Your Cleaning Kit Together

Before you even think about cleaning, let's talk tools. Getting this right is less about fancy gadgets and more about being gentle. Your biggest enemy isn’t dirt; it’s scratches and moisture forced into the seams of the wood. The wrong tool can be just as damaging as the harshest chemical.
Think of it like dusting a nice piece of wooden furniture – you wouldn't grab a scouring pad. Your aim is to lift grit and dust without causing any abrasion.
Here’s what your cleaning cupboard really needs:
- A Vacuum with a Soft Brush Head: Always use the floor-brush setting. That aggressive rotating beater bar is brilliant for carpets but can leave tiny dents and scratches on wood.
- A Good Microfibre Mop: These are fantastic. They grip onto dirt and grime with very little water, which is exactly what you want for engineered wood.
- An Electrostatic or Microfibre Duster: Perfect for those quick, daily sweeps. They trap fine dust, pet hair, and allergens before they get a chance to be trodden in.
Picking the Right Cleaners
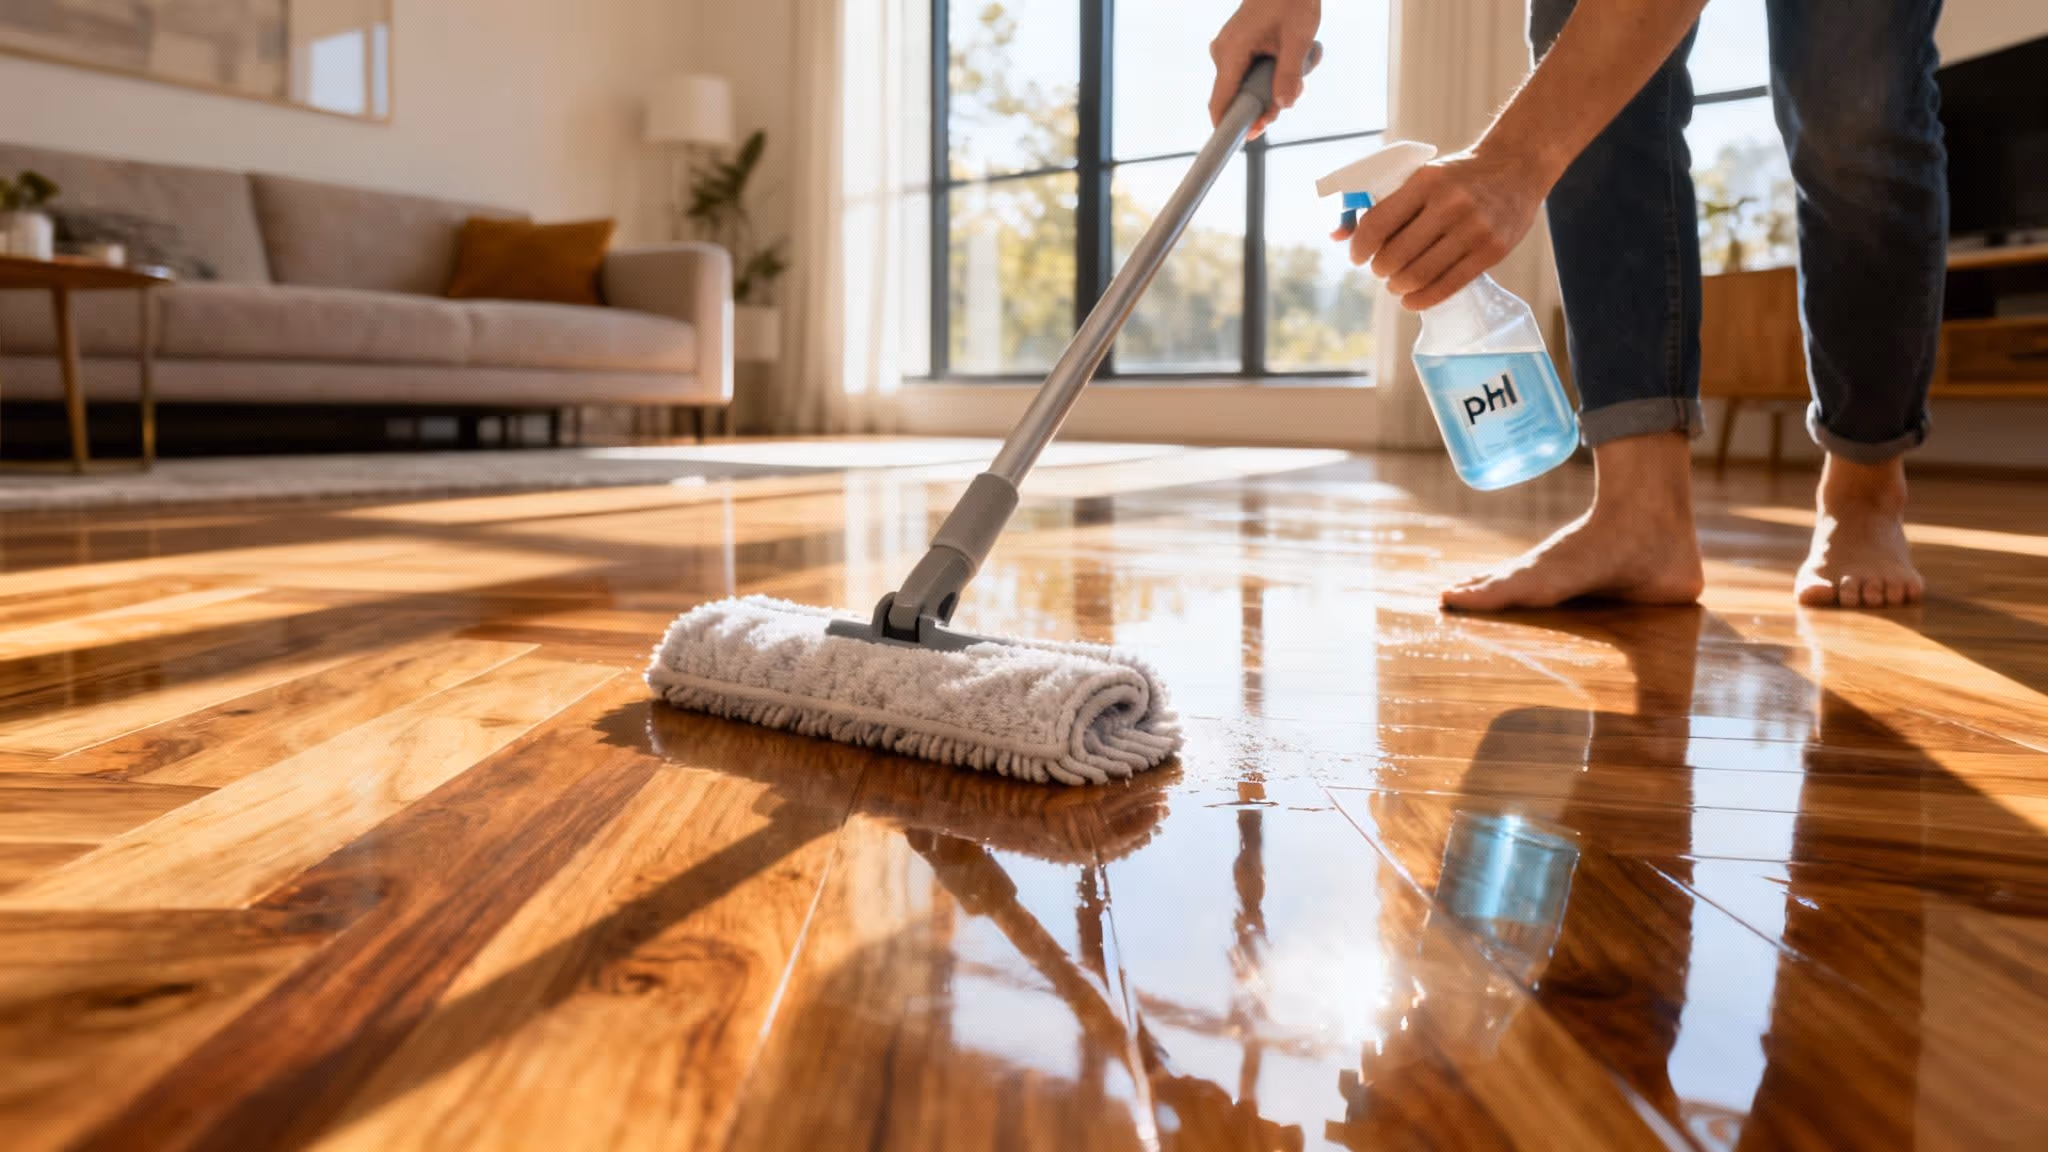
With your tools sorted, the next minefield is the cleaning solution. This is where so many people trip up, grabbing an all-purpose cleaner that's far too harsh. If you remember one thing, make it this: always use a pH-neutral cleaner.
These gentle formulas are designed specifically to clean without stripping away the protective top layer of your floor. You can buy ready-made solutions formulated for wood, or just make your own. A capful of mild, pH-neutral soap in a bucket of warm water does the job beautifully.
This 'less is more' approach applies to lots of surfaces in your home. For instance, our guide on how to clean upholstered furniture also hammers home the importance of using gentle, appropriate cleaners to avoid ruining delicate fabrics.
To make things crystal clear, here’s a quick-reference table to help you choose the right cleaning solutions and avoid the stuff that flooring experts see causing damage all the time.
Safe vs Harmful Cleaning Agents for Engineered Wood
Choosing the right cleaner is half the battle won. Sticking to the "Recommended" column will keep your floors looking their best for years.
What to Keep Miles Away From Your Floor
Just as important as knowing what to use is knowing what to banish from your cleaning routine. Some tools and products are notorious for causing irreversible damage – the kind that often voids your warranty.
Steer clear of these:
- Steam Mops: We can't stress this enough. The combination of intense heat and moisture is a recipe for disaster. It forces water deep into the wood's core, causing the layers to swell, warp, and even come apart.
- Abrasive Scouring Pads or Steel Wool: These will instantly create a mess of fine scratches, permanently dulling the beautiful finish of your floor.
- Oil-Based Soaps and Furniture Polish: These might seem like a good idea for a quick shine, but they build up over time, creating a hazy, sticky film that’s a nightmare to remove and actually attracts more dirt.
With a simple kit of soft brushes, microfibre cloths, and a pH-neutral cleaner, you’ve got everything you need to keep your floors looking brilliant without putting their lifespan at risk.
A Simple Weekly Cleaning Routine That Works
The secret to keeping your engineered wood floors looking brand new? Consistency. Forget spending hours on your hands and knees scrubbing; a quick, sustainable weekly clean is far more effective. It prevents the slow build-up of grime and keeps that beautiful lustre alive.
The trick is to make it a simple habit, not a massive chore. And it always, always starts with dry cleaning first. Think of it as essential prep work. The real villains behind a dulling floor finish are the tiny particles of dust and grit that cause micro-scratches over time. Getting rid of those first means you won’t be just pushing them around with a wet mop later.
First, The Dry Clean
Your first job is to gently sweep or vacuum up all that loose debris. If you're using a broom, one with soft bristles is a must. A vacuum cleaner is often a better bet, but only if you use the hard floor head attachment. This is critical: make sure the rotating beater bar is switched off. Those stiff bristles are designed to rough up carpet fibres and they can easily scratch your wood’s delicate surface.
Interestingly, a simple weekly dry mop can prevent up to 80% of dulling caused by dust accumulation. An electrostatic duster is even better, capturing around 98% of particles. This creates the perfect clean slate before a single drop of water touches the floor. You can find more insights like this in Salience’s flooring market report.
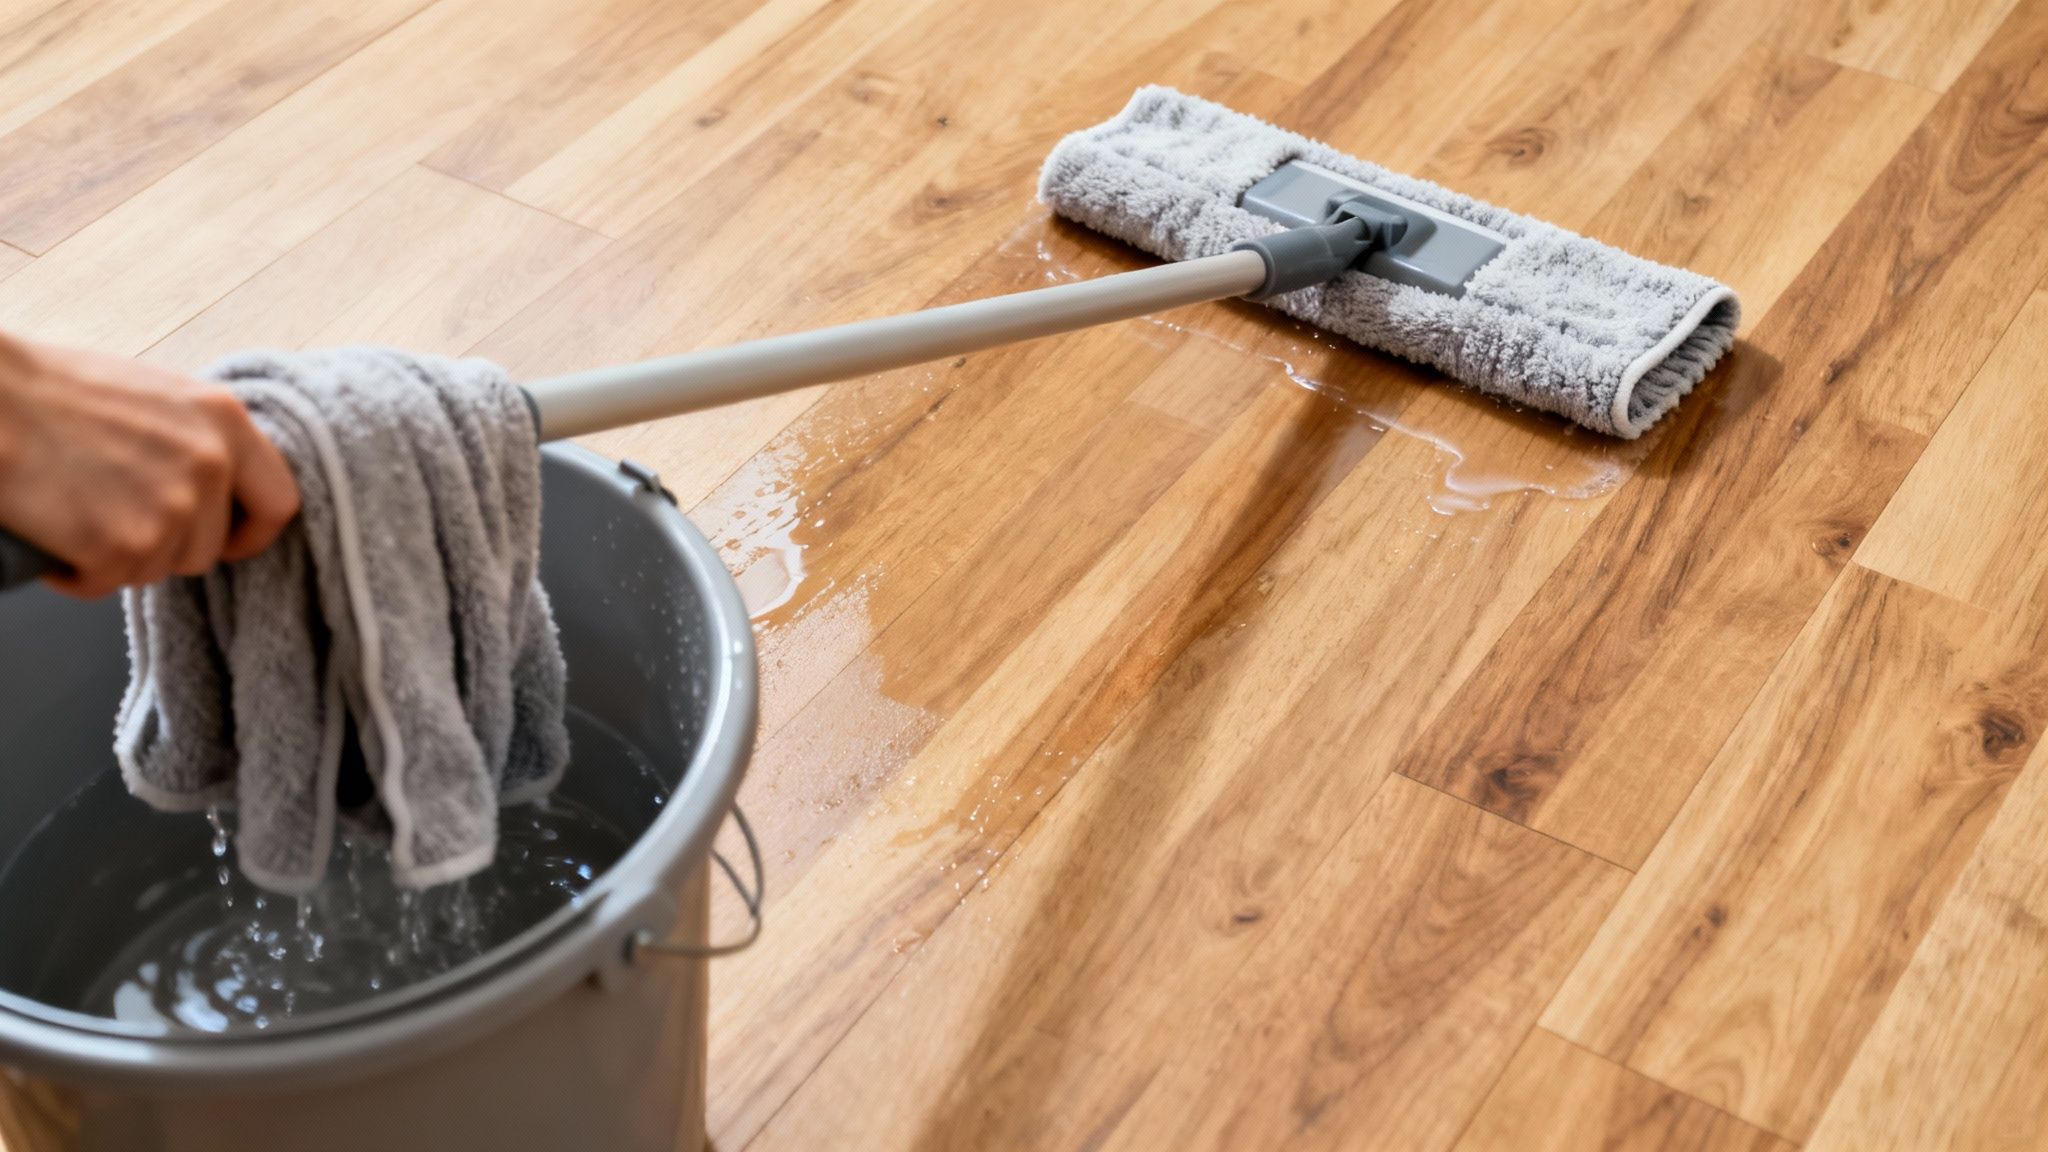
The Art of The Damp Mop
Now for the part where so many people go wrong: damp mopping. The key word here is damp. Drenching your engineered wood is the fastest way to cause long-term damage like warping, lifting, or delamination of the layers.
Here's how to get it right every time:
- Prep your tools. A two-bucket system is ideal. Fill one with warm water and a tiny amount of a pH-neutral wood floor cleaner, and the other with clean water for rinsing.
- Wring it out well. Dip your microfibre mop into the cleaning solution, then wring it out until it’s almost dry to the touch. It shouldn't leave any drips behind.
- Follow the grain. Mop in the same direction as the wood planks are laid. This is a simple but brilliant trick to avoid streaks as the floor dries.
Here's a pro tip: don't let the floor air-dry completely. For a truly flawless, streak-free finish, quickly go over the freshly mopped section with a separate dry, clean microfibre cloth. This buffs away any leftover moisture and leaves a perfect shine.
Of course, high-traffic spots like hallways, kitchens, and entryways will need a bit more focus. You might find you need to rinse your mop head more often in these areas to avoid spreading dirt. This is where a bit of prevention goes a long way. Good quality doormats and knowing how to choose a rug for your living room can drastically cut down the amount of dirt tracked inside, making your weekly clean that much quicker.
How to Handle Spills, Stains, and Scuffs
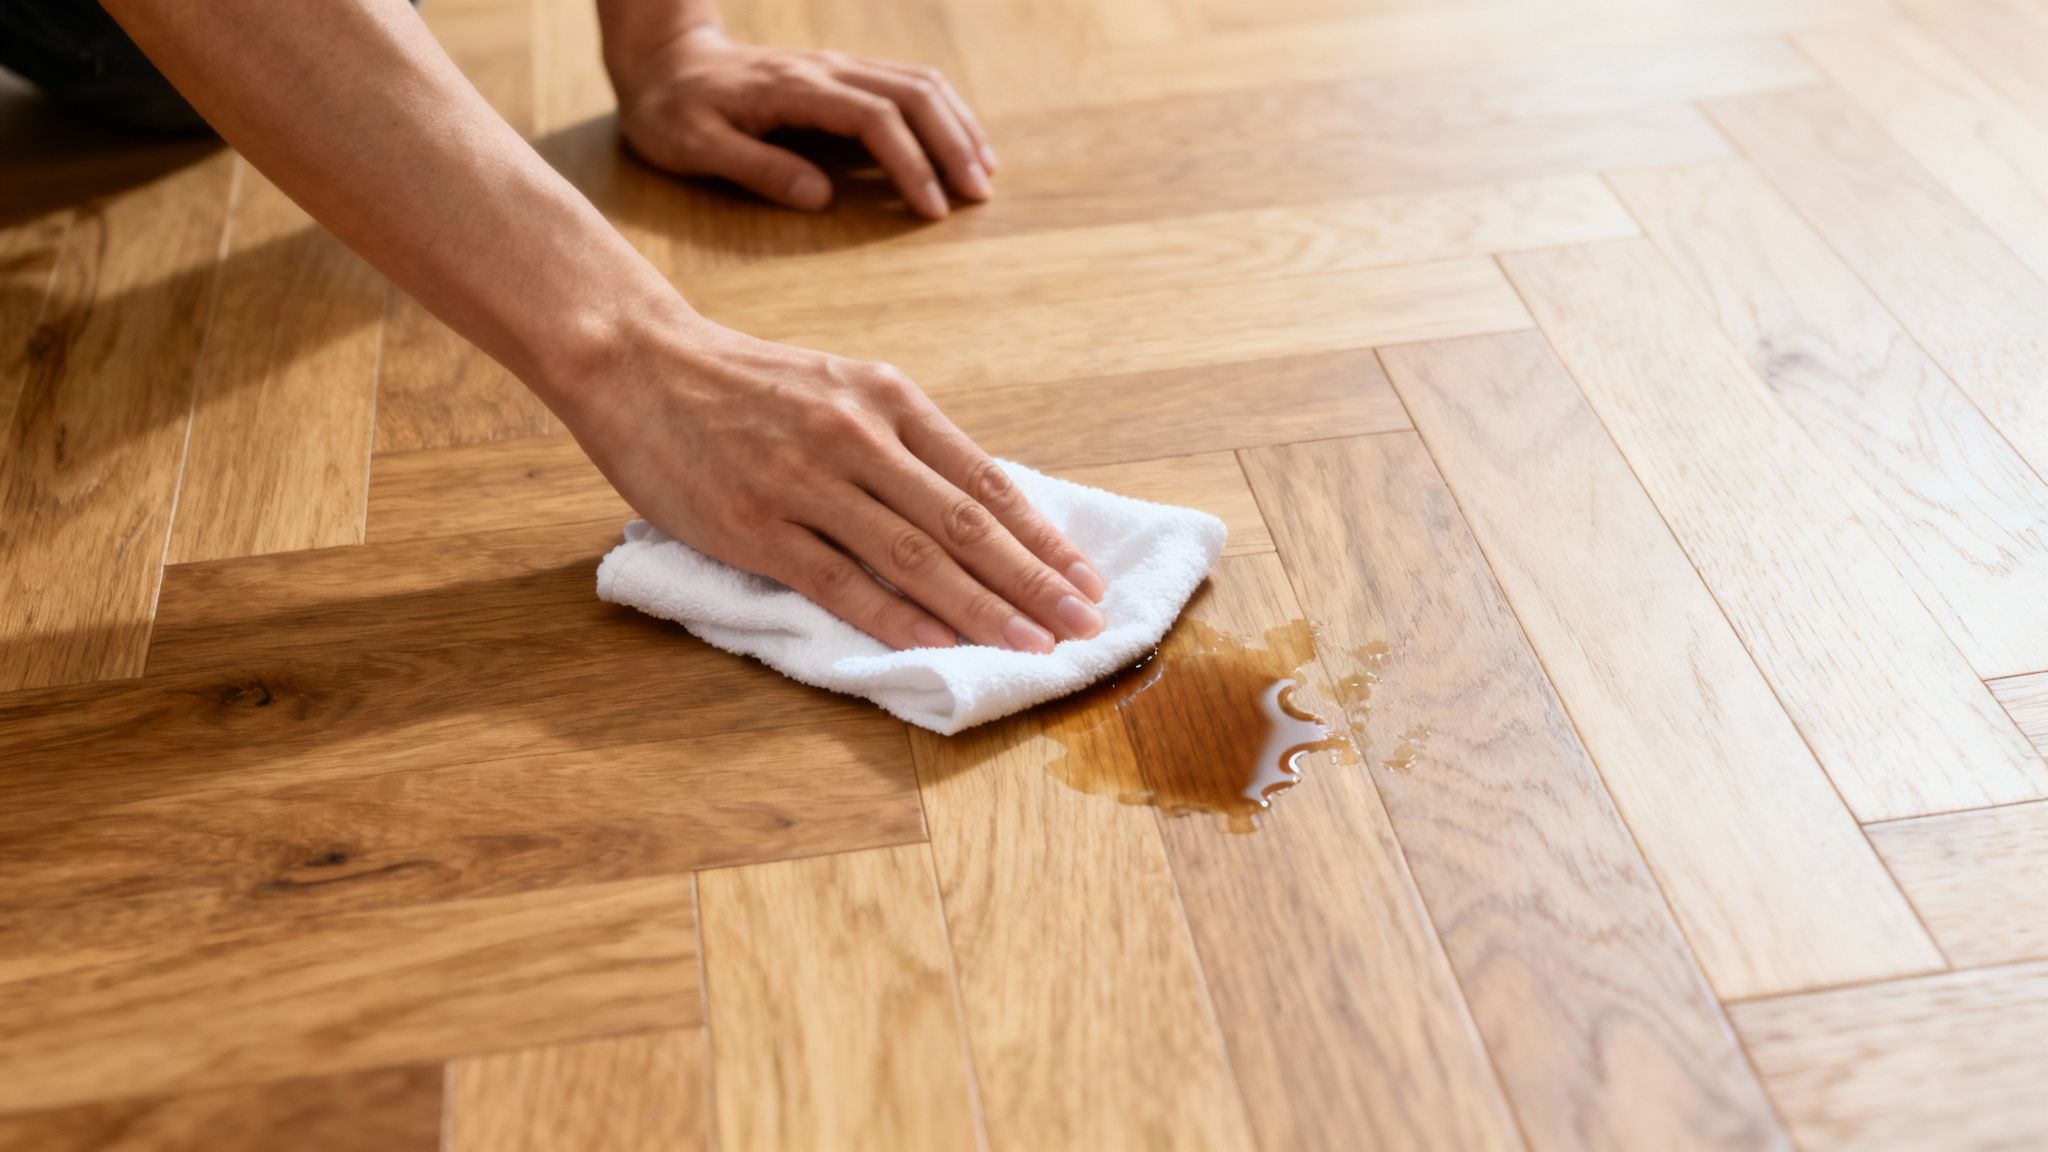
No matter how careful you are, life happens. A dropped glass of wine, a greasy splash from the hob, or a dark scuff mark can feel like a mini-disaster on your beautiful engineered wood floors. But here’s the thing: the key isn't to avoid messes entirely (an impossible task), but to know exactly how to react when they happen.
Acting fast is your best defence, especially with liquids. Because engineered wood has a layered construction, it really doesn't like moisture. Your number one job is to blot the spill immediately with a clean, dry cloth. Always work from the outside of the spill inwards to stop it from spreading.
Tackling Common Spills and Stains
Once you've soaked up the worst of it, you can deal with any marks left behind. For most water-based spills like juice or coffee, a slightly damp microfibre cloth is often all you need. If the spot is a bit sticky, just a single drop of your pH-neutral floor cleaner on the cloth should do the trick.
Greasy or oily stains are a different beast. Water alone will just smear them around, making things worse. Here’s what to do instead:
- Oily Spots: For things like salad dressing or a dropped bit of butter, a small amount of rubbing alcohol on a cotton pad can cut through the grease. Dab the area gently – don't rub – then wipe clean with a fresh damp cloth before drying it completely.
- Ink Marks: If a pen leaks, you can use the same rubbing alcohol method. Just be sure to test it on a hidden spot first (under a sofa, for example) to make sure it doesn't affect your floor's finish.
- Sticky Residue: For dried-on food or a bit of glue, try gently scraping it off with the edge of a plastic card, like an old credit card. A quick wipe with a damp cloth afterwards will remove any leftover stickiness.
It’s the same principle we apply to other delicate materials in our homes. For instance, knowing how to care for leather furniture teaches you that harsh chemicals can cause irreversible damage, just as they can with your floors.
Erasing Scuffs and Scratches
Scuff marks, usually left by rubber-soled shoes, can look alarming but are often just surface transfers. Before you reach for any cleaning products, try a surprisingly simple tool: a clean pencil eraser. Gently rub the mark, and you'll often find it lifts right off.
For more stubborn scuffs, a tennis ball can work wonders. The felt surface has just enough gentle abrasion to remove the mark without scratching the floor's delicate finish.
The most important rule for stain removal on engineered wood is to always start with the least aggressive method first. This patient approach protects your floor's delicate finish and prevents a small issue from becoming a major repair job.
By tackling these minor accidents with the right techniques, you can keep your floors looking flawless. A quick, calm response using things you probably already have in your cupboards is all it takes to manage everyday mishaps.
Long-Term Care and Proactive Floor Protection
Knowing how to mop up a spill is one thing, but the secret to truly beautiful floors isn’t frantic cleaning—it’s smart prevention. The best-kept floors are the ones that are quietly protected from the daily grind, shifting the focus from reacting to messes to stopping them from happening in the first place.
Think of it as your floor's long-term wellness plan. A few small, consistent habits are your best defence against the gradual wear and tear that can dull a floor's finish over time, saving you a lot of hassle down the line.
The Power of Prevention
Your first line of defence starts right at the front door. A good quality doormat at every entrance is non-negotiable when it comes to cleaning engineered wood floors. It’s incredible how much grit, dirt, and moisture they trap before anyone has a chance to tread it through your home.
This one simple thing drastically cuts down on the tiny abrasive particles that act like sandpaper on your floor's finish. Over months and years, these micro-scratches are what make a floor look tired and dull.
Another game-changer? Felt pads on the feet of all your furniture. This is a must for things that get moved around a lot, like dining chairs, coffee tables, and sofas. These cheap-as-chips pads create a soft barrier, preventing the deep gouges and scratches that happen when heavy furniture gets dragged or nudged.
A proactive mindset is the most effective tool in your floor care arsenal. By focusing on preventing scratches and managing moisture, you actively extend the life and beauty of your engineered wood, saving yourself time and money on future repairs.
Strategically placed rugs also play a huge role, protecting high-traffic hallways and living areas from concentrated wear while adding a lovely decorative layer. If you're looking for inspiration, learning how to layer rugs can protect your floors while creating a stylish, cosy feel in any room.
Occasional Deep Cleaning and Maintenance
Even with the best daily habits, every floor benefits from a proper deep clean to restore its original lustre. This isn't a weekly job; for most homes, a deep clean once or twice a year is more than enough to get things sparkling again.
A real deep clean involves moving furniture out of the way to get to every corner, followed by a thorough vacuum. After that, you can use a manufacturer-approved cleaner designed specifically for engineered wood to gently lift away any stubborn grime or residue. Here's a crucial stat: moisture-related issues account for a staggering 75% of engineered wood complaints, usually from over-wetting the floor during cleaning. Always stick to pH-neutral cleaners and dilute them correctly to avoid this.
Finally, don't forget about the air in your home. While engineered wood is more stable than solid wood, it still reacts to big swings in humidity. Keeping your indoor humidity level consistent—ideally between 35-55%—helps stop the planks from expanding or shrinking, which keeps them fitting together tightly for the long haul.
Your Top Engineered Wood Questions, Answered
Even with the best advice, there are always a few lingering questions when it comes to looking after your floors. It's a big investment, after all. To help you feel completely confident, we’ve tackled some of the most common queries we get about keeping engineered wood looking its best.
Think of this as your quick-fire round for clearing up any confusion and getting straight back to enjoying your beautiful floors.
Can I Use a Steam Mop on My Floors?
Let's be crystal clear on this one: it’s a hard no. Steam mops are the enemy of engineered wood flooring. That combination of intense heat and high-pressure moisture is a recipe for disaster, forcing water deep into the seams between the planks.
This can wreck the adhesives that hold the layers together, causing them to warp, swell, or peel apart permanently. Using a steam mop is also a surefire way to void your flooring warranty. Just stick to a slightly damp microfibre mop – it’s the safest and most effective tool for the job.
The golden rule for engineered wood is simple: minimal water and no intense heat. Gentle, pH-neutral cleaners are your best friends, protecting the delicate layered construction of your floor.
How Often Should I Deep Clean My Floors?
This is definitely not a weekly job. For most homes, a proper deep clean is only needed once or twice a year, just to lift any subtle residue that your regular cleaning might miss and bring back that original lustre.
Now, if you’ve got a busy house – think kids, pets, and a high-traffic hallway – you might want to up that to every three or four months. But honestly, your best defence is consistent weekly maintenance. Get that right, and you’ll find you rarely need a major deep clean.
What Is the Best Way to Remove Stubborn Scuff Marks?
Always start with the gentlest trick in the book. You’d be surprised how often a simple pencil eraser, rubbed lightly over the mark, will lift a rubber scuff without a fuss. A clean tennis ball works wonders, too; its felt surface has just enough grip to buff away the mark without scratching the finish.
If it’s still hanging around, dampen a tiny corner of a microfibre cloth with water and a single drop of your pH-neutral cleaner. Work on the spot gently, then wipe it clean with a dry cloth. Whatever you do, never use abrasive powders or harsh scourers. They’ll permanently scratch and dull your floor’s protective finish.
Are Homemade Cleaners Safe for Engineered Wood?
This is a tricky one. While some homemade solutions can be okay, you have to be really careful. A heavily diluted mix of white vinegar and water (we’re talking roughly one part vinegar to ten parts water) is sometimes suggested, but its acidity can still pose a risk to the finish over time. If you do go down this route, your mop needs to be wrung out until it’s almost dry.
Frankly, it’s much safer to stick with a professionally formulated, pH-neutral commercial cleaner. These have been specifically designed to be gentle on modern floor finishes and won’t leave behind a sticky residue. Whether you go homemade or store-bought, always steer clear of anything containing ammonia, oil, wax, or harsh detergents.


