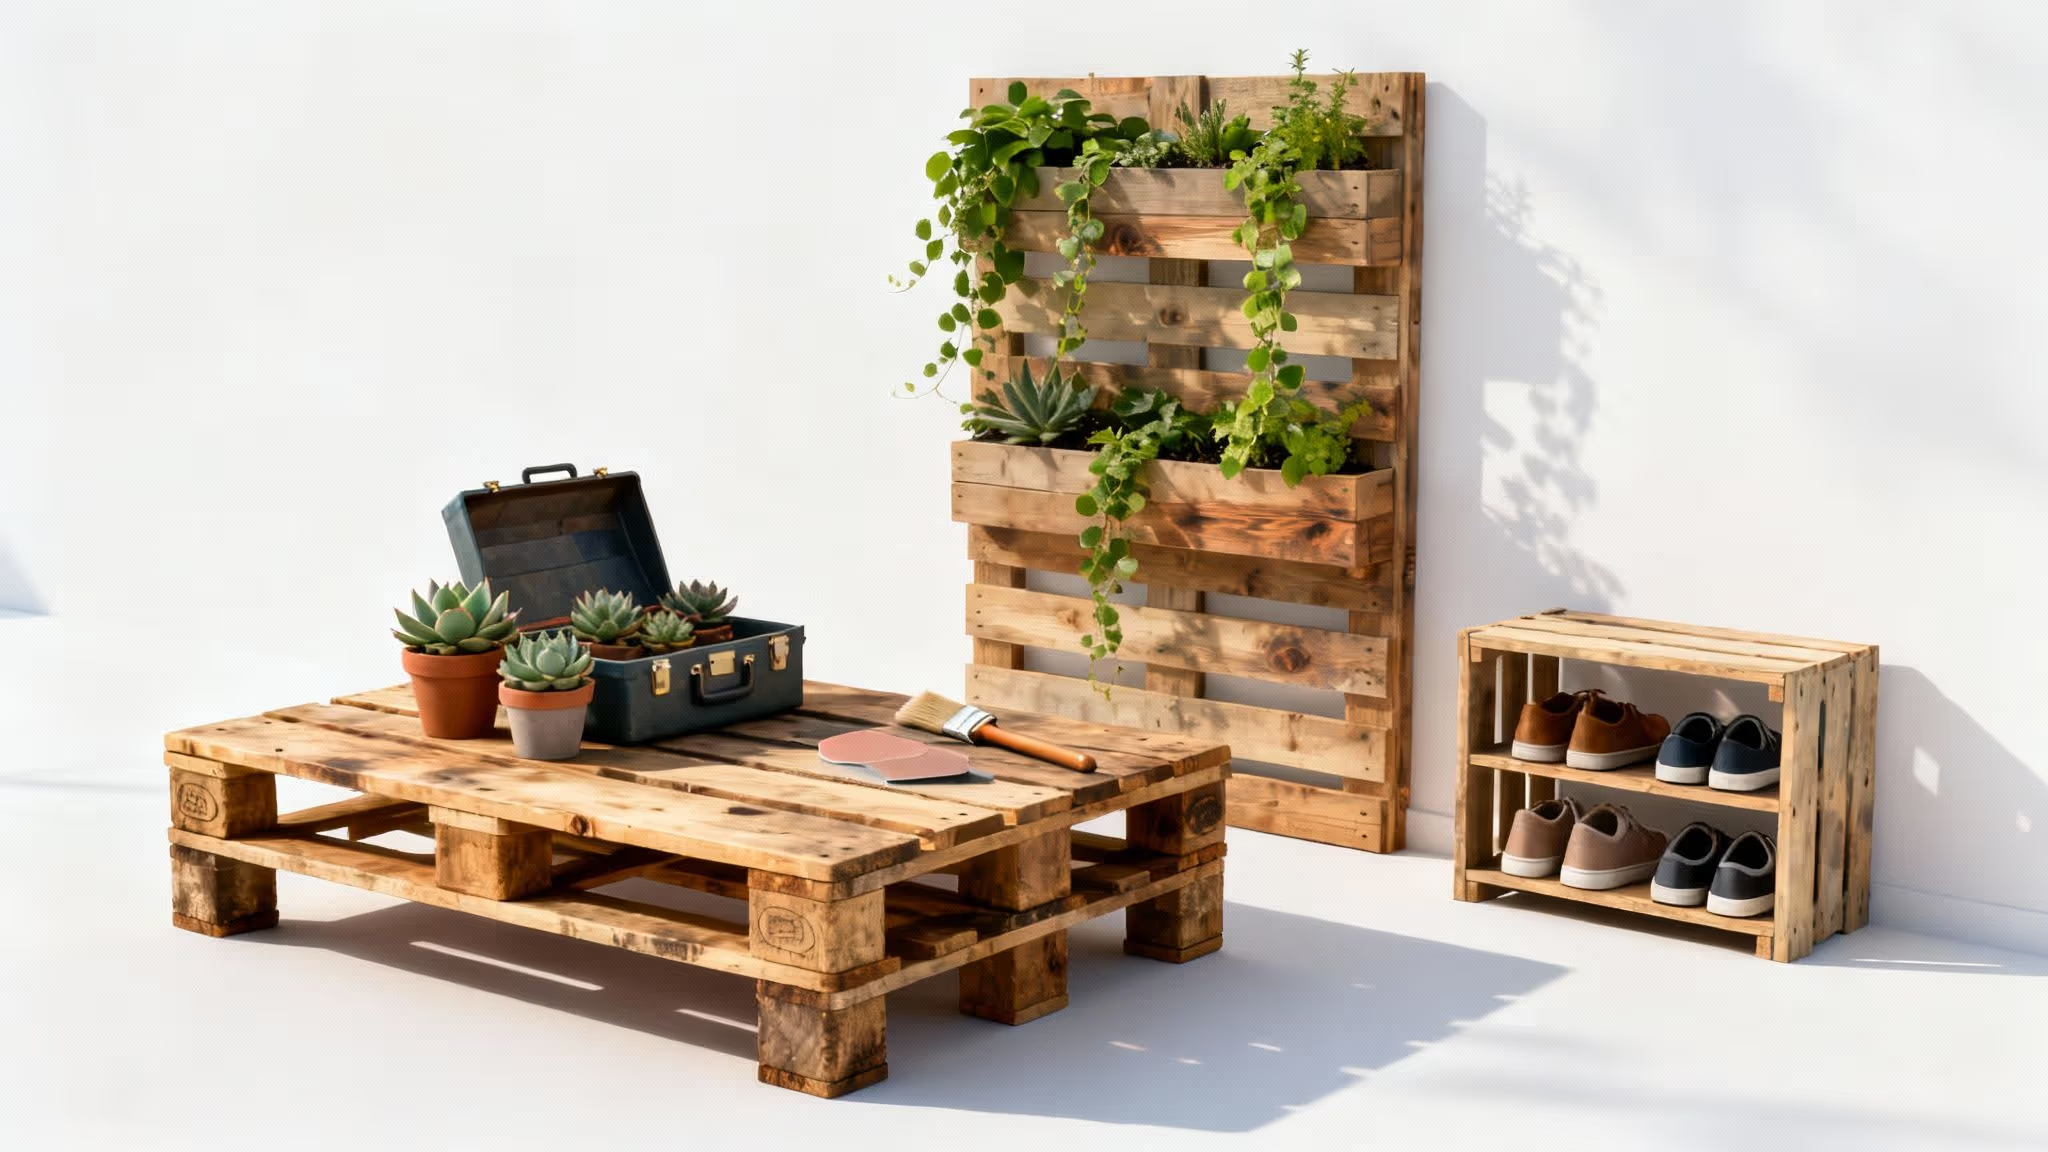
Welcome to the world of creative upcycling, where humble wooden pallets are transformed into stunning and functional pieces for your home and garden. The appeal of wood pallet projects lies not just in their rustic charm and affordability, but in the sustainable practice of giving discarded materials a new lease on life. This guide has been curated specifically for home and garden enthusiasts looking to infuse their spaces with personality without breaking the bank.
This article provides a comprehensive roundup of ten diverse projects, from indoor furniture like coffee tables and bed frames to outdoor creations such as vertical gardens and beverage stations. We offer actionable steps, materials lists, and insider tips to ensure your creations are both beautiful and durable. You will learn how to select, prepare, and transform basic pallets into high-quality, customised items that reflect your personal style.
Before we begin, understanding pallet safety is paramount. Always source pallets stamped with 'HT' (heat-treated), as these are free from the harmful chemicals found in 'MB' (methyl bromide) treated pallets, making them safe for home use. A thorough clean and a good sanding are your first steps towards a splinter-free, high-quality finish. Prepare to be inspired as we dive into projects that prove style and sustainability can go hand-in-hand.
1. Pallet Wood Coffee Table
The pallet wood coffee table is arguably one of the most iconic and popular wood pallet projects, serving as a fantastic starting point for any DIY enthusiast. This project transforms humble shipping pallets into a functional and stylish centrepiece for your living room. Its appeal lies in its simplicity and rustic charm, providing both a tabletop surface and built-in cubbies for storing magazines, remote controls, or decorative items.
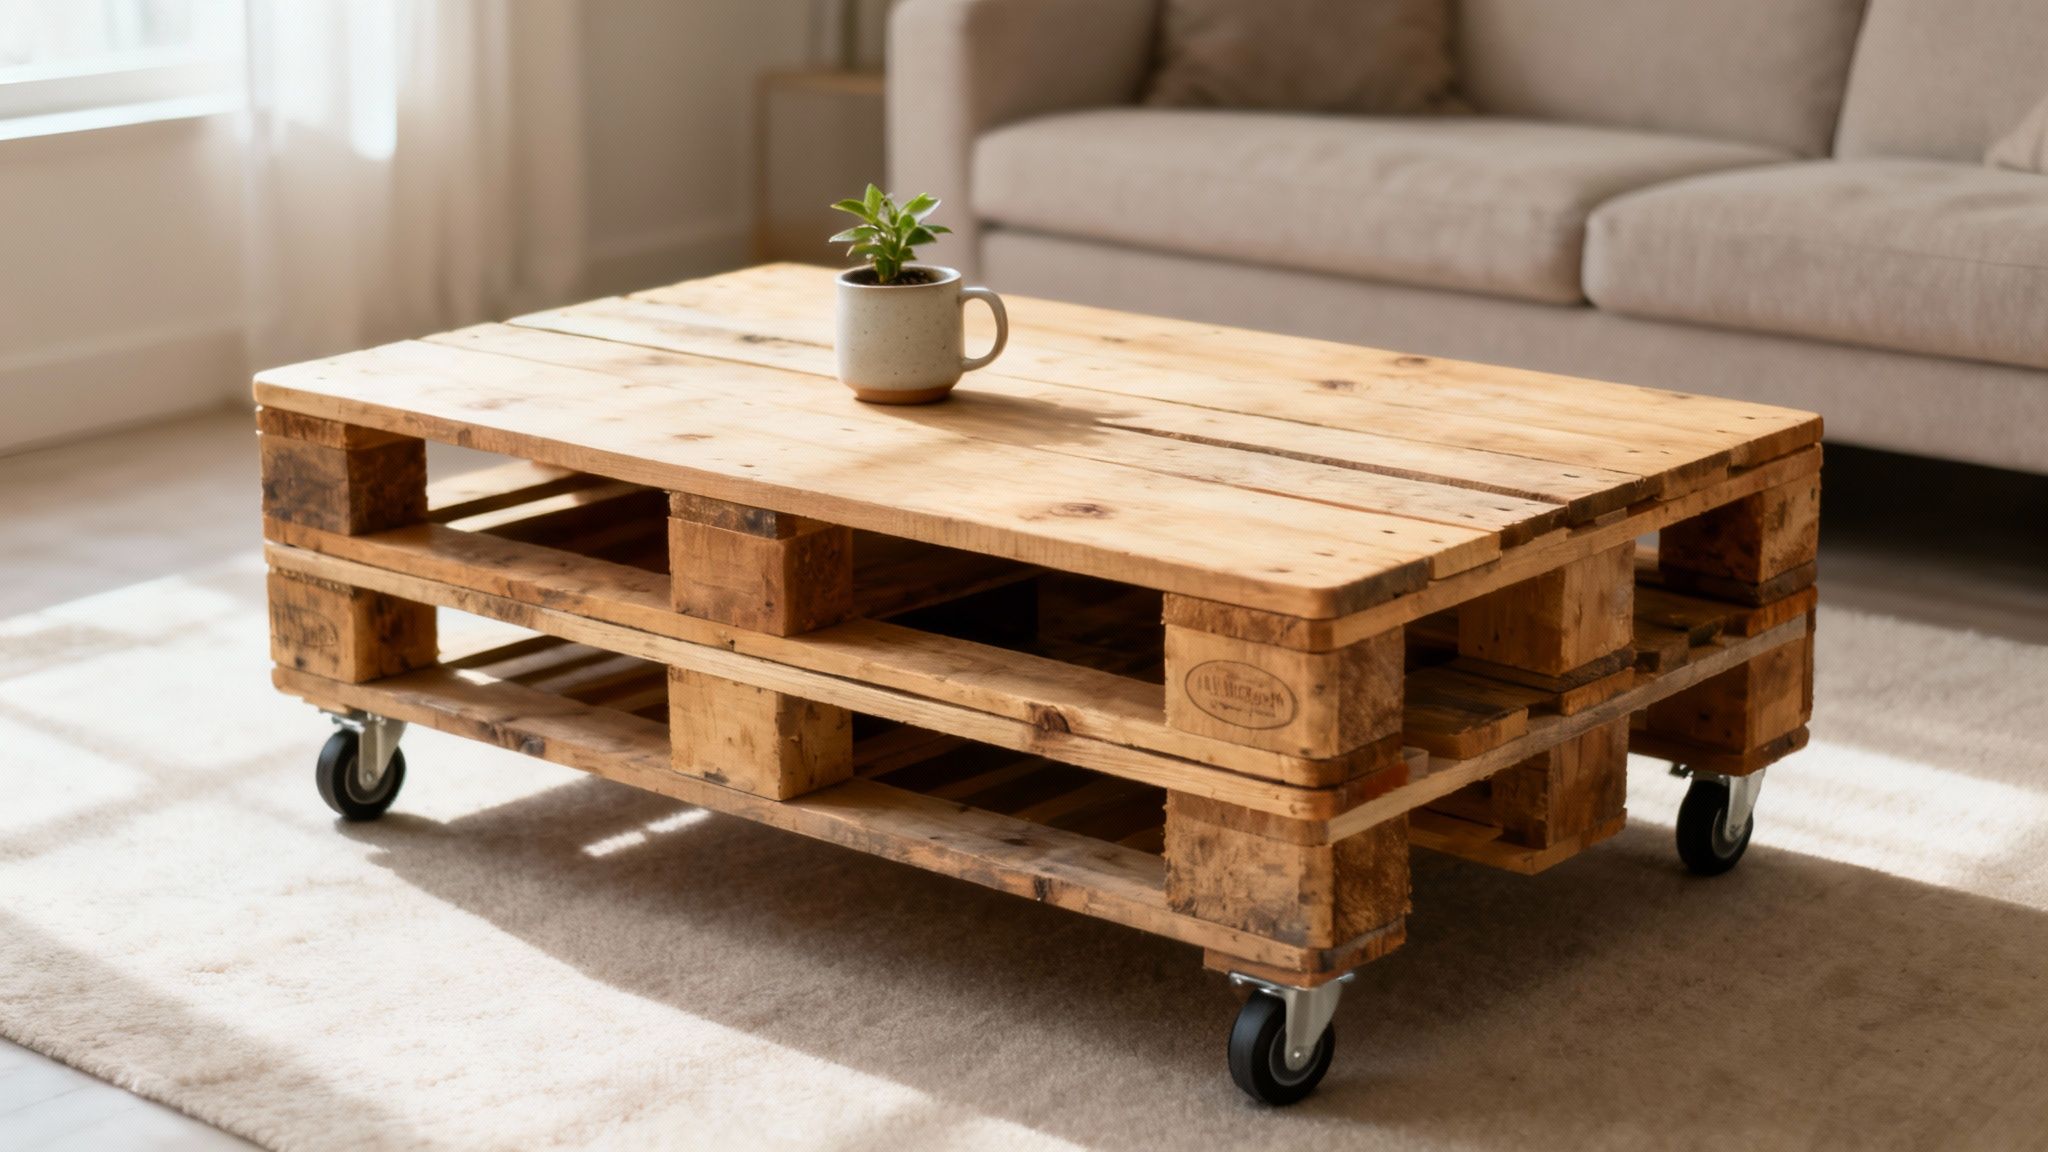
This project is ideal for beginners due to its straightforward construction, typically requiring only two to four pallets stacked and secured. The open-slat design creates a distinctive industrial-meets-farmhouse aesthetic that complements a wide range of interior décor styles. Its versatility has made it a favourite on home improvement shows and a staple in DIY blogger portfolios.
Project Essentials
- Difficulty: Beginner
- Estimated Time: 3-5 hours
- Key Materials: 2-4 HT-marked pallets, power sander, wood screws, caster wheels (optional), wood stain or sealant.
Top Tips for a Perfect Finish
To ensure your coffee table is both beautiful and safe, sand all surfaces meticulously to remove any splinters and create a smooth finish. Always use pallets stamped with 'HT' (heat-treated), as they are free from the harsh chemicals used in 'MB' (methyl bromide) treated pallets. For added practicality, attaching caster wheels makes the table easy to move for cleaning or rearranging furniture. Applying a durable, food-safe sealant not only protects the wood but also makes spills easier to clean up. For a more in-depth look at similar builds, you can explore a wide variety of pallet wood project ideas.
2. Vertical Pallet Garden Wall
A vertical pallet garden wall is a brilliant and space-saving solution, making it one of the most rewarding wood pallet projects for green-fingered enthusiasts. This project ingeniously repurposes a standard shipping pallet by mounting it upright and transforming its slats into pockets for soil and plants. It's a perfect way to cultivate herbs, flowers, or even small vegetables in compact spaces like balconies, patios, or small yards, turning a plain wall into a living piece of art.
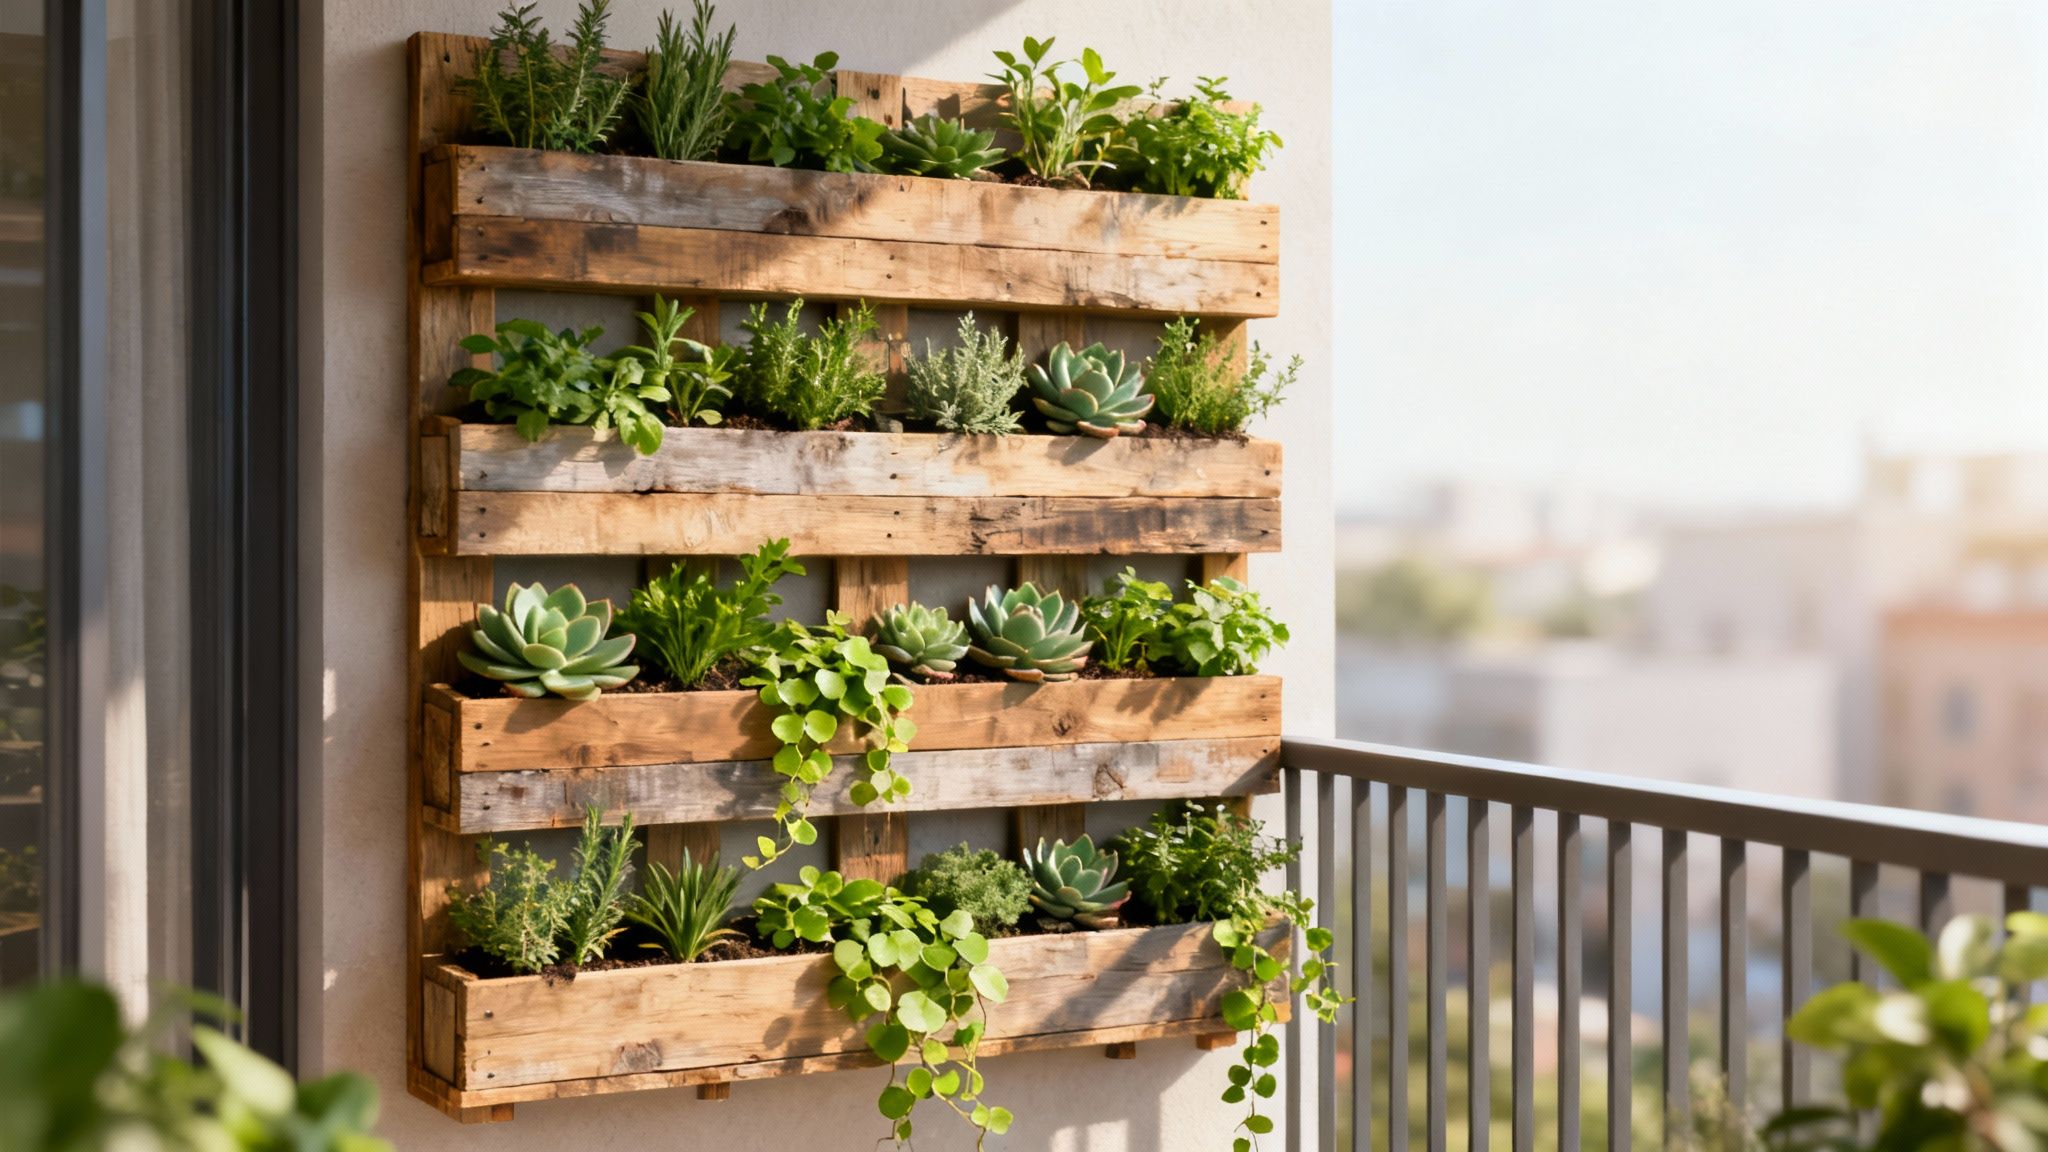
Popularised by the urban farming movement and home-and-garden influencers, this project merges functionality with aesthetic appeal. It allows you to grow fresh produce right outside your kitchen or create a stunning decorative feature that adds natural beauty and texture to any outdoor area. Its efficiency and visual impact have made it a favourite in city gardens and eco-conscious homes.
Project Essentials
- Difficulty: Beginner-Intermediate
- Estimated Time: 2-4 hours (plus planting time)
- Key Materials: 1 HT-marked pallet, landscape fabric, staple gun, potting soil, selection of plants or herbs.
Top Tips for a Perfect Finish
To create a durable garden, securely line the back, bottom, and front of each planting compartment with landscape fabric to hold the soil in place. Ensure you use a lightweight potting mix to minimise stress on the wall and the pallet itself. For easy maintenance, consider installing a simple drip irrigation system to keep plants consistently watered. Position your garden where it will receive at least 4-6 hours of sunlight daily, and always check that the wall you're mounting it on can support the final weight. For more creative inspiration, explore these other fantastic things to make from pallets.
3. Pallet Bed Frame
Creating a pallet bed frame is one of the most transformative wood pallet projects, turning simple shipping materials into a stylish and sturdy foundation for your mattress. This project offers a minimalist, industrial-chic aesthetic that is both budget-friendly and remarkably durable. Its low-profile design and natural wood texture provide a unique platform that enhances bohemian, rustic, or Scandinavian-inspired bedroom décor.
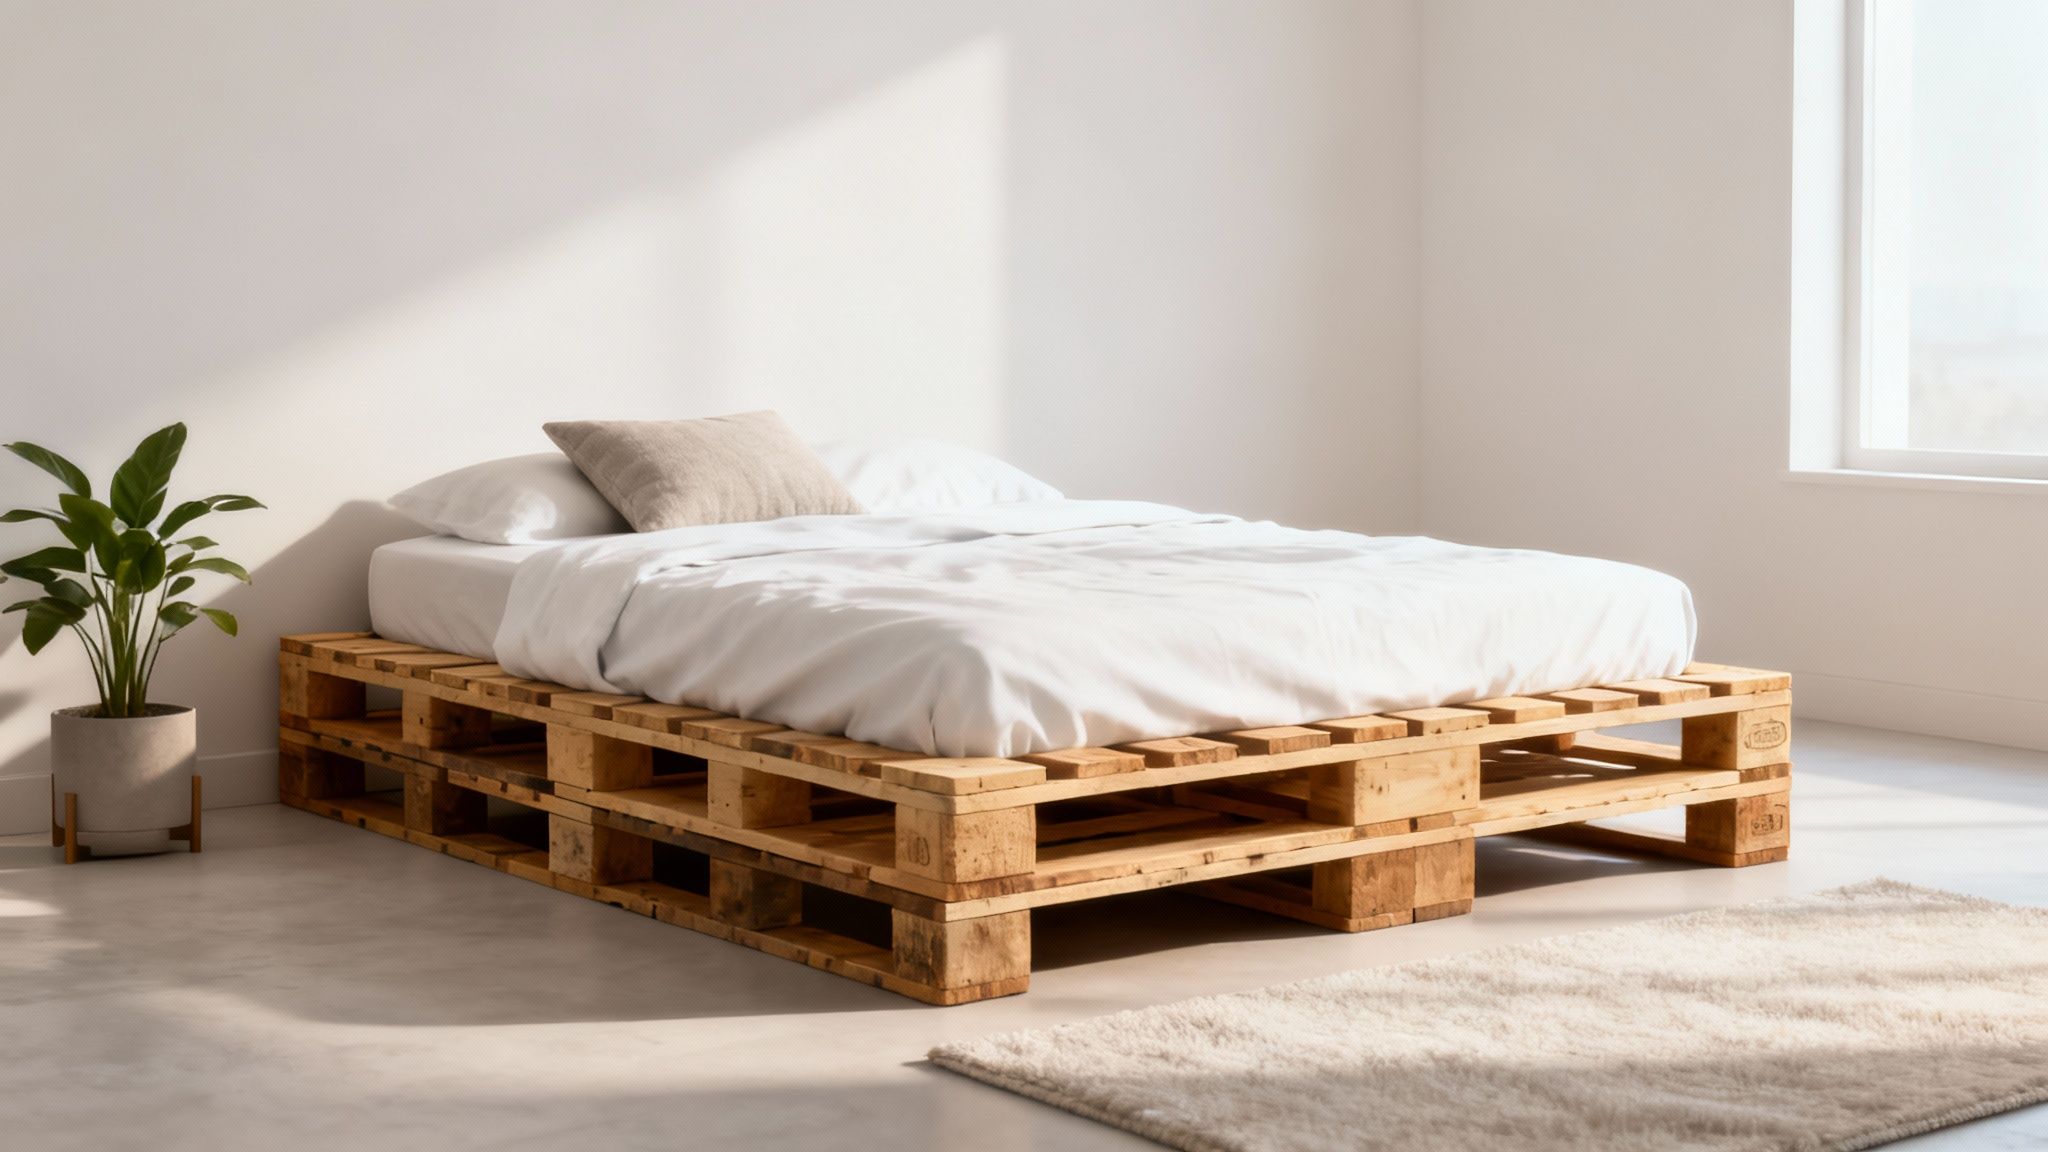
Popularised by budget lifestyle bloggers and the minimalist design movement, this project is perfect for anyone seeking a cost-effective alternative to a traditional bed frame. The structure is typically created by arranging four to six pallets to form a solid base, which can be left natural, painted white, or stained to match your room. Some designs even incorporate built-in lighting for a cosy, ambient glow.
Project Essentials
- Difficulty: Beginner
- Estimated Time: 2-4 hours
- Key Materials: 4-6 HT-marked pallets, power sander, wood screws or metal brackets, L-brackets, non-toxic wood sealant.
Top Tips for a Perfect Finish
To ensure stability and safety, select pallets that are in excellent condition, free from rot or significant damage. Thoroughly sand every surface to prevent splinters and create a smooth finish that won’t snag your bedding or mattress. For larger beds, like a queen or king, add a central support beam to prevent sagging. Always secure the pallets together using strong wood screws or metal brackets to stop them from shifting. Finally, apply a non-toxic, low-VOC sealant to protect the wood and ensure a safe sleeping environment.
4. Pallet Shoe Rack or Shelf Unit
A pallet shoe rack is one of the most practical wood pallet projects for bringing order and rustic charm to a cluttered entryway, mudroom, or closet. This project repurposes pallet wood into a multi-level storage solution, perfect for organising shoes, boots, and other daily essentials. Its simple construction and slim profile make it a fantastic space-saver, especially in smaller homes or apartments where floor space is at a premium.
This project has gained popularity through home organisation influencers and DIY blogs, celebrated for its ability to transform a single pallet into an efficient vertical storage system. It can be left freestanding or mounted securely to a wall, offering a stylish and incredibly low-cost alternative to generic shop-bought shelving. Its customisable nature means it can be adapted to fit any space perfectly.
Project Essentials
- Difficulty: Beginner
- Estimated Time: 2-4 hours
- Key Materials: 1-2 HT-marked pallets, power sander, wood screws, L-brackets (for wall mounting), paint or wood stain.
Top Tips for a Perfect Finish
To create a shoe rack that is both functional and safe for your footwear, thoroughly sand all wood surfaces to prevent splinters from snagging or damaging your shoes. When planning the layout, consider staggering the shelf levels to accommodate taller items like boots. For wall-mounted versions, always use strong L-brackets to securely fix the unit to the wall studs for maximum stability. Applying a durable, weather-resistant finish is a great idea if the rack will be placed in a high-moisture area like a mudroom.
5. Pallet Wood Outdoor Furniture Set (Sofa/Loungers)
Creating an outdoor furniture set is one of the most ambitious and rewarding wood pallet projects you can undertake. This project transforms simple pallets into a stylish and comfortable outdoor oasis, perfect for patios, gardens, or balconies. By stacking and arranging pallets, you can construct everything from a simple two-seater sofa to a large L-shaped sectional, creating a bespoke seating area tailored to your space.
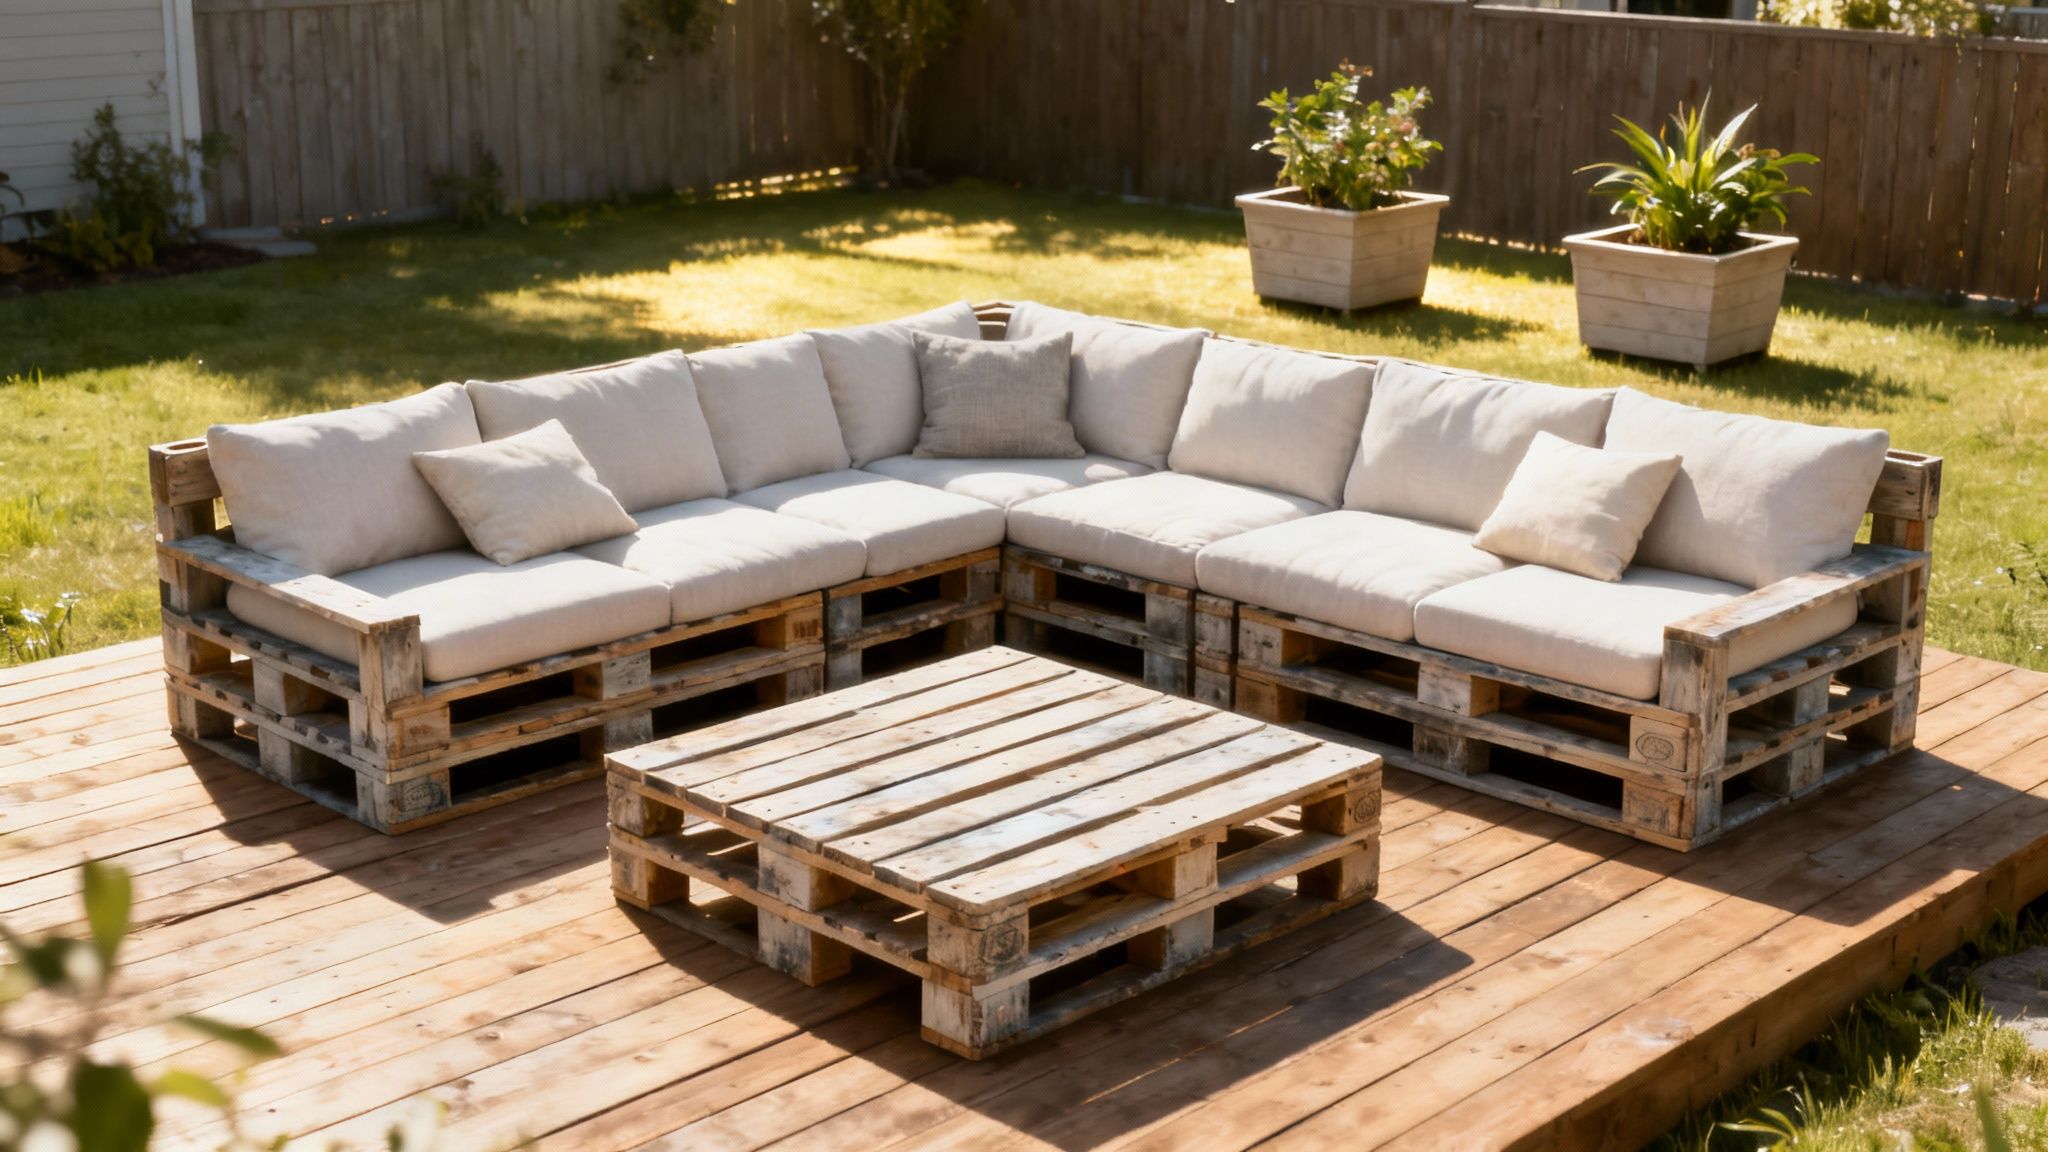
This DIY approach offers a cost-effective alternative to expensive garden furniture, allowing for complete customisation in size and layout. The addition of plush, weather-resistant cushions and colourful pillows turns the rustic base into an inviting lounge spot. Its popularity on garden design blogs and Pinterest boards stems from its ability to deliver a high-end, contemporary look on a minimal budget.
Project Essentials
- Difficulty: Intermediate
- Estimated Time: 6-10 hours
- Key Materials: 6-10 HT-marked pallets, heavy-duty wood screws, orbital sander, waterproof wood sealant, outdoor cushions.
Top Tips for a Perfect Finish
To ensure your furniture withstands the elements, apply a high-quality waterproof sealant annually to protect the wood from moisture and UV damage. It is also wise to elevate the base slightly or ensure good drainage to prevent rot from ground contact. Invest in durable outdoor cushions with removable, washable covers for easy maintenance. For a cohesive look, define the seating area with an outdoor rug and coordinate your pillows with your garden's colour scheme. Choosing the right timber is crucial for longevity; you can learn more about the best wood for outdoor furniture to inform your project.
6. Pallet Wall Art or Accent Wall
Creating a pallet wood accent wall is one of the most transformative wood pallet projects you can undertake, instantly adding texture, warmth, and a strong rustic character to any room. This project involves dismantling pallets and using the individual boards to create a feature wall or a large piece of framed art. Its popularity, championed by designers like Joanna Gaines, stems from its ability to turn a plain wall into a stunning focal point with a farmhouse or industrial aesthetic.
This project is fantastic for spaces needing a high-impact, low-cost design upgrade, such as a living room, bedroom, or even a commercial space like a café. The varied tones, nail holes, and grain patterns of reclaimed pallet wood give the wall a unique, story-filled appearance that cannot be easily replicated. It’s a versatile design element that supports a range of styles from cosy cabin to modern industrial.
Project Essentials
- Difficulty: Intermediate
- Estimated Time: 8-12 hours (for an average-sized wall)
- Key Materials: Multiple HT-marked pallets, pry bar, stud finder, construction adhesive, brad nailer or hammer and nails, wood stain or sealant.
Top Tips for a Perfect Finish
Before starting, plan your layout by arranging the boards on the floor to get the colour and texture combination just right; consider a staggered or herringbone pattern for added visual interest. Use a stud finder to locate and mark the wall studs, ensuring you can secure the boards firmly. For a professional, splinter-free finish, thoroughly sand each board and apply a sealant to protect the wood and make it easier to clean. This approach can be a great alternative to traditional framed art, offering a similar impact to some gallery wall ideas.
7. Pallet Sandbox for Kids
Creating a dedicated outdoor play space for children doesn't have to be expensive, and the pallet sandbox is a perfect example of how wood pallet projects can foster family fun. This DIY project transforms simple pallets into a sturdy, contained sandpit, providing hours of entertainment. By arranging pallets into a square frame and lining it, you create a rustic and highly functional play area that keeps sand neatly in one place.
This project has gained popularity on parenting blogs and DIY family websites for its cost-effectiveness and simplicity. It provides a wonderful opportunity to build something tangible for your children while upcycling materials. The addition of a simple cover, made from a tarp or plywood, protects the sand from garden debris and local animals, ensuring it remains a clean and safe environment for play.
Project Essentials
- Difficulty: Beginner
- Estimated Time: 2-4 hours
- Key Materials: 2-4 HT-marked pallets, landscape fabric, wood screws, power sander, child-safe wood sealant, clean play sand.
Top Tips for a Perfect Finish
Safety is paramount, so always use pallets marked 'HT' (heat-treated) and thoroughly sand all wooden surfaces to eliminate any risk of splinters. Apply a non-toxic, child-safe sealant to protect the wood from the elements and prevent decay. To stop weeds or bugs from coming up through the sand, lay down a layer of landscape fabric at the base before filling it. Always use certified play sand, not construction sand, which can contain harmful silica. A fitted cover is essential for keeping the sand clean and dry when not in use.
8. Pallet Planter Box (Ground Level)
Transforming your garden space with a wood pallet project like a ground-level planter box is a brilliant way to merge rustic aesthetics with practical gardening. This project involves arranging pallets to create square or rectangular raised beds directly on the ground, which are then filled with soil. It’s an effective solution for creating defined planting areas for vegetables, herbs, or flowers, especially in gardens with poor native soil.
Popularised by the urban farming and organic gardening movements, these planter boxes offer an organised and accessible way to grow your own produce. They are commonly seen in community gardens and school projects, providing a simple, low-cost method for building robust garden beds. The structure helps contain soil and compost while improving drainage and soil temperature.
Project Essentials
- Difficulty: Beginner
- Estimated Time: 2-4 hours
- Key Materials: 2-4 HT-marked pallets, landscape fabric, wood screws, quality compost and topsoil.
Top Tips for a Perfect Finish
To create a food-safe garden, only use heat-treated (HT) pallets and avoid any that appear stained or chemically treated. Line the interior walls with landscape fabric to contain the soil and help with drainage while preventing weeds from growing through. For added protection against burrowing pests, you can staple hardware cloth to the bottom before filling. Fill your planter with a high-quality mix of compost and topsoil to give your plants the best start. For those new to this style of cultivation, exploring the basics of container gardening for beginners can provide valuable insights.
9. Pallet Pet Bed or Dog House
Creating a bespoke space for a furry friend is one of the most heartwarming wood pallet projects you can undertake. This project transforms reclaimed pallet wood into a cosy and stylish pet bed for indoors or a sturdy dog house for the garden. It offers a practical way to give your pet a dedicated retreat while adding a touch of rustic charm to your home or outdoor area.
Popularised by pet lifestyle influencers and DIY bloggers, these custom-built beds and houses are far more personal than store-bought alternatives. The simple, block-like structure of a pallet provides a solid base that can be easily customised with paint, cushions, and even your pet's name. It's a fantastic project for using up smaller sections of pallet wood leftover from other builds.
Project Essentials
- Difficulty: Beginner to Intermediate
- Estimated Time: 4-6 hours
- Key Materials: 1-3 HT-marked pallets, jigsaw, power sander, wood screws, pet-safe paint or sealant, cushion.
Top Tips for a Perfect Finish
The safety of your pet is paramount. Sand every wooden surface meticulously to eliminate any risk of splinters, paying close attention to edges and corners where your pet will rest. Always use a non-toxic, pet-safe stain or sealant to avoid exposing them to harmful chemicals. For maximum comfort, create a custom-fit cushion with a removable, washable cover for easy cleaning. If building an outdoor dog house, ensure it has proper ventilation and add a slight roof overhang to protect your companion from the elements.
10. Pallet Bar or Beverage Station
Creating a pallet bar or beverage station is one of the most rewarding wood pallet projects for anyone who loves entertaining guests. This project repurposes sturdy pallets into a functional and stylish serving area, perfect for a garden, patio, or basement man cave. It serves as an impressive focal point for parties and gatherings, providing a dedicated space for mixing drinks, serving beverages, and storing bar supplies.
This build is incredibly versatile, ranging from simple, stacked pallet configurations to more elaborate L-shaped bars with integrated shelving and countertops. The open-slat design is perfect for hanging glass racks or bottle openers, adding to its practical charm. Its popularity with home entertaining enthusiasts and event planners stems from its low cost and high visual impact, instantly upgrading any social space.
Project Essentials
- Difficulty: Intermediate
- Estimated Time: 5-8 hours
- Key Materials: 3-5 HT-marked pallets, wood screws or bolts, structural timber for bracing, a solid piece of wood for the countertop, waterproof sealant.
Top Tips for a Perfect Finish
For a sturdy and safe structure, always reinforce the pallets with extra timber bracing, especially if you plan to store heavy bottles or rest against it. If placing the bar outdoors, apply multiple coats of a high-quality waterproof sealant to protect it from the elements. To create a practical and level serving area, add a solid countertop made from a single piece of wood or reclaimed timber. Elevate the design by installing hooks for utensils, racks for wine glasses, and even adding LED strip lighting underneath the counter for a professional finish during evening events.
Top 10 Pallet Wood Projects Comparison
Your Next Masterpiece Awaits
As we have explored, from a rustic coffee table in the centre of your living room to a sprawling outdoor furniture set perfect for summer gatherings, the humble wood pallet holds limitless potential. We've journeyed through ten distinct wood pallet projects, each demonstrating how this reclaimed material can be transformed into something both functional and beautiful. You now have the blueprint to create everything from a vertical garden that breathes life into a small balcony to a charming pet bed for your furry companion.
The core message woven through each project is that thoughtful preparation is paramount. The success of your creation hinges not just on the final assembly, but on the crucial first steps. Choosing heat-treated (HT) pallets, meticulously sanding down rough surfaces, and applying the correct, non-toxic finishes are the foundational pillars of safe, durable, and professional-looking results.
Key Takeaways for Your Pallet Journey
To ensure your venture into upcycling is a resounding success, let’s distil our findings into a few essential principles:
- Safety First, Always: Prioritise sourcing HT-marked pallets and steer clear of those marked MB (Methyl Bromide) or any that show signs of spills or stains. Your health, and that of your family, is the most important material in any project.
- Preparation is 90% of the Work: The quality of your finished piece is directly proportional to the effort you invest in cleaning, dismantling, and sanding. A smooth, splinter-free surface is the canvas for a masterpiece.
- Customisation is Your Signature: These ideas are merely a starting point. The true magic happens when you infuse your personality into a project. Experiment with vibrant colours, unique stains, or even combine pallet wood with other materials like metal or glass to create something uniquely yours.
- Measure Twice, Cut Once: This age-old advice is particularly relevant for wood pallet projects. The non-standardised nature of pallet wood means careful and repeated measurements are your best defence against wasted materials and frustration.
Your Actionable Next Steps
Feeling inspired? It’s time to transition from reading to doing. Begin by identifying a space in your home or garden that could benefit from a custom touch. Was it the clever shoe rack that caught your eye, or the ambitious pallet bed frame? Once you have a project in mind, start your search for quality pallets. Reach out to local businesses, garden centres, or construction sites, always asking for permission before taking any.
By mastering the art of pallet upcycling, you are not just building furniture; you are making a powerful statement about sustainability, creativity, and resourcefulness. You are proving that with a bit of effort and imagination, you can create a beautiful, personalised home without a hefty price tag. The satisfaction of pointing to a stylish piece and saying, "I made that," is a reward in itself. So, roll up your sleeves, gather your tools, and get ready to transform discarded wood into your next treasured creation.


