Yes, you absolutely can paint over wallpaper. When it's done right, it’s a brilliant shortcut to a fresh look, saving you the messy, time-consuming job of stripping it all off. But here’s the catch: your success depends entirely on the condition and type of wallpaper you’re dealing with.
Before you even think about picking up a roller, you need to play detective. A poor surface will only lead to a disastrous finish, and that’s a headache no one needs.
Should You Paint Over Your Wallpaper or Remove It?
Think of your wallpaper as the foundation for your paint job. If that foundation is crumbling, anything you put on top is bound to fail. A fresh coat of paint is fantastic for changing a colour scheme, but it’s not a magic fix for underlying problems with the paper or the wall itself.
Spending ten minutes properly inspecting your walls now will save you hours of frustration later. Minor flaws can usually be managed, but widespread issues are a red flag. In those cases, removing the paper is the smarter, though more labour-intensive, choice for a lasting result.
Inspecting the Wallpaper's Condition
Time for a hands-on inspection. Take a slow walk around the room and really look at the walls. Pay special attention to the seams, corners, and the areas around windows and doors where problems love to hide.
- Check for Peeling Seams: Gently run your hand along the vertical lines where the wallpaper strips meet. Are the edges lifting or starting to curl away from the wall? If you only find a few isolated spots, you can probably just glue them back down. If most of the seams are peeling, the original adhesive is failing, and the weight of wet paint will only make it worse.
- Look for Bubbles and Blisters: Widespread bubbling is a tell-tale sign that the paper has lost its grip on the wall, often because of moisture. Painting over these will just trap the air and dampness, leaving you with a lumpy, uneven finish that will almost certainly peel down the line.
- Assess Tears and Damage: A couple of small nicks or rips aren't a deal-breaker; they can be filled and sanded smooth. However, large tears or patches where the top layer has been ripped off will create texture differences that are incredibly difficult to hide with paint alone.
- Count the Layers: This is a classic issue in older homes – wallpaper on top of wallpaper. Press gently on the wall in a few different spots. If it feels a bit soft or spongy, you might have multiple layers. Painting over more than one layer is a gamble, as the added weight of the paint can cause all the layers to pull away from the wall at once.
My rule of thumb is this: if more than 30-35% of the wallpaper has significant damage—like widespread peeling or large bubbles—the prep work just isn't worth it. You'll spend more time trying to patch it up than you would just removing it for a truly professional finish.
Identifying Your Wallpaper Type
Not all wallpapers are created equal, and some are far better candidates for painting than others. The material makes a huge difference.
Vinyl Wallpaper
This is one of the most common types you’ll find, especially in kitchens and bathrooms, thanks to its durability. That slick, non-porous surface is designed to repel moisture, which means it will also repel your water-based paint. To paint over vinyl successfully, you absolutely must scuff the surface with sandpaper first and then use a high-adhesion, oil-based primer. This gives the paint something to grab onto. Seeing some creative examples of modern kitchen wallpaper can also give you an idea of how different textures and finishes work in a space.
Textured and Embossed Papers
Painting is a fantastic way to modernise an old-fashioned textured pattern like anaglypta or the dreaded woodchip. The paint preserves the unique texture but gives it a clean, monochromatic look that can feel very contemporary. The trick here is to use a roller with a deeper nap (the fuzzy part) to make sure the paint gets into all those tiny grooves and crevices.
Foil or Metallic Wallpaper
Honestly, don't even try. These are almost always a poor choice for painting over. Their incredibly smooth, non-absorbent surface makes it nearly impossible for paint to adhere properly. Even with specialist primers, the finish is notorious for chipping and peeling off. Your best bet is always to remove foil wallpaper.
Taking the time to check these factors will help you make a smart decision, setting your project up for a beautiful, lasting finish rather than a DIY disaster.
Paint or Remove Your Wallpaper? A Quick Decision Guide
Use this checklist to quickly assess your wallpaper and decide if painting over it is a viable option for your project.
Making the right call at this stage is the single most important step. If your walls tick the "Paint" boxes, you're ready to move on to the prep work
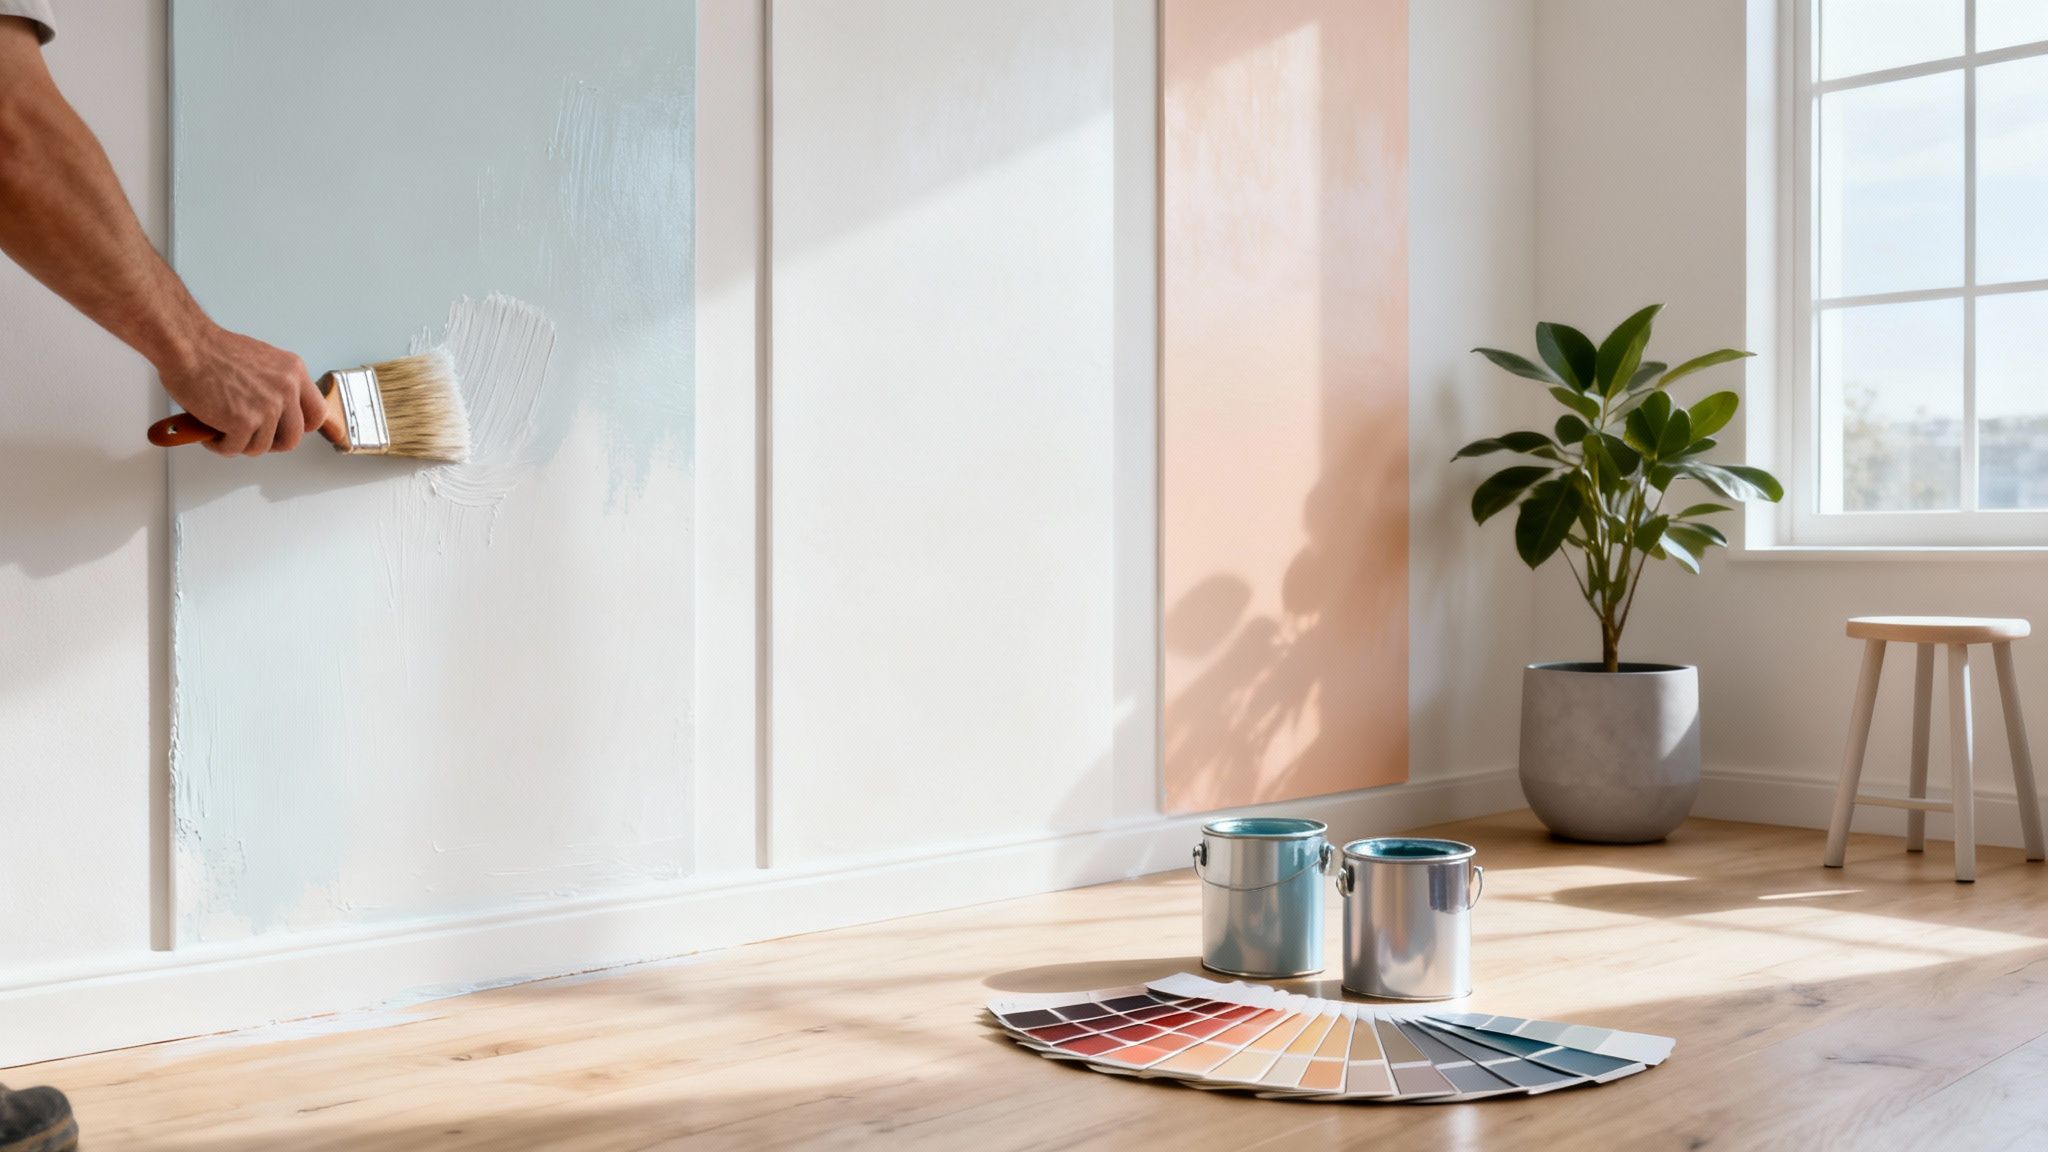
Your Essential Toolkit for Painting Wallpaper
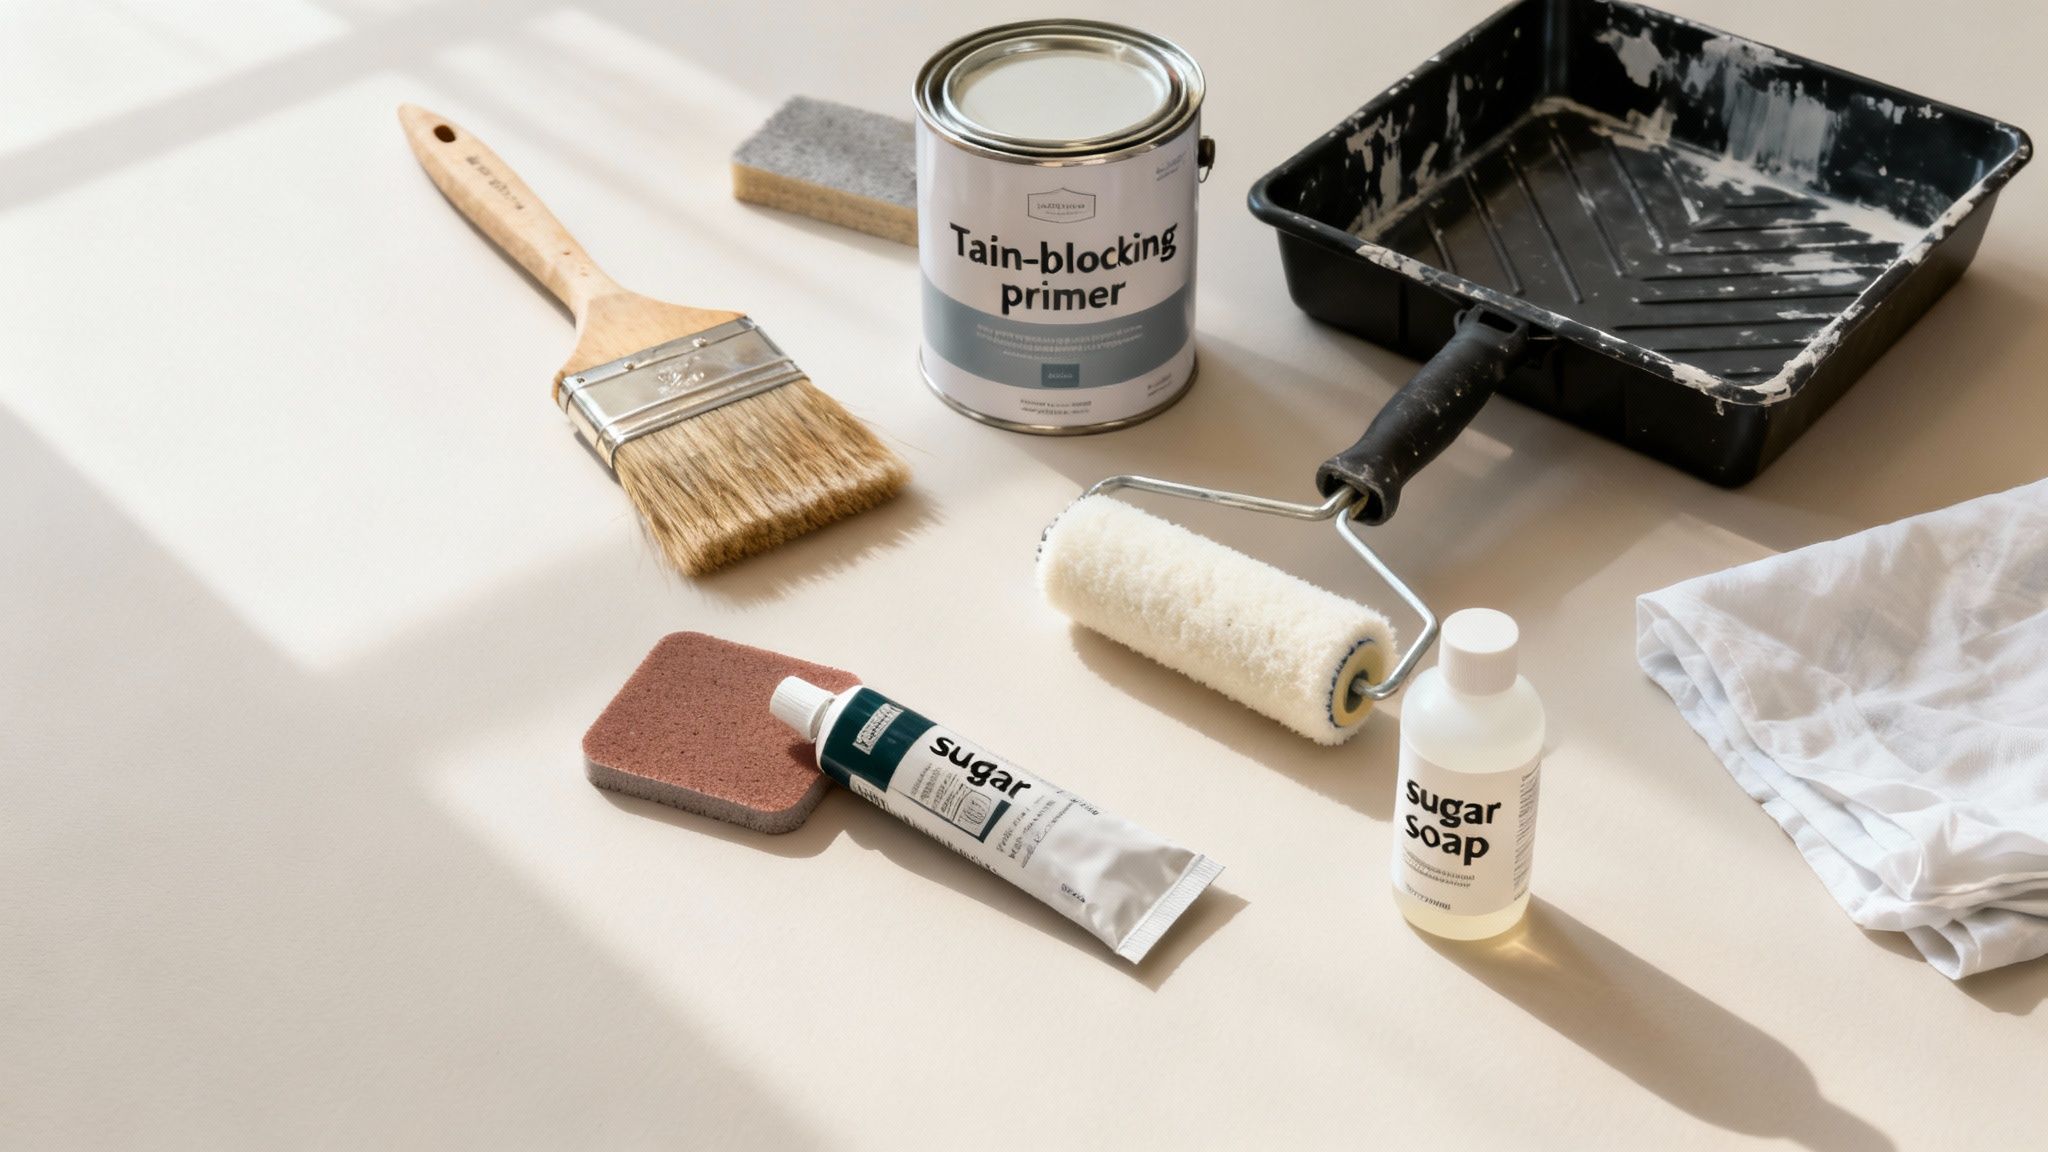
Right, so you’ve decided to paint over your wallpaper. Good on you. But before you even think about cracking open a tin of paint, let’s talk kit. Getting this right from the start is the difference between a job you’re proud of and a frustrating mess.
Think of this as your definitive shopping list. We’ll cover everything you need to get from grubby old wallpaper to a flawless new finish, including a few unsung heroes that make all the difference.
First Things First: Cleaning and Repair Supplies
You can’t paint on a dirty, damaged surface and expect good results. It just won’t happen. Any little speck of grime or imperfection will telegraph straight through your new paint, so this prep stage is non-negotiable.
Your first job is giving the walls a proper scrub. A bucket of warm water mixed with sugar soap is an absolute must. It’s a decorator’s best friend for a reason, cutting through years of built-up dust and grease that would otherwise stop your primer from gripping properly.
Next, you'll need to patch up any dings or tears in the paper. A decent filler and a flexible filling knife are all you need here. Once the filler is dry, you’ll want a medium-grit sanding block (around 120-grit is ideal) to smooth it all down. This is also brilliant for giving any glossy wallpaper a quick 'key' or scuff, which really helps the primer to stick.
The All-Important Priming and Painting Kit
This is where the real transformation begins, and choosing the right products is probably the most important decision you'll make.
The single biggest mistake I see people make is grabbing a standard water-based primer. Old wallpaper paste often reacts with the water, causing ugly yellow or brown stains to bleed through. No amount of topcoat will cover it up.
You absolutely must use a dedicated stain-blocking primer. I’d recommend an oil-based or shellac-based formula. These create a bulletproof barrier, sealing in the old wallpaper, any ink from the pattern, and the adhesive underneath. It completely stops moisture from your topcoat from causing any problems.
For the final colour, a good quality acrylic emulsion is perfect. I usually lean towards a satin or eggshell finish; it gives you a lovely, durable surface that's easy to wipe down without being too shiny. If you're stuck between the two, this guide on the difference between eggshell and satin is a great read.
Of course, the paint is only as good as the tools you apply it with. Here’s what you’ll need:
- Rollers: A medium nap roller (3/8-inch is a good all-rounder) is your best bet. It holds plenty of paint for great coverage without leaving a heavy texture, even on slightly textured papers.
- Brushes: Don't skimp here. A quality 2-inch angled brush is essential for "cutting in" – getting those crisp, clean lines against the ceiling and around skirting boards.
- The Rest: You’ll also need a paint tray, dust sheets to protect everything you don't want painted, and some good-quality painter's tape for masking off edges.
Prepping Your Wallpaper for a Perfect Paint Job
Ask any seasoned decorator their secret to a flawless finish, and they'll all tell you the same thing: it’s all in the prep work. This isn't the glamorous part of the project, I'll admit, but it is without a doubt the most important. Skimping here is a classic false economy; you’ll only pay for it later with peeling paint, visible flaws, and a finish that just looks… off.
Proper preparation is what transforms your existing wallpaper into a stable, uniform canvas that’s ready to take paint. This is the stage that ensures your paint actually sticks, looks perfectly smooth, and lasts for years. Think of it as laying the foundation for a brilliant result.
Cleaning the Surface Thoroughly
Over the years, walls accumulate a surprising amount of grime. Kitchens collect a fine film of grease, living rooms gather dust, and fingerprints can pop up anywhere. If you try to paint directly over this invisible layer, you’re setting yourself up for failure. The paint will simply struggle to bond properly.
Start by giving the walls a proper clean. A simple solution of sugar soap and warm water is all you need. Grab a large sponge and wipe down the entire surface, but here’s a little pro tip: work from the bottom up. This prevents clean streaks from running down and marking the wallpaper, a small trick that makes a big difference.
Once you’re done, rinse the walls with a separate sponge and clean water to get rid of any soap residue. Let the walls dry completely before you even think about repairs. This simple cleaning step alone can improve paint adhesion by up to 40%, making it a non-negotiable first move.
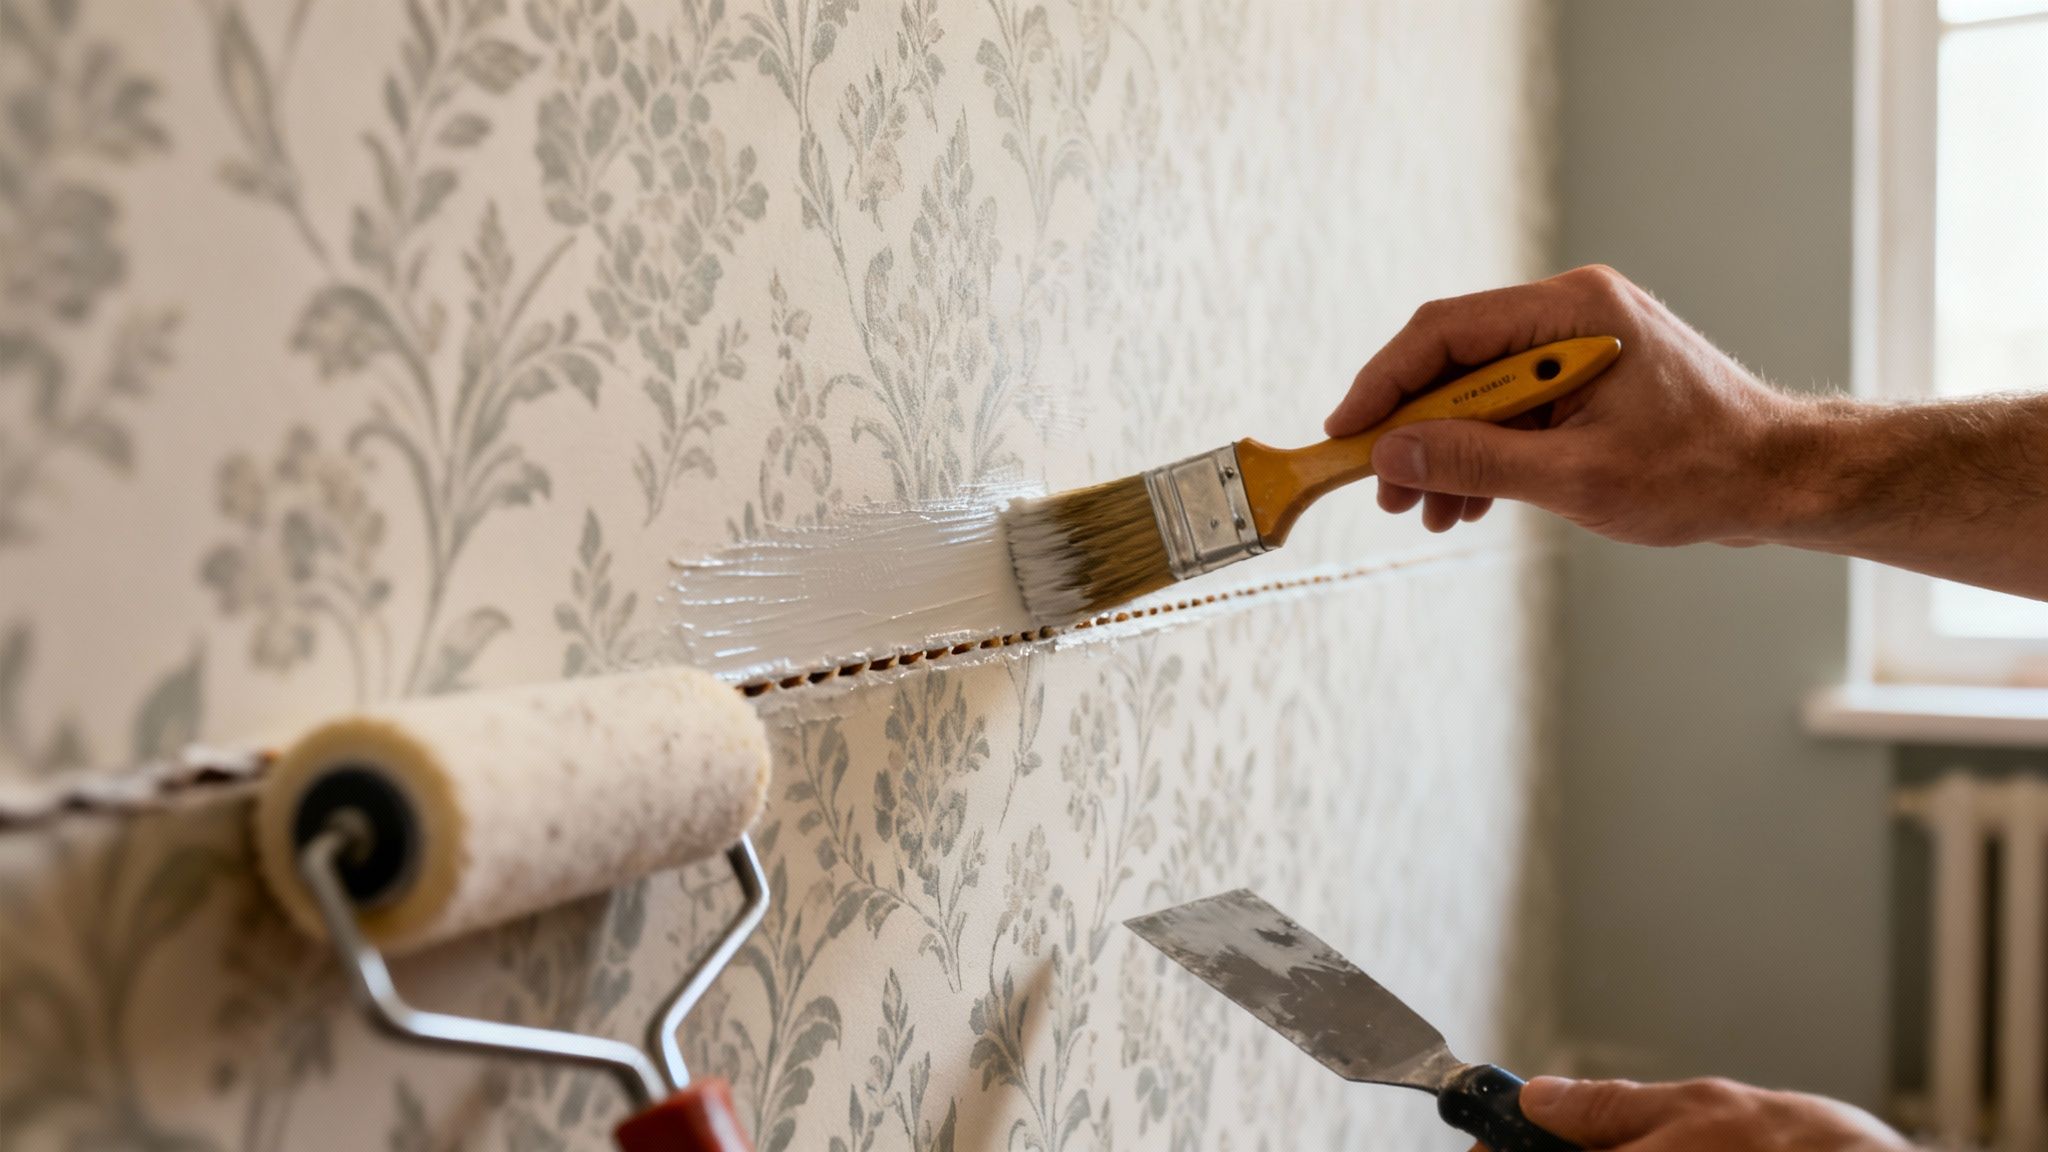
Making Flawless Repairs
With the walls clean, it's time to play detective and hunt down every last imperfection. It’s amazing how even the smallest flaw can stand out like a sore thumb once it’s covered in a fresh coat of paint.
Your main focus should be the wallpaper seams. Run your hand along each vertical join and feel for any edges that are lifting or peeling away from the wall.
- Secure Loose Seams: For any lifting edges, use a small artist's brush to apply a thin layer of wallpaper seam adhesive right behind the paper. Press the seam down firmly with a seam roller or a clean cloth to squeeze out any excess glue and get a tight bond.
- Fill Gouges and Tears: If you spot any nicks, small holes, or tears, grab some decorator's filler. Apply a small amount with a flexible filling knife, pushing it into the gap and smoothing it off. It’s best to leave it slightly proud of the surface, as it will shrink a little as it dries.
- Sand Everything Smooth: After the filler and any glued seams are completely dry, it's time to sand. Using a medium-grit sanding block (around 120-grit is perfect), gently sand your repairs until they are perfectly flush with the wallpaper. You should be able to run your hand over the patch without feeling any ridges at all.
This meticulous repair work is what gives you that seamless, professional look. It's often these small details that separate an average DIY job from a great one. Skipping this is one of the most common issues people run into, as you’ll often read when looking up how to avoid common renovation mistakes.
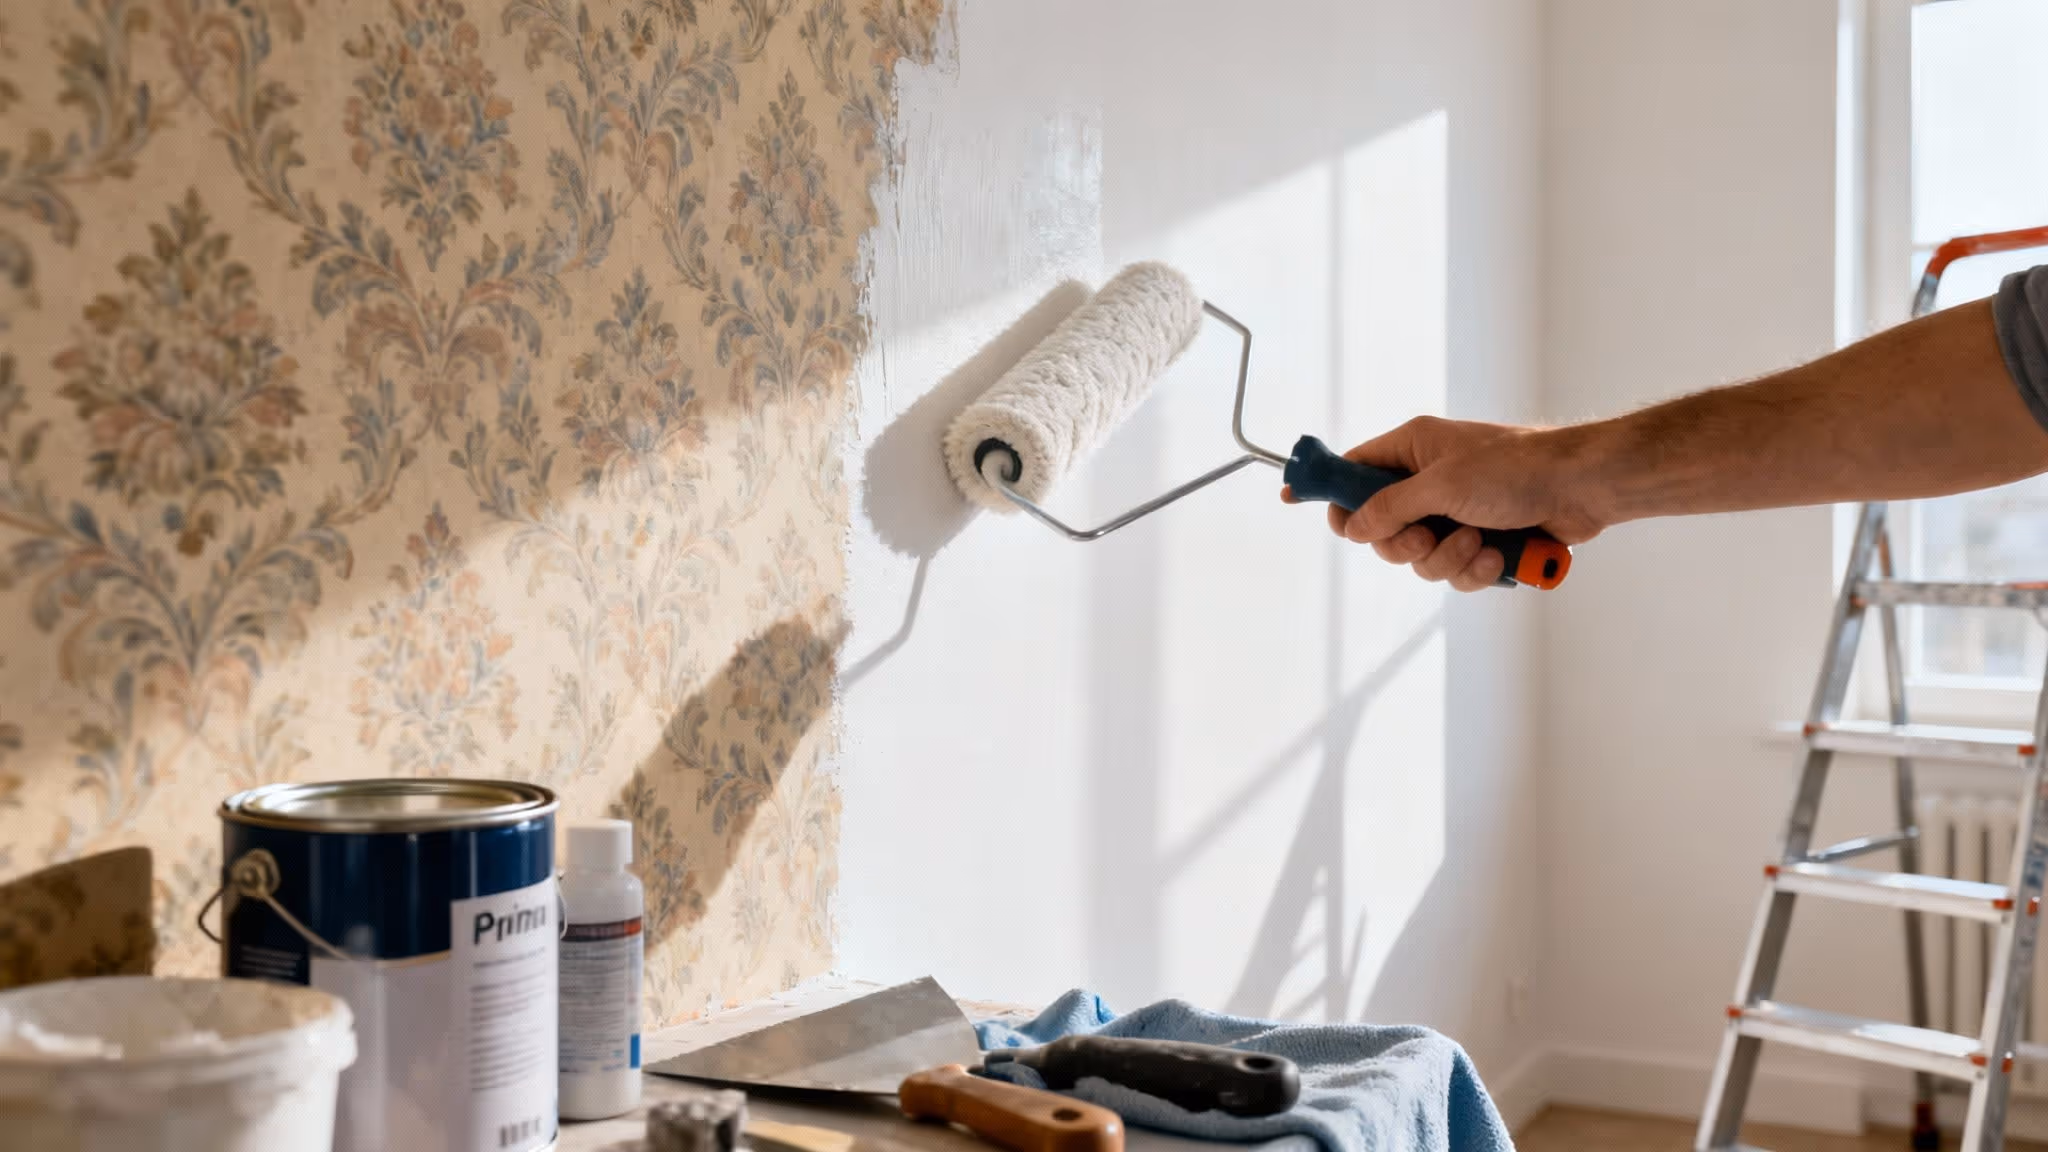
Applying the Critical Primer Coat
Right, listen up. If there is one step you absolutely cannot skip when painting over wallpaper, this is it. Priming isn’t a suggestion; it’s mandatory for a good outcome. Primer does a couple of crucial jobs that a standard topcoat of paint simply can't handle.
First, it creates a barrier. The moisture in modern water-based emulsions can reactivate old wallpaper adhesive, causing the paper to bubble, blister, or even start peeling away from the wall. A good oil-based or shellac-based primer prevents this by completely sealing the paper.
Second, a quality primer stops stains and patterns from bleeding through. If your wallpaper has a dark or vibrant pattern, even a few coats of paint might not be enough to hide it completely. You can end up with a faint, ghostly image showing through your new colour. A stain-blocking primer is specifically designed to stop this from happening.
Using a high-quality, oil-based primer is the single most important investment you'll make in this project. It solves 99% of the potential problems before they even start, from bubbling paper to pattern bleed-through.
When you're ready to prime, use a roller for the large areas and a brush for cutting in around the edges, just as you would with your main paint. Apply one even, consistent coat across the entire surface. Make sure the room is well-ventilated—especially with oil-based products—and let it dry completely. Check the tin for instructions, but this often means waiting a full 24 hours.
Once your walls are clean, repaired, and properly primed, you’ve done all the hard work. You've created the perfect surface, and now the fun can begin.
How to Apply Paint for a Professional Finish
With all that painstaking preparation behind you, we finally get to the satisfying part: the painting itself. This is where your hard work really pays off, letting you lay down a smooth, uniform colour that will completely transform the room. A great finish isn't about speed; it's all about technique.
Applying paint correctly over a primed wallpaper surface is what separates a decent DIY job from a truly professional-looking one. We'll focus on two crucial techniques: cutting in to get those razor-sharp edges and rolling for flawless coverage on the main walls.
The Art of Cutting In
Before you even think about picking up a roller, you need to tackle the edges. "Cutting in" is simply painting along all the borders of the wall with a brush—think ceilings, skirting boards, and around window frames. This creates a clean boundary that a big roller just can't manage.
A good quality 2-inch angled brush is your best friend here. The angled bristles give you fantastic control, making it much easier to create a sharp line. Only dip the tip of your brush into the paint, then wipe off the excess on the side of the tin. This simple habit prevents drips and runs.
Work in smooth, steady strokes, bringing the paint right up to your painter's tape or the edge of the adjoining surface. You’re aiming to create a painted band about 2-3 inches wide. This gives your roller a generous margin to blend into later, which is key to avoiding those tell-tale lines between the brushed and rolled sections.
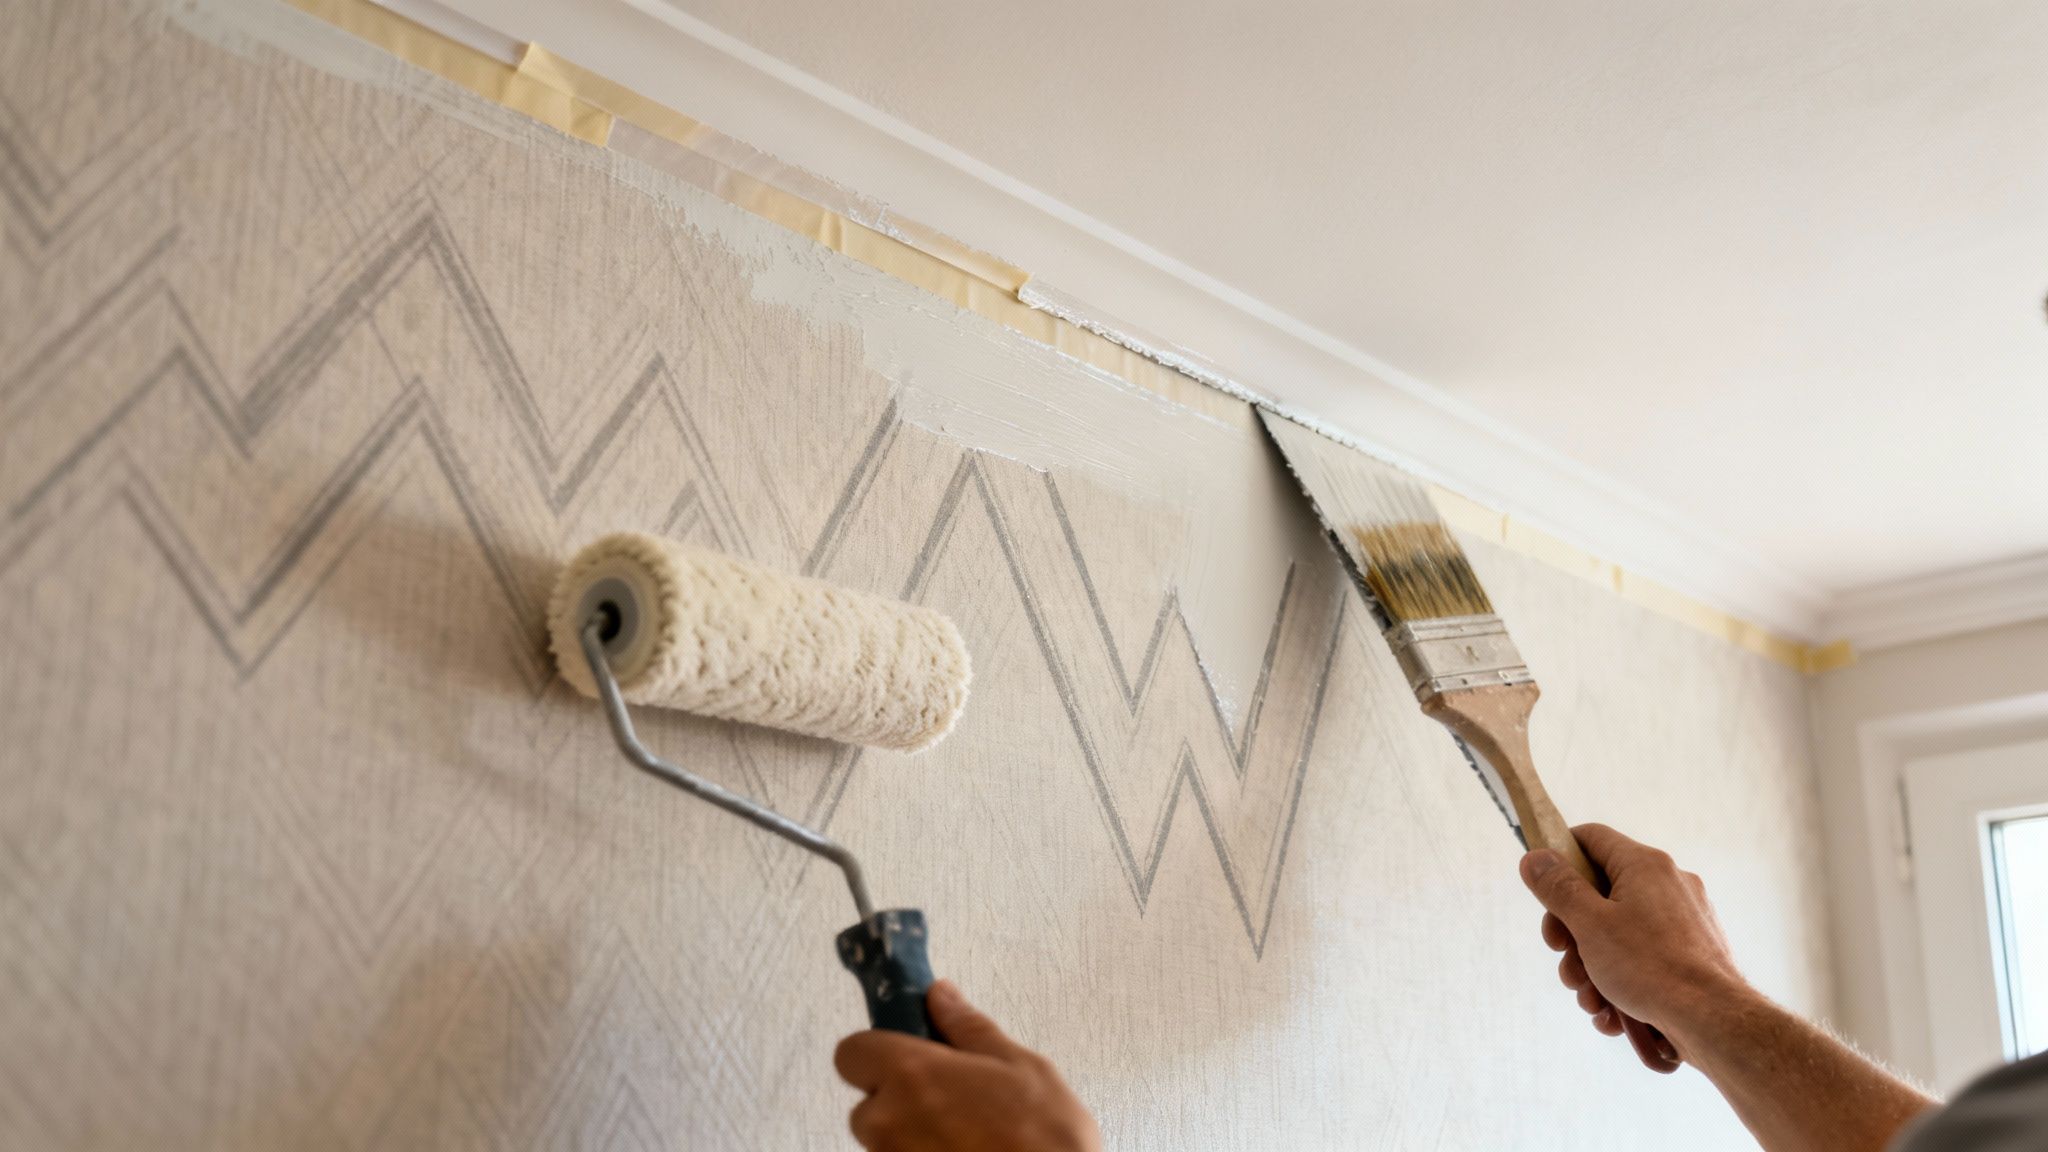
Mastering the 'W' Technique for Rolling
Once you've cut in all your edges, it’s time to cover the main wall surfaces. The biggest mistake I see people make is rolling in random directions. That’s a surefire way to end up with streaks, an uneven texture, and what decorators call "holidays"—those annoying little patches you’ve missed.
The secret to a flawless finish lies in the 'W' (or 'M') technique. It’s a simple method that guarantees even paint distribution and prevents roller marks.
- Load Your Roller: Dip your roller into the paint tray, then roll it back and forth on the ribbed section. You want it to be fully saturated but not dripping with paint.
- Start Your 'W': Begin about a foot from a corner and roll a large 'W' shape onto the wall, roughly three feet square. This first pass gets the bulk of the paint onto the surface.
- Fill It In: Without lifting the roller off the wall, immediately fill in the gaps in your 'W' using parallel, slightly overlapping vertical strokes. This smooths everything out into one uniform coat.
- Move and Repeat: Shift over to the next section, making sure to overlap the bit you just painted to maintain a "wet edge." Then, just repeat the 'W' and fill-in process until the wall is done.
This technique is particularly important when you're painting over textured wallpaper, as it really helps to push the paint into every little nook and cranny.
A quick tip from experience: don't press too hard on the roller. Let the tool do the work. Too much pressure can create thick edges on your roller strokes, known as "tramlines," and can even cause the paint to lift right off the primed wallpaper.
Applying Coats and Managing Drying Times
Patience really is a virtue when it comes to painting. Slapping on one thick coat is never the answer; it dries unevenly and almost always looks patchy. The real goal is to build up the colour with multiple thin, even coats. For most projects, two coats of your chosen topcoat over the primer will give you that rich, solid colour you're after.
The drying time listed on the paint tin isn't just a suggestion—it's a rule you need to follow. Rushing the second coat before the first one has properly cured can lead to disaster. The still-damp first layer can get pulled up by the roller, creating a tacky, lumpy mess that’s an absolute nightmare to fix.
Always check the manufacturer's instructions, but here's a good rule of thumb:
- Wait at least 4-6 hours between coats for most water-based emulsions.
- Remember that high humidity or a cold room will slow things down, so give it extra time if needed.
- Don't panic if the first coat looks a bit patchy or uneven. That's completely normal. The second coat is where the magic happens and you get that beautiful, uniform finish.
By combining careful cutting in, methodical rolling, and respecting the drying times, you’ll achieve a stunning finish that lasts. If you’re looking for a bit of inspiration, checking out different painting walls ideas can spark some creative ways to use your freshly prepped space.
Troubleshooting Common Wallpaper Painting Problems
Even when you've done everything by the book, painting over wallpaper can sometimes throw a curveball. Don’t panic if something looks a bit off after your first coat; most issues are fixable without having to strip everything back and start from scratch. Think of this as your go-to guide for figuring out what’s gone wrong and, more importantly, how to put it right.
These little hurdles are just part of the decorating game. Here in the UK, the residential painting and decorating sector is holding strong, mainly because homeowners are always looking for smart, cost-effective updates. Although the wider UK painting industry saw its revenue dip to an estimated £3.5 billion, the demand for home renovation projects keeps us decorators on our toes, finding practical solutions for everyday challenges like these.
Dealing with Bubbles and Blisters
You’ve just finished priming or applying the first coat of paint, and you step back to admire your work. But wait—what are those ugly bubbles and blisters that have suddenly appeared? This is probably the most common (and heart-stopping) issue people run into.
Nine times out of ten, the culprit is moisture. The water in your paint soaks through the paper and reactivates the old wallpaper paste underneath, causing it to lift away from the wall. This is exactly why a shellac or oil-based primer is your best friend here; it creates a seal that moisture can't penetrate.
If you’re staring at a bubbly wall, here’s the game plan:
- Wait and See: First, just walk away. It sounds counterintuitive, but small air bubbles often sort themselves out as the paint dries and the moisture evaporates. Give it at least 24 hours before you do anything else.
- Lance the Bubble: If it’s still there once the paint is fully dry, grab a sharp craft knife and make a small, clean slit right in the centre.
- Inject Some Glue: Using a syringe or a tiny artist's brush, carefully work a small amount of wallpaper seam adhesive into the slit. You don't need much.
- Smooth it Out: Gently press the wallpaper flat, working from the outside of the bubble in towards the slit. This pushes out any trapped air and excess adhesive. Wipe away any that seeps out with a damp cloth, let it dry completely, and then you can touch it up with paint.
Fixing Visible Seams
Another all-too-common frustration is when the wallpaper seams refuse to disappear, even after a coat or two of paint. You might see them as faint lines or even slight ridges, ruining the illusion of a perfectly smooth, painted wall.
This usually happens if the original paper wasn't hung perfectly flush, or if the edges have soaked up the paint differently to the rest of the surface. A bit of targeted effort is all it takes to fix it.
Here's a trick I swear by: take a very fine-grit sanding sponge (220-grit or higher) and lightly sand just the seam line. This helps knock down any raised edge. Afterwards, apply a thin coat of primer over the seam before you paint your next topcoat.
If you’re dealing with more of a gap, you can skim a very thin layer of decorators' filler along the seam with a flexible filling knife, feathering the edges out so it blends in. Once it's bone dry, sand it perfectly smooth, prime the repaired area, and then carry on with your final coat. It's a little extra work, but it makes all the difference.
Stopping Stains or Patterns Bleeding Through
You thought your primer had everything locked down, but now the ghost of that old, dark floral pattern is peeking through. Or maybe a mysterious yellow stain is making an unwelcome appearance. This is called "bleed-through," and it’s a classic sign that your primer wasn't quite up to the task.
Things like dark inks, old water damage, or nicotine stains are notoriously stubborn. If this is happening, your only real move is to apply another coat of a high-quality, stain-blocking primer directly over the problem area.
Don't be tempted to just slap more paint on top; the stain will almost certainly keep working its way through. A targeted coat of a shellac-based primer is virtually foolproof for this kind of thing. Once that new primer coat is dry, you can get back to painting with your chosen colour, confident that the stain is finally gone for good. If this has you reconsidering your final shade, our guide on how to choose paint colours has plenty of fresh inspiration.
Got Questions About Painting Over Wallpaper? We've Got Answers
It's completely normal to have a few questions buzzing around before you crack open a can of paint. Painting over wallpaper isn't your everyday DIY job, and a bit of extra know-how can make all the difference. Let's tackle some of the most common queries we hear from homeowners to help you get started with confidence.
Can You Just Paint Over Any Old Wallpaper?
The short answer is, unfortunately, no. Most wallpapers, like your standard paper-based or textured types (think Anaglypta), take paint beautifully once primed. The trouble starts with the slick, non-porous varieties.
Wallpapers with a foil, metallic, or high-gloss vinyl finish are a real pain for paint to stick to. Even with a top-notch primer, you're risking a finish that peels or chips down the line. For these, I'd almost always recommend stripping them first. If your paper just has a slight sheen, you can often get away with a light scuff-sand and an oil-based primer to give the paint a fighting chance to grip.
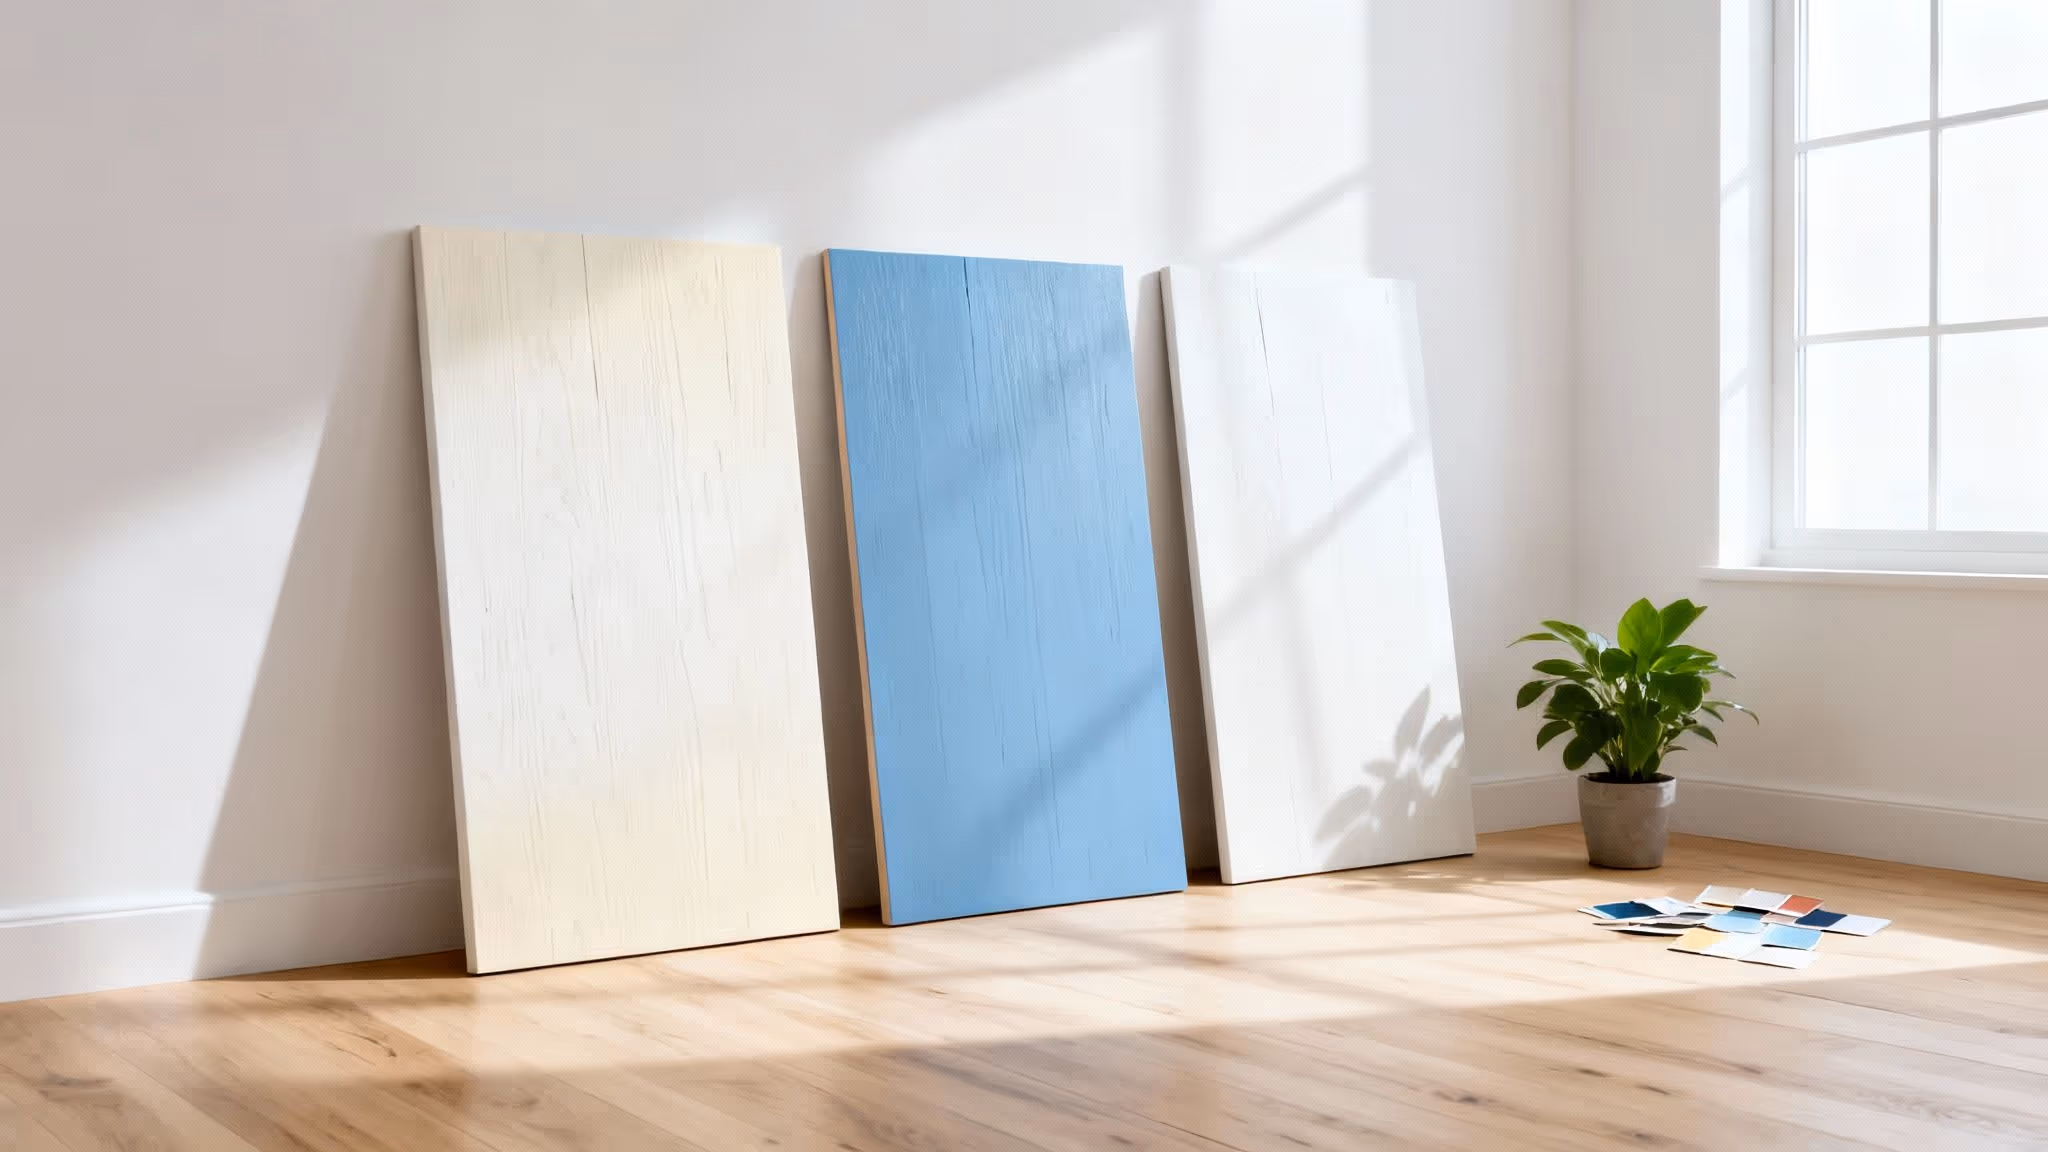
What’s the Best Paint for the Job?
After you've done the all-important priming stage, your best friend is a good quality acrylic-latex emulsion. This type of paint is durable, gives great coverage, and is generally a breeze to clean up.
As for the finish, I usually steer people towards a satin or eggshell. They've got just enough of a subtle sheen to be hard-wearing and wipeable, which is a lifesaver in busy homes. A completely flat matt finish can look lovely, but it tends to highlight every scuff. And gloss? I'd avoid it. It will shout about every single tiny imperfection on the wall's surface.
Here's a tip from experience: The most crucial "paint" you'll use isn't the topcoat—it's the primer. Do not skip this. A quality oil-based or shellac-based primer is your secret weapon. It stops old patterns from bleeding through, prevents moisture from bubbling the paper, and ensures your paint job lasts for years.
Will I See the Wallpaper Seams Through the Paint?
This is a classic worry, and it all comes down to how well you prep. If the wallpaper was hung perfectly, with seams butted up tightly against each other, they should vanish once you've primed and painted. But if those seams are overlapped, lifting, or raised even slightly, they will absolutely stick out like a sore thumb.
Before you even think about priming, run your hand over every seam. Glue down any loose edges with wallpaper adhesive. If you can feel a ridge, you'll need to carefully sand it flush. For any gaps, a little decorator's filler, sanded completely smooth, will make them disappear. Trust me, spending an extra 30 minutes on the seams is what separates an amateur job from a professional one.
Is This Genuinely Easier Than Stripping the Wallpaper?
In many cases, yes, it really is. When wallpaper is stuck fast and in great shape, painting over it saves a huge amount of mess, time, and hassle. Wallpaper stripping can be a horribly unpredictable task—you never know if you're going to uncover crumbling plaster that needs a whole new set of repairs.
But, and this is a big but, if your wallpaper is peeling all over the place, bubbling, or hiding signs of damp, painting is just putting a plaster on a much bigger issue. In that situation, you have to bite the bullet. The hard work of stripping it will pay off with a far better, more durable finish in the end.